| 39
Using Reddy with Sharck Probes
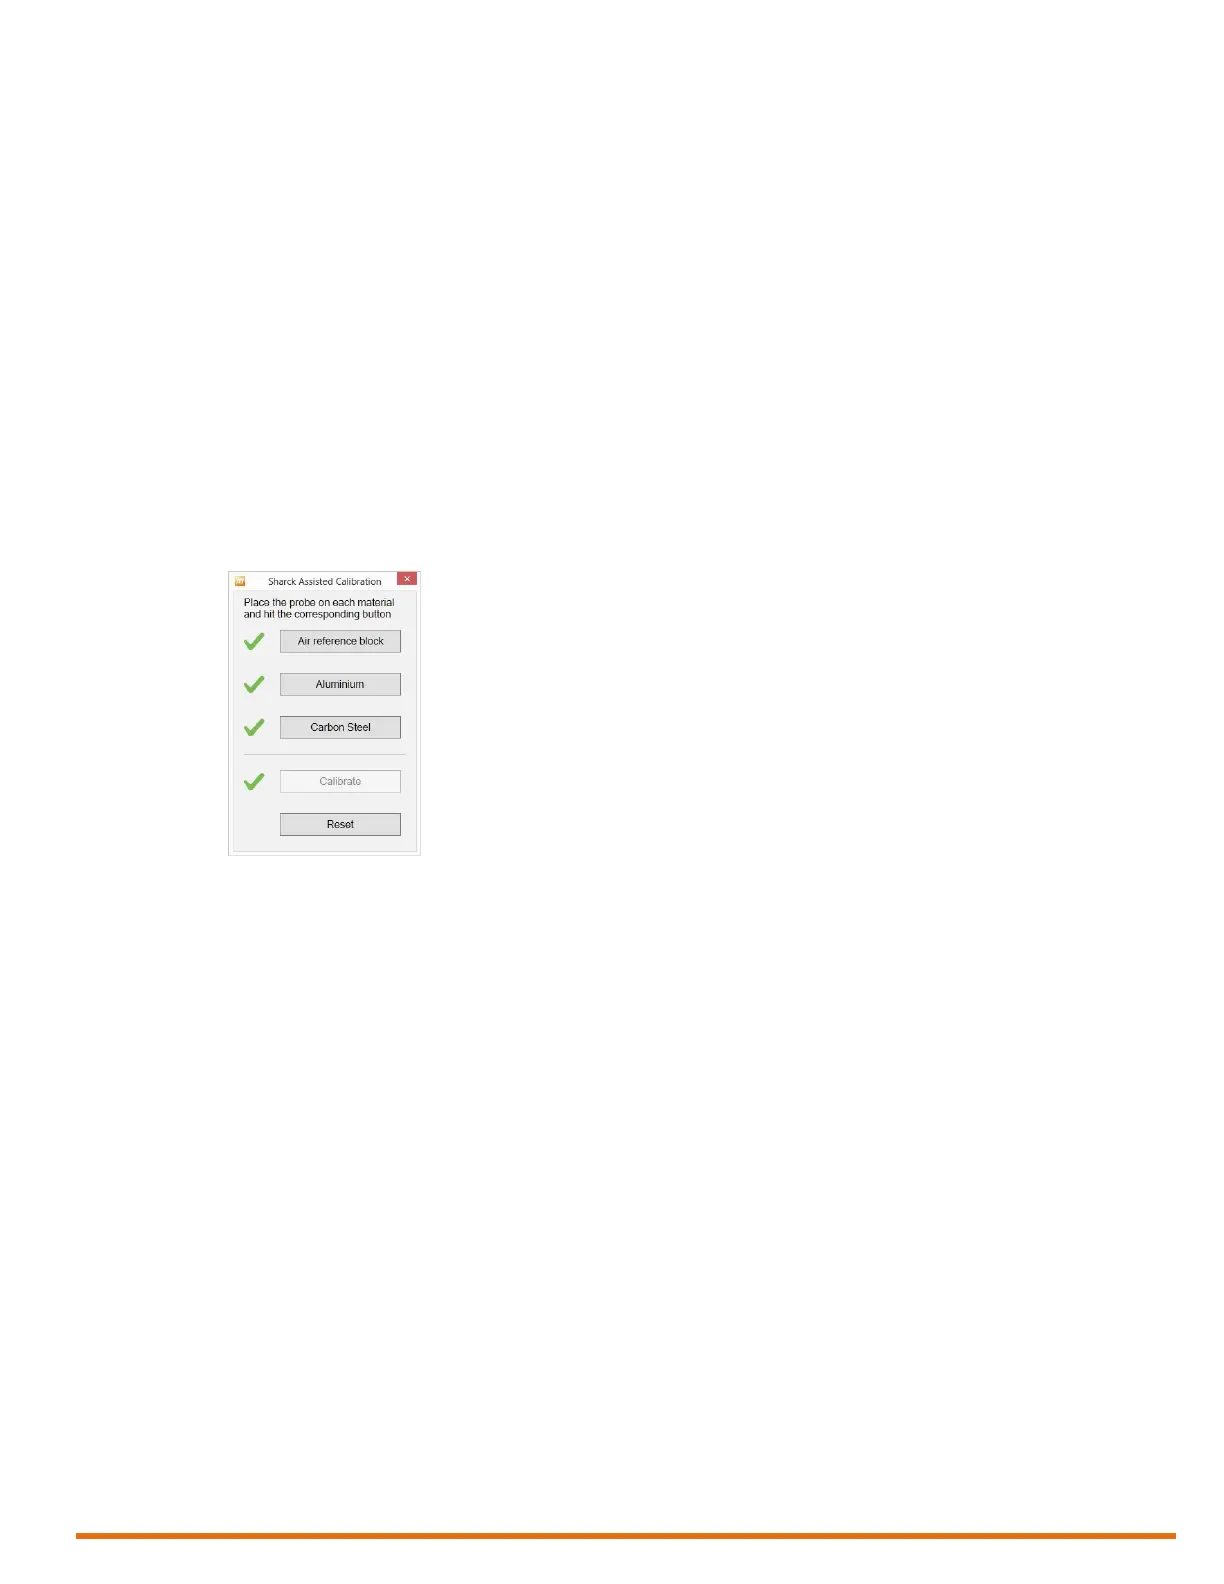
7. In the Sharck Assisted Calibration dialog box, tap Aluminum.
When the necessary data is acquired, a green check mark appears next to Aluminum.
8. Position the Sharck probe on the carbon steel component to be tested.
9. Apply even pressure on the probe.
10. In the Sharck Assisted Calibration dialog box, tap Carbon steel.
11. Move the probe over a distance of 200 mm (7.9 in) on the component to be tested (over the weld).
You have approximately 4 seconds to carry out the scan from the moment you tap the Carbon
steel button. When the necessary data is acquired, a green check mark appears next to Carbon
steel.
Note
If non-magnetic paint or coating is present, there is no need to remove it (unless it is thicker than
3 mm (0.118 in). The Sharck calibration process takes this liftoff into account and manages accordingly.
12. In the Sharck Assisted Calibration dialog box, tap Calibrate.
When the necessary data is acquired, a green check mark appears next to Calibrate.
Figure 5–24 Sharck Assisted Calibration: Calibration complete
Note
If, for any reason, you must normalize the probe again, tap Reset before you perform the above
procedure.
13. To close the dialog box, tap the red X in its upper-right corner.
Collecting Data
1. Position the Sharck probe on the plastic portion of the normalization plate (REFPL-CAL-SHARCK-
AAL-LG).
Note
The normalization plate should be on a steady, at surface and shall be at least 10 cm (4 in) from any
ferritic surface.
2. Apply even pressure on the probe.
3. On Reddy’s keypad, press the Probe nulling button (see page 3).
Alternatively, in the front stage view, on the Home or Calibration ribbon, tap Null.
4. Position the probe on the part to be inspected across the weld, as illustrated.
We recommend that the center coverage reference mark be on the centerline of the weld.