38 | www.eddy.com
Using Reddy with Sharck Probes
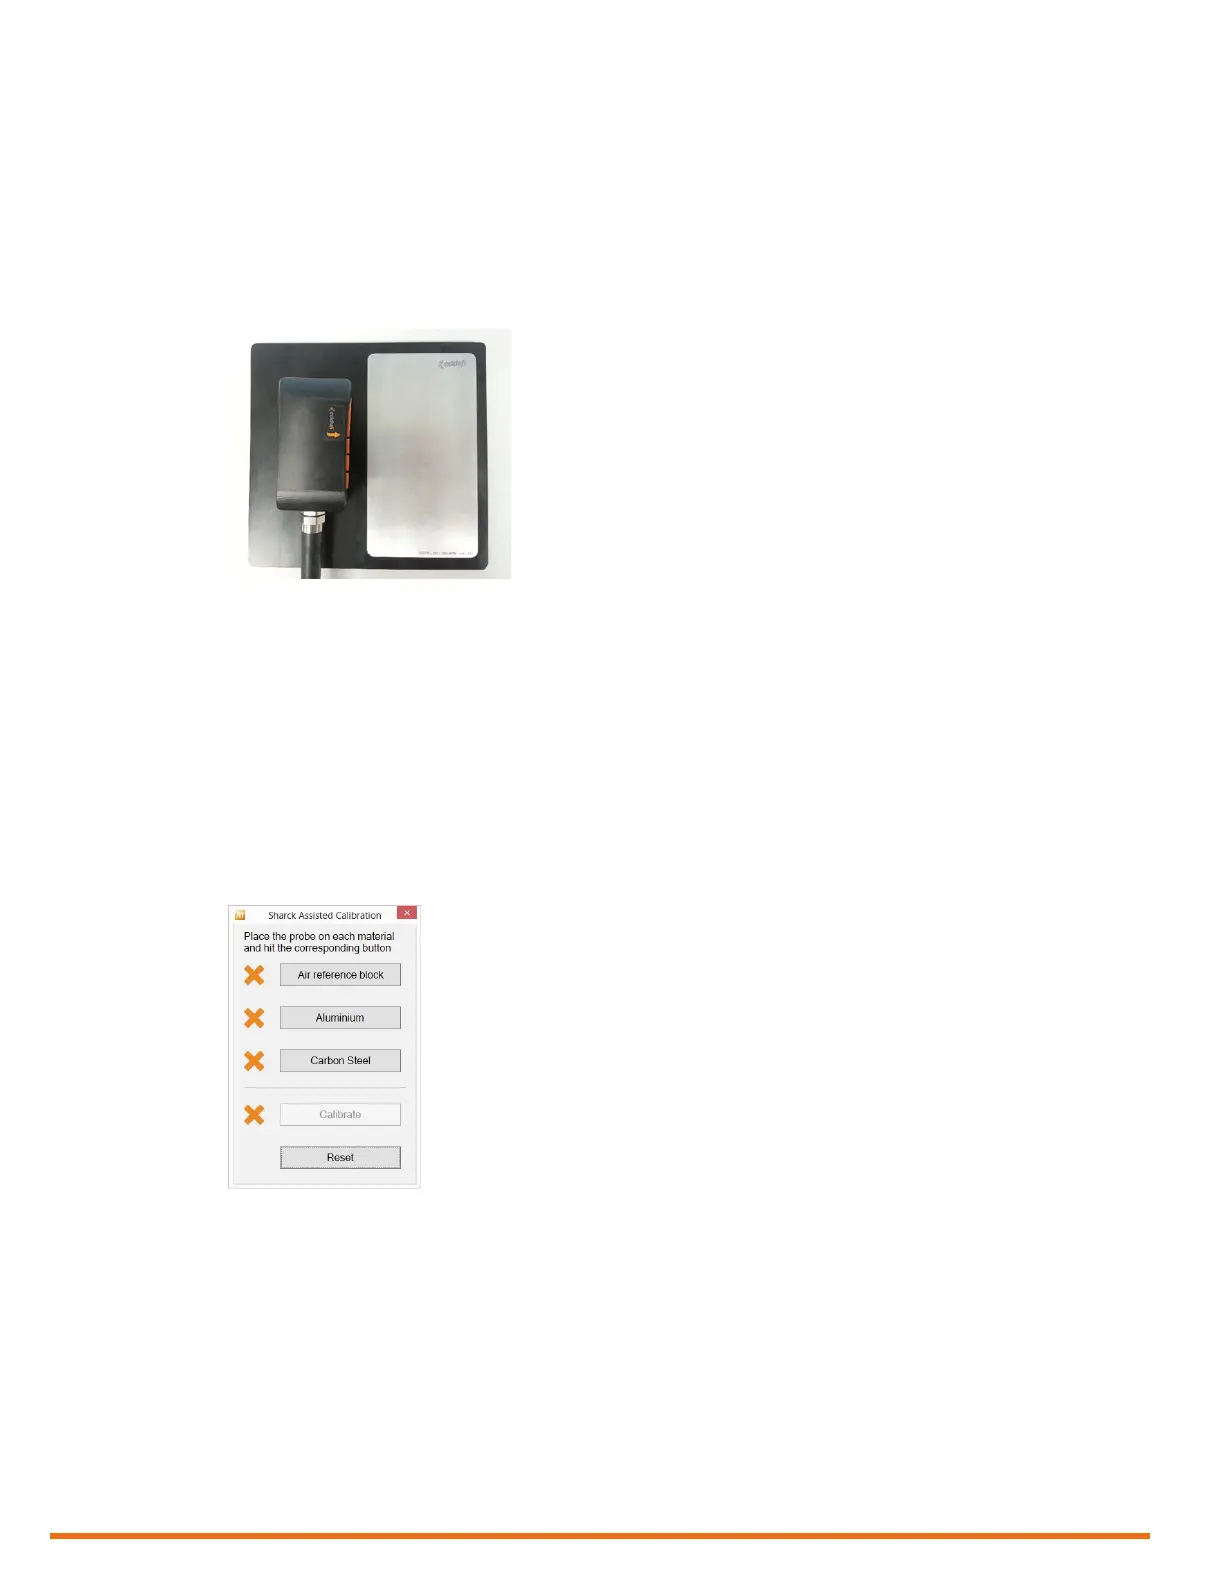
Nulling the Sharck Probe
1. Position the Sharck probe on the plastic portion of the normalization plate.
Note
The normalization plate should be on a steady, at surface and shall be at least 10 cm (4 in) from any
ferritic surfaces.
2. Apply even pressure on the probe.
Figure 5–22 Nulling the Sharck probe
Note
To balance the probe, we strongly recommend that you press the probe onto a non-metallic surface,
instead of keeping it in the air. This avoids having one or only a few ngers compressed at a lower
position than neighboring ngers, which can slightly affect the probe’s balance.
3. On Reddy’s keypad, press the Probe nulling button (see page 3).
Alternatively, in the front stage view, on the Home or Calibration ribbon, tap Null.
Calibrating the Sharck Probe
1. In the front stage view, on the Calibration ribbon, tap Assisted Sharck.
Figure 5–23 Sharck Assisted Calibration
2. Position the Sharck probe on the plastic portion of the normalization plate (REFPL-CAL-SHARCK-
AAL-LG).
Note
The normalization plate should be on a steady, at surface and shall be at least 10 cm (4 in) from any
ferritic surface.
3. Apply even pressure on the probe.
4. In the Sharck Assisted Calibration dialog box, tap Air reference block.
When the necessary data is acquired, a green check mark appears next to Air reference block.
5. Position the Sharck probe on the aluminum portion of the normalization plate.
6. Apply even pressure on the probe.