| 11
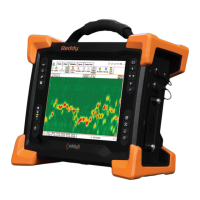
Reddy Overview
Inserting/Removing Batteries
Inserting Batteries
1. On Reddy’s left side, unlatch the battery compartment’s door, and then open it.
2. Align your battery with one of the battery cradles.
Note
Battery cradles are marked A and B. If you are inserting only one battery, it does not matter which
of the two cradles you use.
3. Make sure that the battery contacts are facing inward and upward.
4. Slide the battery into the battery cradle until it is fully inserted.
You should feel the battery contacts snap into place.
Removing Batteries
1. On Reddy’s left side, unlatch the battery compartment’s door, and then open it.
2. Grab the battery tab between thumb and forenger.
3. Pull on the tab.
You will feel the battery contacts being released.
4. Slide the battery out of its cradle.
Hot Swapping Batteries
You can remove one of Reddy’s batteries when the instrument is turned on as Reddy can operate with
a single battery. Should the power in the remaining battery be insufcient to keep Reddy operating, the
instrument shuts down without damaging electronic components, but all your work in progress in
Magni GO (acquisition, etc.) is lost.
Charging Batteries
Normally, Reddy’s batteries recharge automatically when they are in the instrument, it is connected to
a power outlet and turned on. The charge indicator on the lower-left keypad displays some information
about the battery charge (see page 3). Magni GO also features a battery charge indicator (see page
16).
Note
Batteries do not recharge when their internal temperature exceeds 45 °C (113 °F). Batteries also do not
power Reddy when the instrument’s internal temperature exceeds 55 °C (131 °F).
Using the Optional Battery Charger
An optional battery charger is available from Eddy. Contact your Eddy representative for more
information about pricing and availability. This charger conditions and calibrates the instrument’s
batteries, which is important to maximize their lives. We recommend calibrating the batteries every six
months.