ELNA XPRESSIVE II 83
User’s Guide
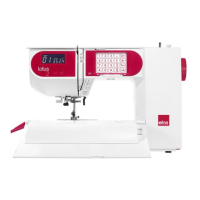
To change the justification:
1 Select the lettering segment.
2 Press Ctrl+E on your keyboard and
choose Properties from the menu.
You see the Segment Settings property
pages.
3 Click the Text property page.
4 In the Justify list, select one of the
following justification types:
5 Click OK.
You see the lettering altered accordingly.
Setting lock stitches for
lettering
You can add lock stitches to your lettering. A
lock stitch keeps your stitches from pulling
apart by firmly attaching the thread at the
location before a long stitch or a trim.
However, if a trim is placed between two
letters then a lock stitch is inserted before the
trim.
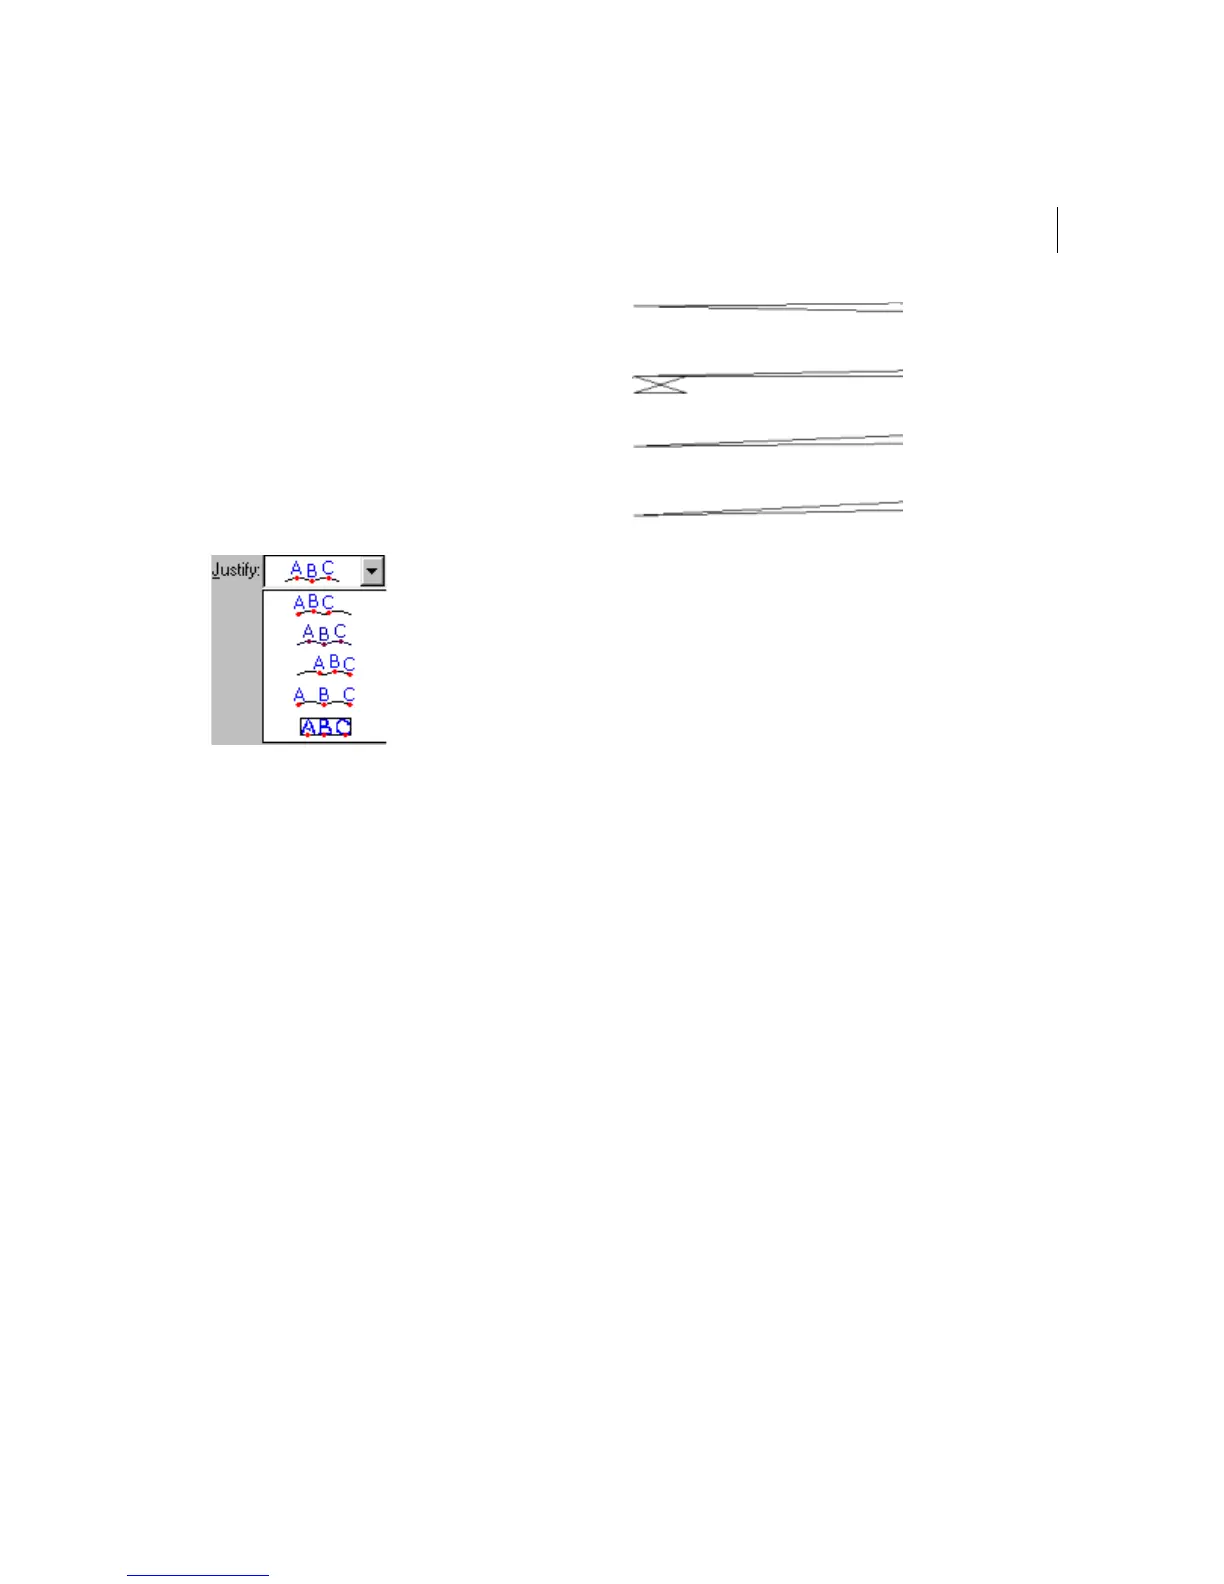
Zoomed-in view of a standard lock stitch.
To set a lock stitch:
1 Select the lettering segment.
2 Press Ctrl+E on your keyboard and
choose Properties from the menu.
You see the Segment Settings property
pages.
3 Click the Commands property page.
4 In the Lock stitch-End list, select a lock
type:
Select None to place a lock stitch at
the end of the text segment only.
Select Basic to place a lock stitch
after each letter in the text segment.
5 Click OK.
You see the lettering altered accordingly.