EasyManuals Logo
Home>EMC>Server>Data Domain DS60

EMC Data Domain DS60 User Manual

EMC Data Domain DS60
186 pages
To Next Page IconTo Next Page
To Previous Page IconTo Previous Page
Page #133 background imageLoading...
Page #133 background image
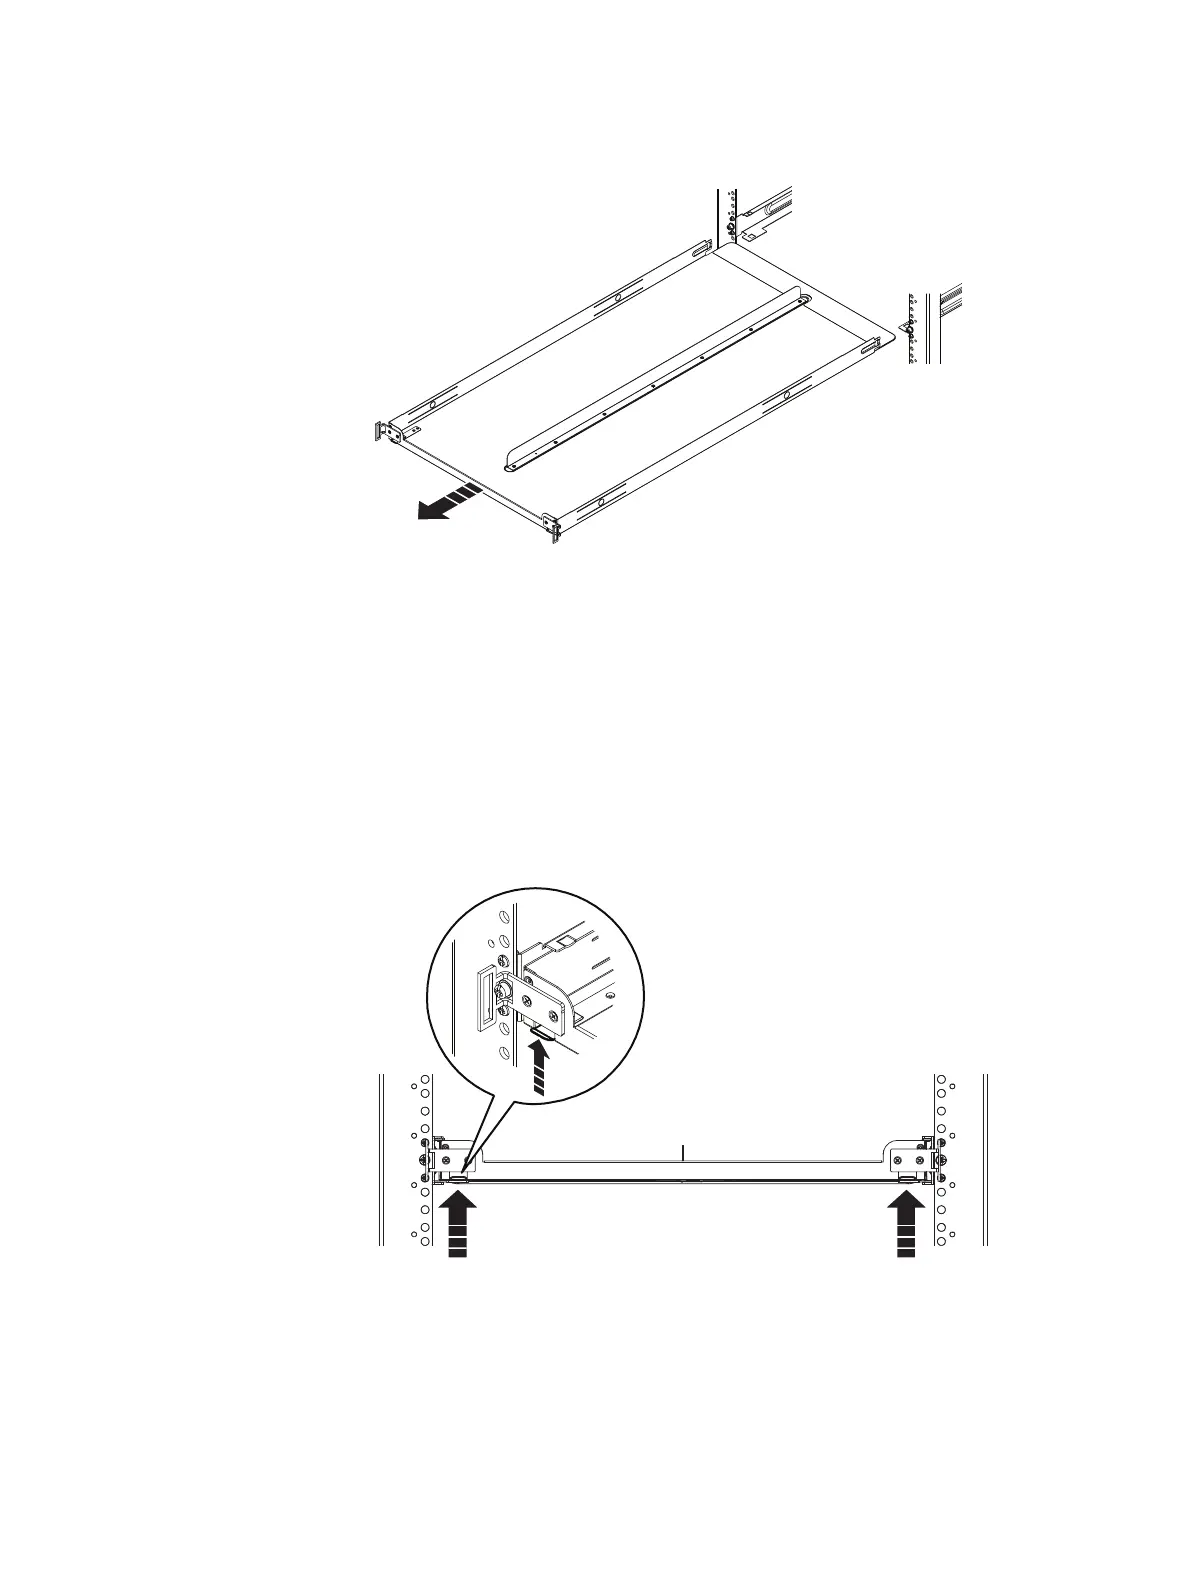
Figure 110 Remove the tray
CL5549
9. At the front of the tray, push up on the spring clips and pull the tray towards
the front of the rack until it is free from the rails.
Installing the 1U cable tray
Procedure
1. Orient the tray so that the UP arrow is pointed in the correct direction and so
that the end of the tray labeled FRONT is to the front of the rack. Slide the tray
into the rails until it locks into place (audible click). To release the tray, press
the spring clips up and pull the tray towards the front of the rack.
Figure 111
Spring Clips - push up to release tray
CL5523
Removing and Replacing FRUs
Installing the 1U cable tray 133

Table of Contents

Questions and Answers:

Question and Answer IconNeed help?

Do you have a question about the EMC Data Domain DS60 and is the answer not in the manual?

EMC Data Domain DS60 Specifications

General IconGeneral
BrandEMC
ModelData Domain DS60
CategoryServer
LanguageEnglish

Related product manuals