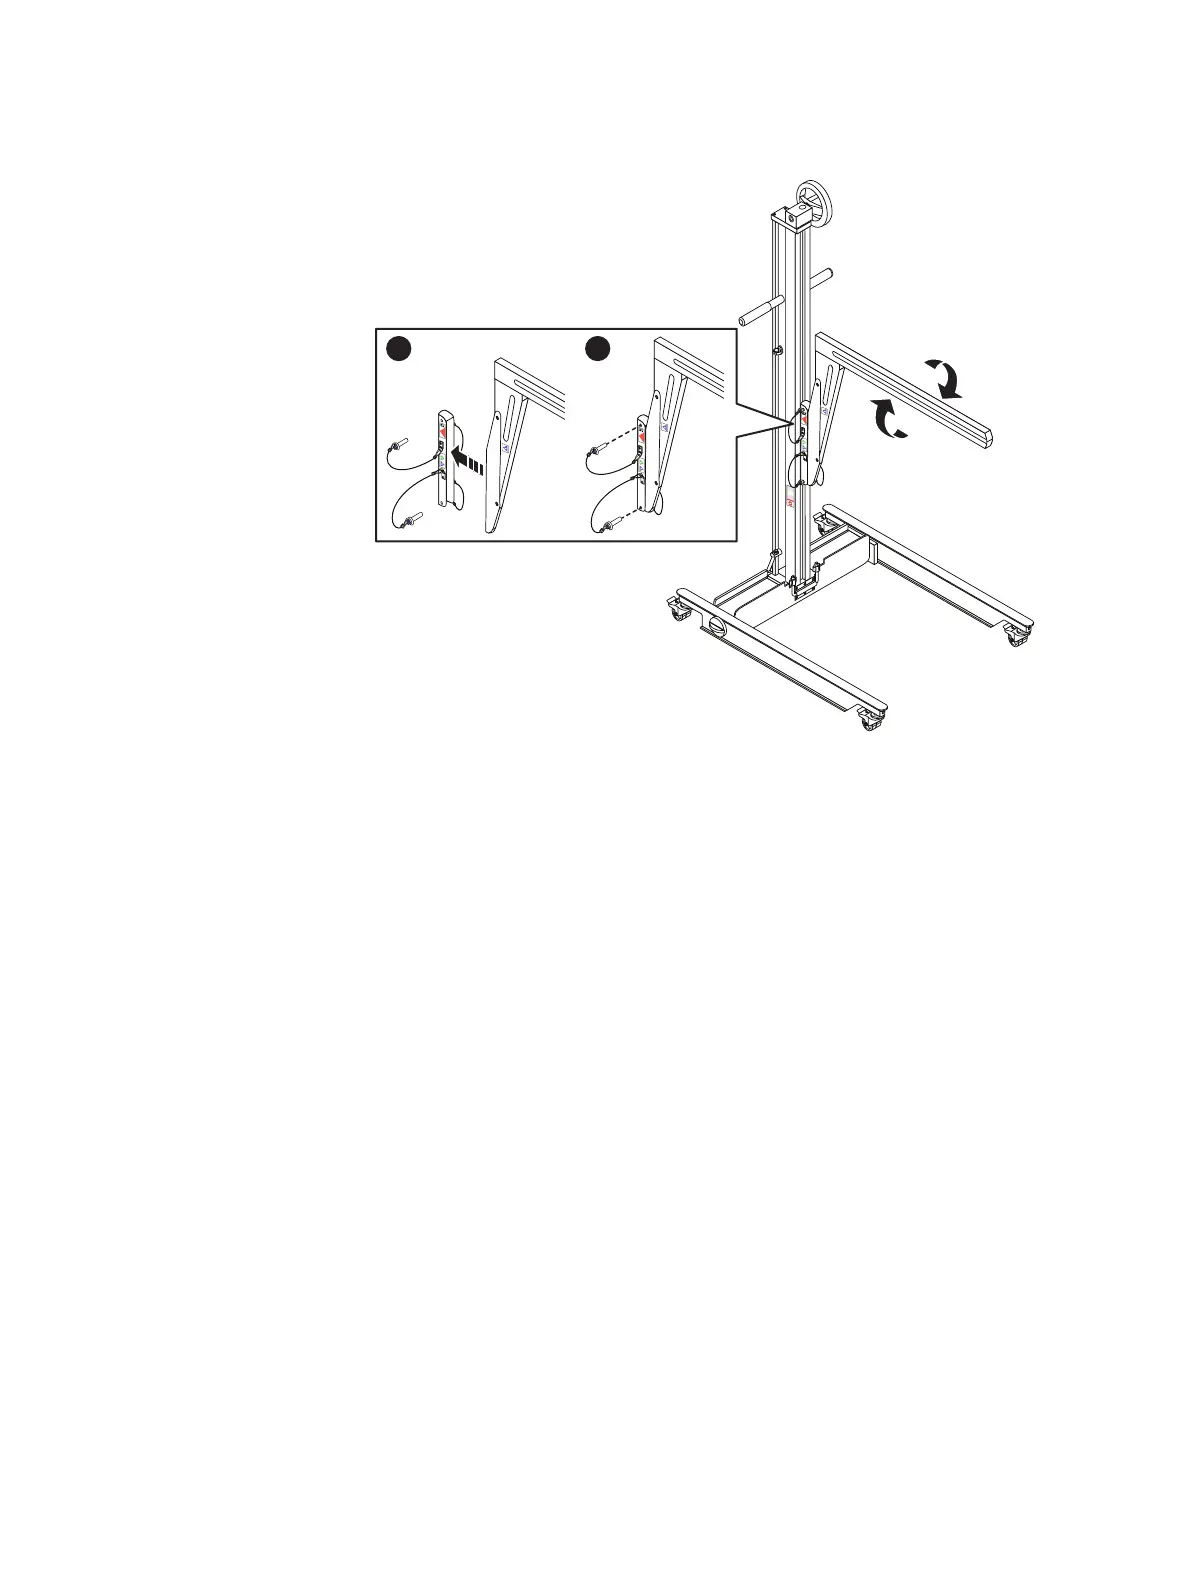
Figure 28 Adjusting the arm for a high rail position
a. Remove the bottom ball lock pin first, by pressing the plunger on the pin and
pulling the pin out. It may be necessary to wiggle the pin with the plunger
pressed to free it from its mounting hole.
b. Hold the arm with one hand while pressing the plunger on the top ball lock
pin and pulling the pin out with the other hand. It may be necessary to wiggle
the pin with the plunger pressed to free it from its mounting hole.
The arm with the adaptor attached will be free of the lift chassis.
c. Remove the arm from the lift and reverse it to achieve the desired
orientation.
d. Attach the arm to the lift chassis by aligning the mounting holes, pressing
the plunger, and inserting the ball lock pins into the holes. Insert the top pin
first.
2. Remove the rotating handle (if necessary) by loosening the set screw and
pulling the handle from the hex fitting.
3. Install and configure the arm trays as required for the lift.
4. Lock all four casters by pressing down on the locking tab so the lift will not roll
as the shelf is placed onto it.
Shelf Installation and Removal
Using the lift on a shelf more than 49" above the floor 45