Installing rails
You should install the rails from the front of the cabinet into which you are installing
the shelf. The 4U includes "inner rails" that slide into the cabinet rail assembly.
Exercise care when installing the short rails. Exposed metal edges may be sharp
and could damage cabling or cause injury to personnel.
Procedure
1. Locate the 4U cabinet space designated for the enclosure.
2. If the rails need to be adjusted, refer to Modifying rail lengths
3. The rails are shipped with M5 adaptors which are designed to fit into the NEMA
channels of an EMC rack. If the rails are being installed in an EMC rack.
Proceed to step 3. If the rails are being installed in a non-EMC rack, proceed as
follows:
a. Using a flat-bladed screwdriver, remove the two M5 adaptors from the
adaptor mounting block on the rails.
b. Identify the correct adaptors needed from the hardware kit and install the
adaptors into the adaptor mounting block. Refer to the following table.
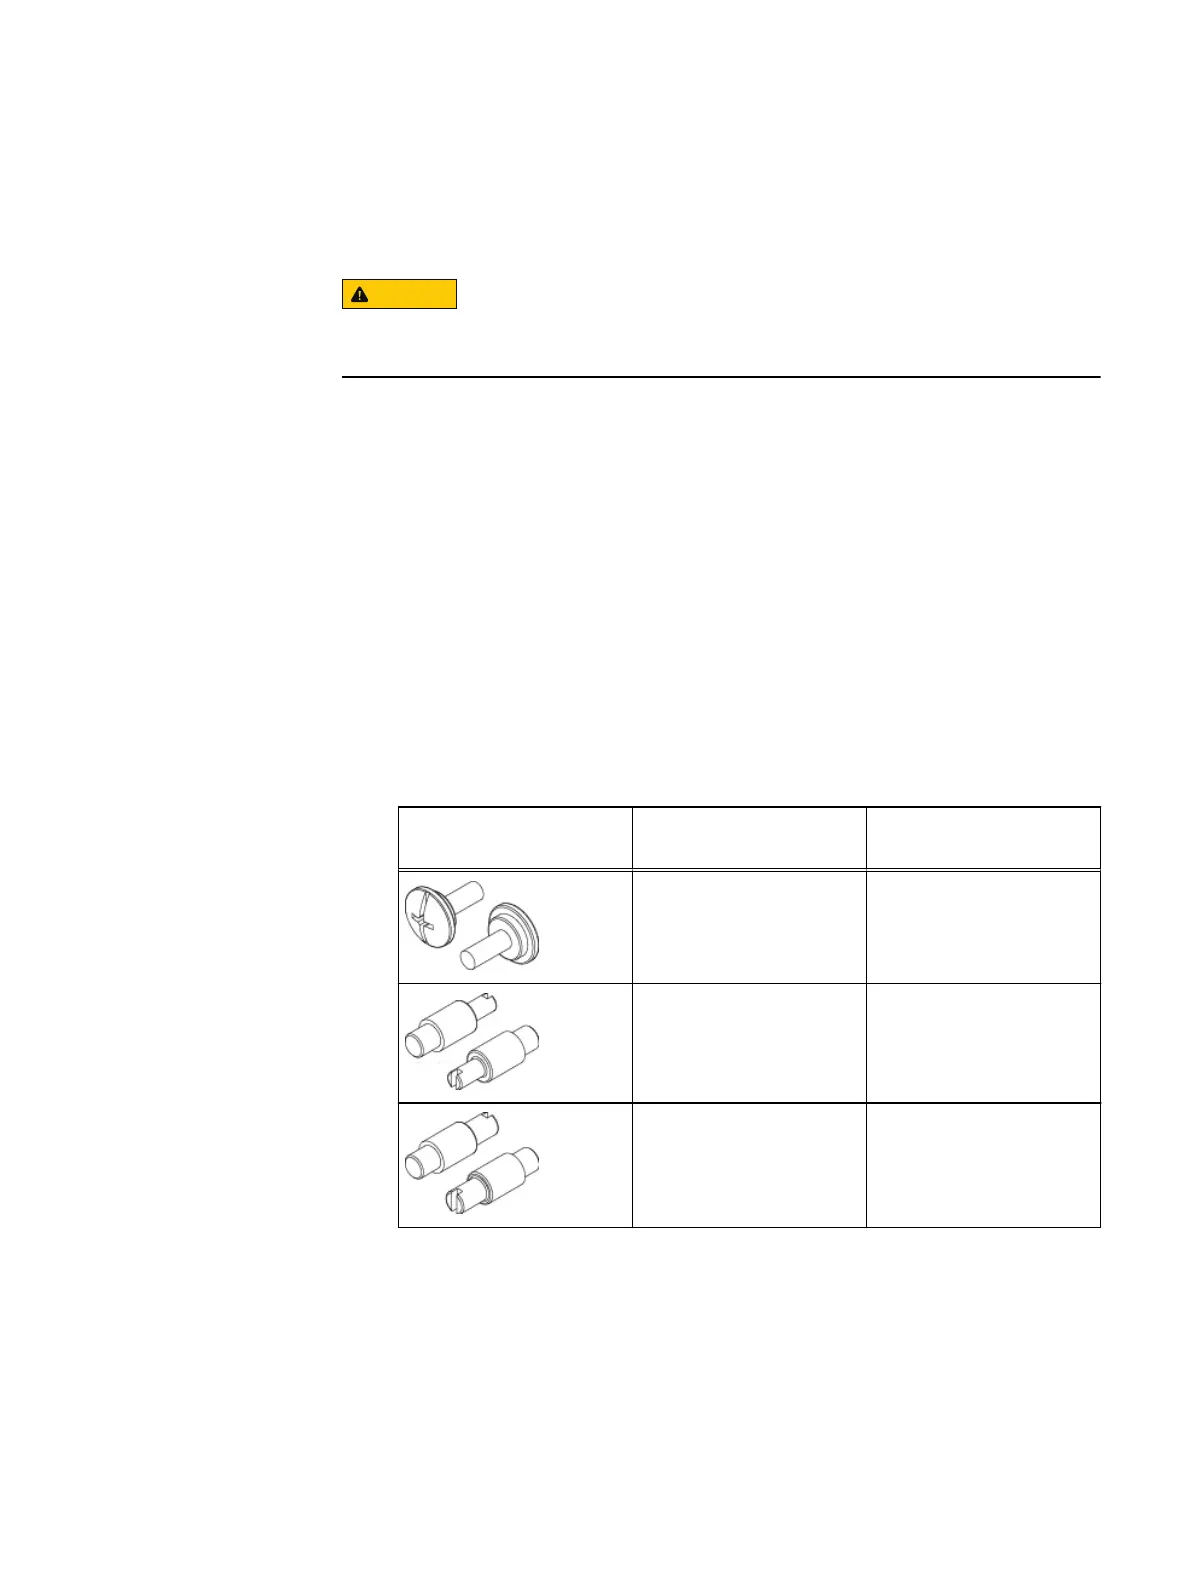
Table 19
Pins for non-EMC racks
Rail Pins from kit Part Number and
Description
Suggested Use
036-028-018
Custom screw, M4 x 10MM
(Quantity: 4 per kit)
Used for any non-EMC
rack. Can be used in racks
with threaded holes.
036-028-016
3.8MM Alignment Pin
(Quantity: 8 per kit)
Used in racks that have
M5, #10, or #12 threaded
holes.
036-028-017
4.8MM Alignment Pin
(Quantity: 8 per kit)
Used in racks that have M6
threaded holes.
4. Install the right rail to the rack rear channel. Later sections will detail how to
adjust rails, if necessary.
Removing and Replacing FRUs
152 EMC Data Domain DS60 Expansion Shelf Installation and FRU Replacement Hardware Guide