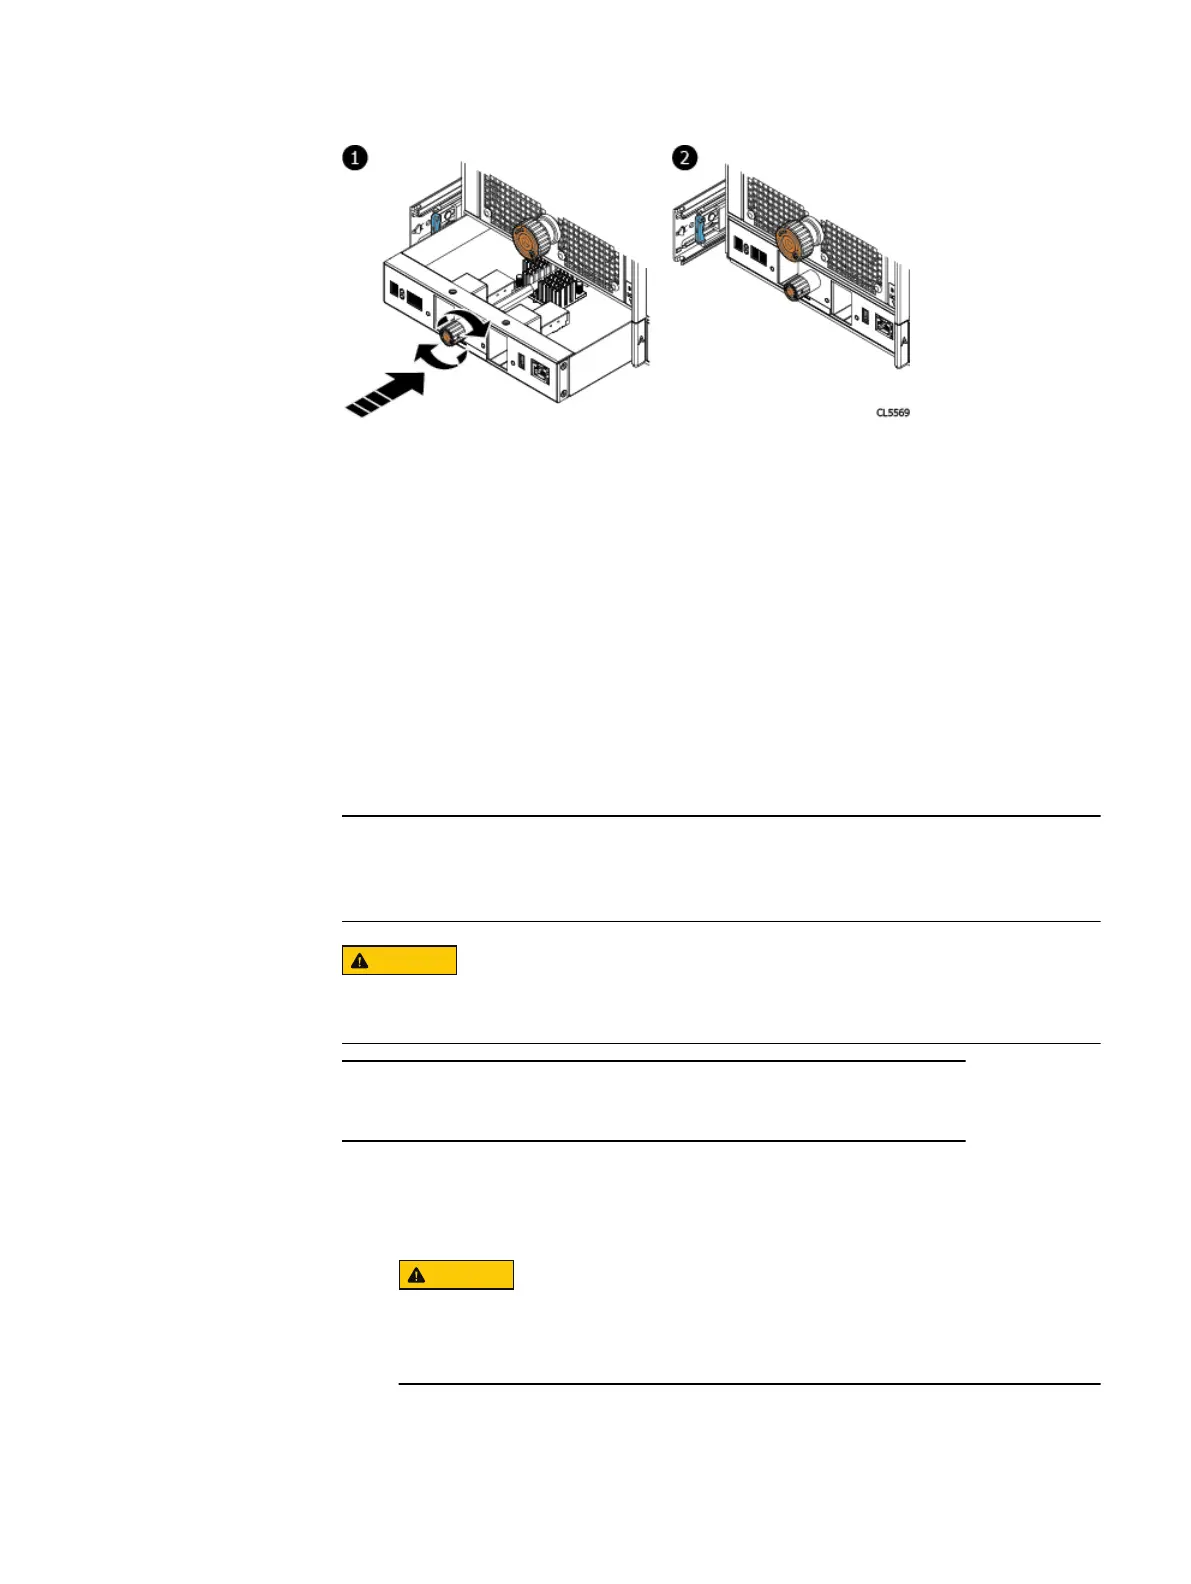
Procedure
1. Refer to the previous figure. Push the LCC straight into the chassis until it is
seated in the chassis.
2. Fully seat the LCC in the chassis by turning the torque-limiting screw handle
clockwise until a single click is heard.
Turning the torque-limiting screw draws the LCC into the chassis and fully seats
it into the chassis. The single click indicates the LCC is fully seated.
3. Connect the data cables to the LCC.
4. Insert the black triangular plastic filler plugs in slots 1 and 3 for both the LCCs.
Installing a disk
Refer to Installing a disk while you perform the procedure that follows.
Disk drives must be placed into the exact same location from which they were
removed.
A disk drive must be replaced within 10 minutes after the shelf is slid out of the
cabinet.
Disks can be removed and replaced with the power applied to the shelf.
Procedure
1. Attach and ESD wristband to your wrist and the shelf in which you are installing
the disk
2.
Do not drop the disk drive into the slot. Dropping the disk drive may
damage the disk drive and the drive interface backplane, which requires a
full chassis replacement.
With the disk carrier latch fully open, align the module with the guides and
gently lower the disk into the slot (1).
The latch begins to rotate downward when its tabs meet the shelf.
Removing and Replacing FRUs
164 EMC Data Domain DS60 Expansion Shelf Installation and FRU Replacement Hardware Guide