Procedure
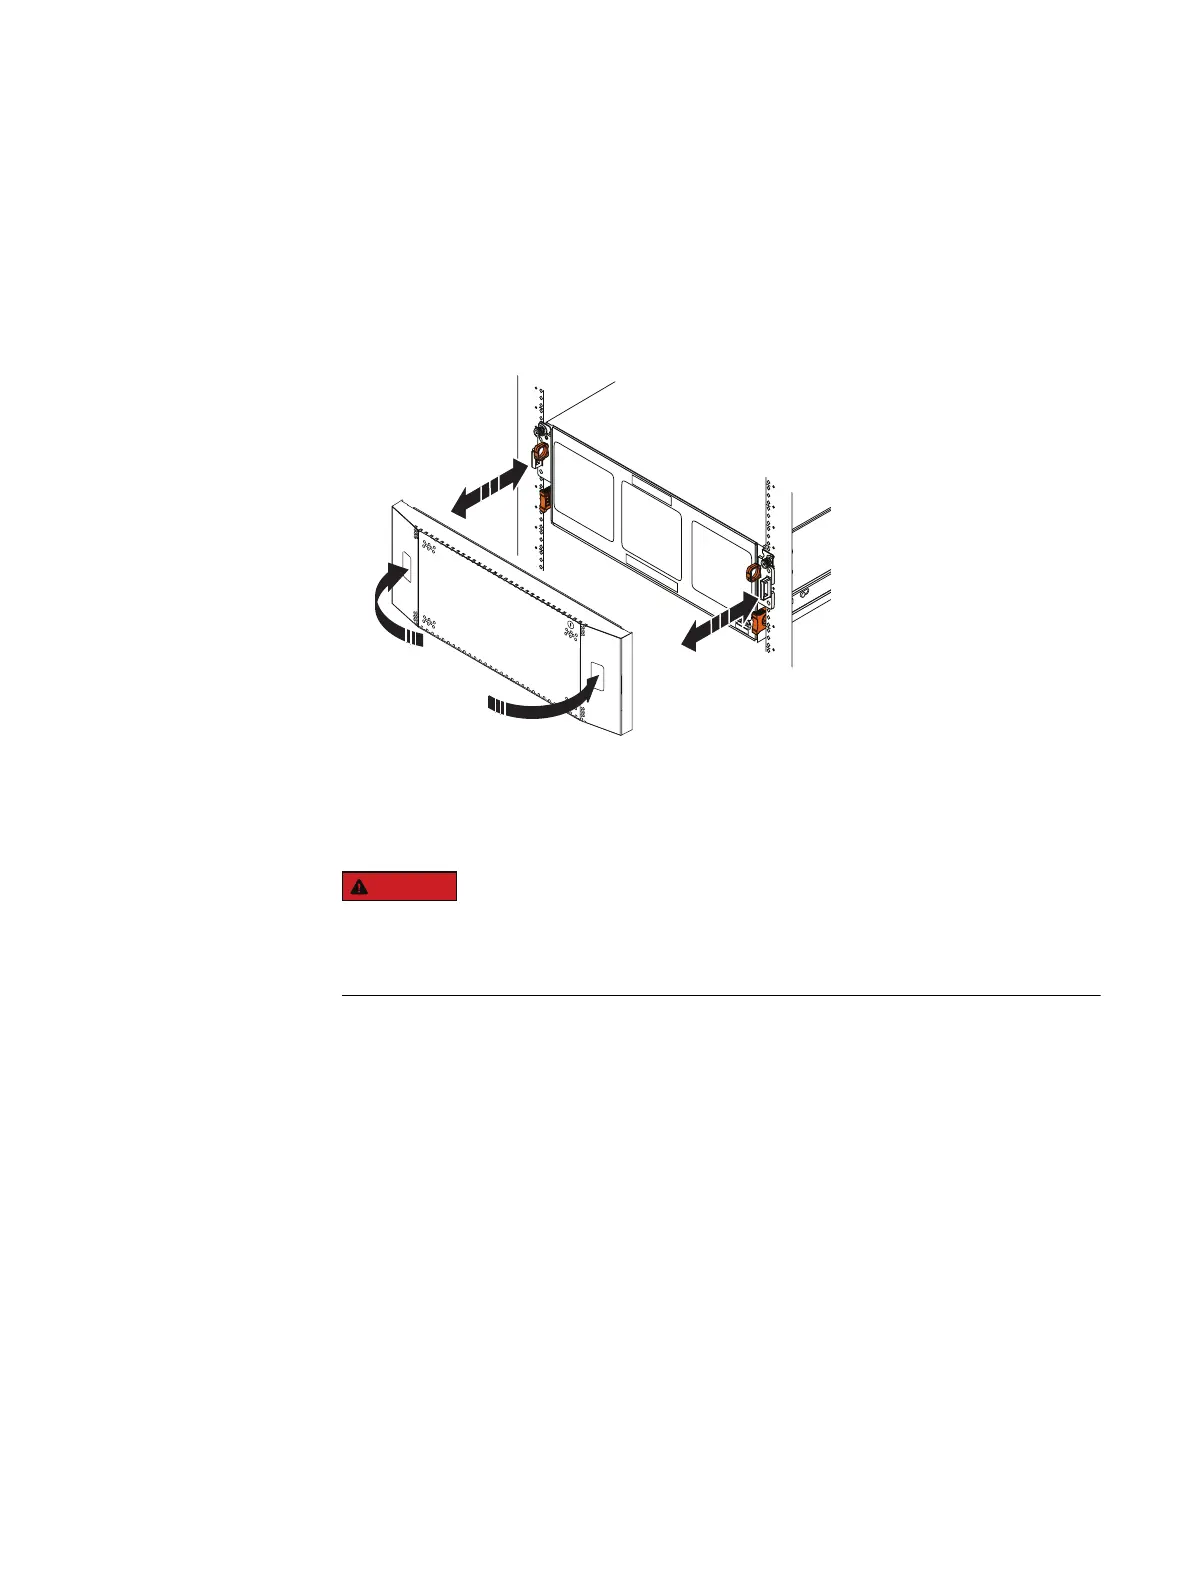
1. If the bezel has a lock, insert the key that shipped with your shelf into the lock,
and turn the key to unlock the bezel.
2. Press the two latch buttons on the bezel surface to release the bezel from the
cabinet.
3. Pull the bezel off the cabinet and put it on a clean, static-free surface.
Figure 167 Removing the front bezel
Pulling the shelf chassis out
Do not extend more than one shelf at a time. Extending more than one shelf at a
time can cause the rack to tip over, which will damage the equipment and may
injure personnel.
To access the internal components, you must release and pull the shelf out of the
cabinet. The shelf slides out of the cabinet far enough for you to access its internal
components and then locks on the rails in the service position so that you cannot pull
it out any farther. The chassis is freed from the cabinet by removing captive shoulder
screws which attach the chassis to the cabinet.
Procedure
1. Unscrew the attaching screws from the NEMA channel.
2. Unscrew the shoulder-screws until they are free from the cabinet. Using the
orange shelf latch handles, pull the slowly pull shelf completely out the cabinet.
Adding Disks
180 EMC Data Domain DS60 Expansion Shelf Installation and FRU Replacement Hardware Guide