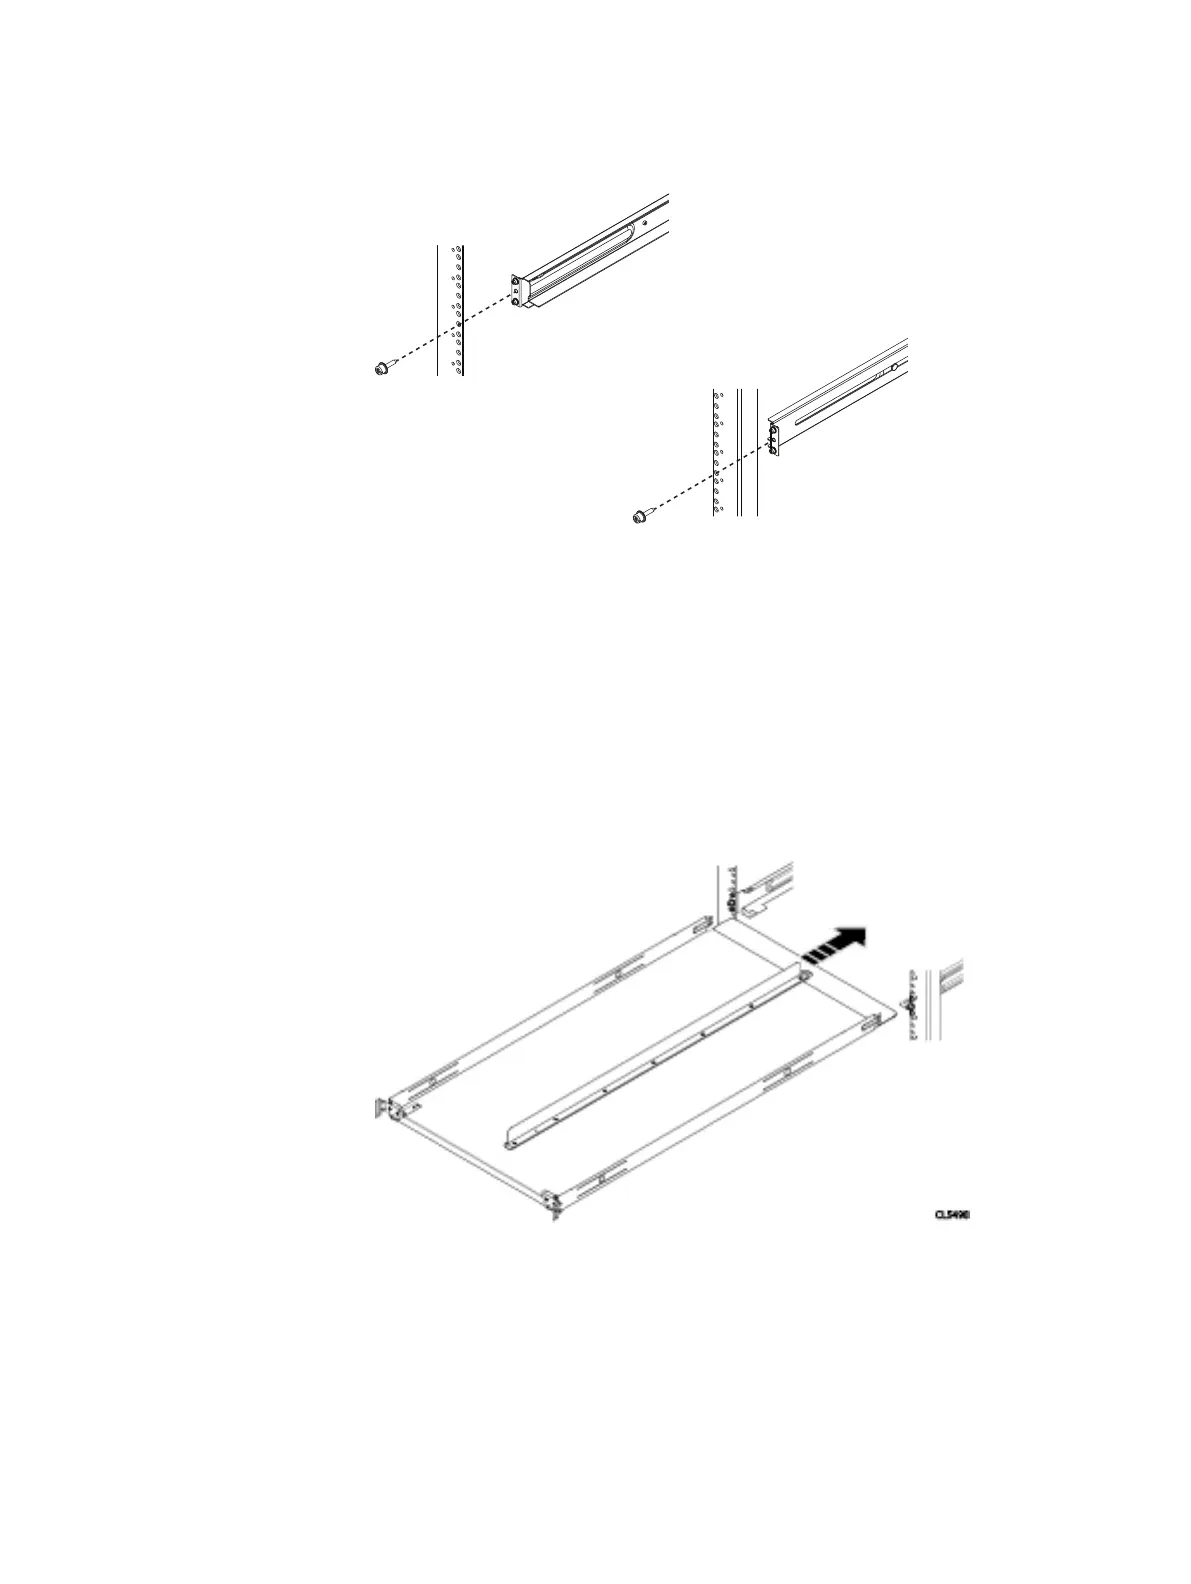
Figure 156 Installing/Securing rails - rear
2. The rails come pre-assembled with adaptors that fit into standard round
mounting holes. If the rack has a different configuration, use the adaptors in the
hardware kit that come with the tray to mount the rails. Align the flanges on the
inside of the mounting holes of the rack. The rails are adjustable to fit the size
rack you are using. Adjust the rails to the correct size and insert the two
adaptors on the rail into the mounting holes, in both the front and the rear of
the rails. Secure the rails to the rack using two knurled screws from the
hardware package, one in the front of the rail, and one in the rear of the rail. If a
torque screwdriver is available, torque the screws to 12-16 inch-pounds. Repeat
for the other rail.
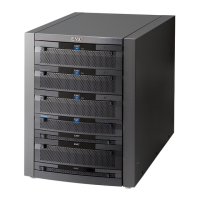
Figure 157
Installing tray
3. Orient the tray so that the UP arrow is pointed in the correct direction and so
that the end of the tray labeled FRONT is to the front of the rack. Slide the tray
into the rails until it locks into place (audible click). To release the tray, press
the spring clips up and pull the tray towards the front of the rack.
Removing and Replacing FRUs
1U cable management tray installation (underneath) 173