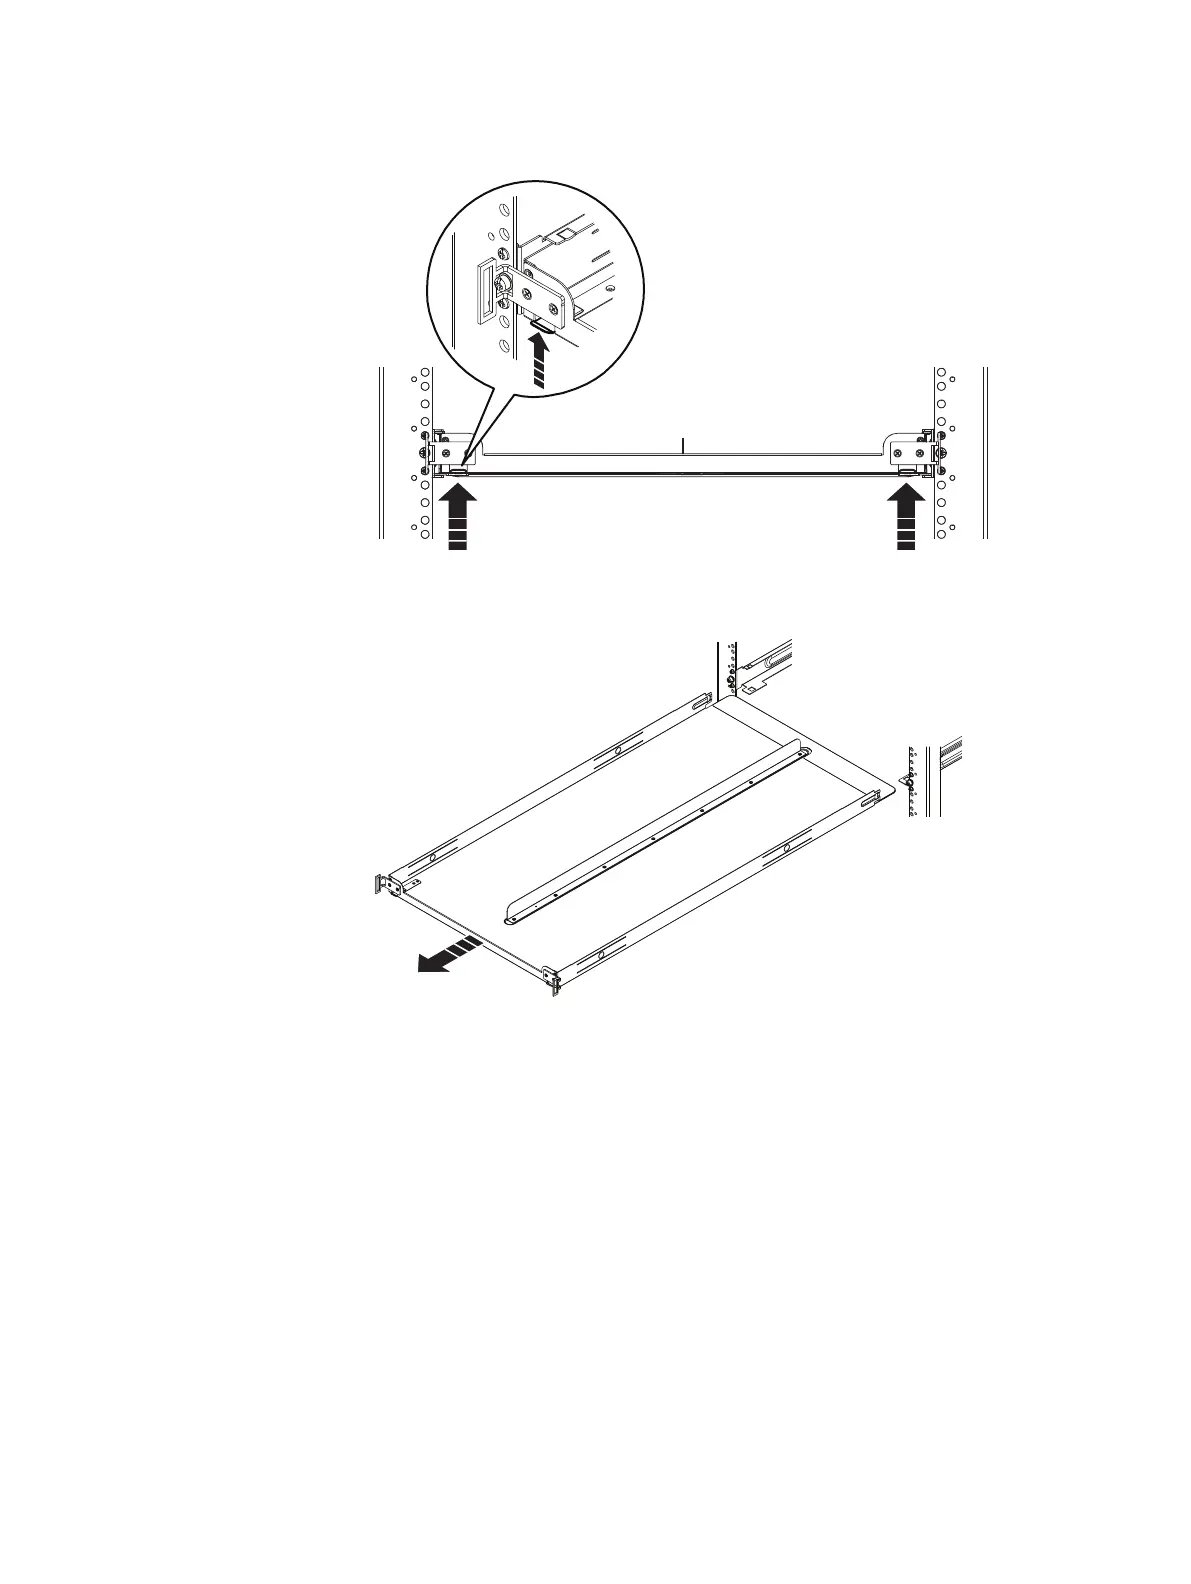
Figure 152 Push spring clips up to release the tray
Figure 153 Remove the tray
9. At the front of the tray, push up on the spring clips and pull the tray towards
the front of the rack until it is free from the rails.
10. Remove the knurled screws from the front and back of the rails.
11. Pull back on the rails until the adaptors clear the front of the rack holes.
Remove the rails.
1U cable management tray installation (underneath)
This section describes how to install the 1U cable management tray.
Racks and rails
You can secure the 1U cable tray to EMC and non-EMC racks with a sliding rail
system.
The rail kits are included in the cable tray packaging and are compatible with racks
with the following types of holes:
l
3/8 inch square holes
Removing and Replacing FRUs
170 EMC Data Domain DS60 Expansion Shelf Installation and FRU Replacement Hardware Guide