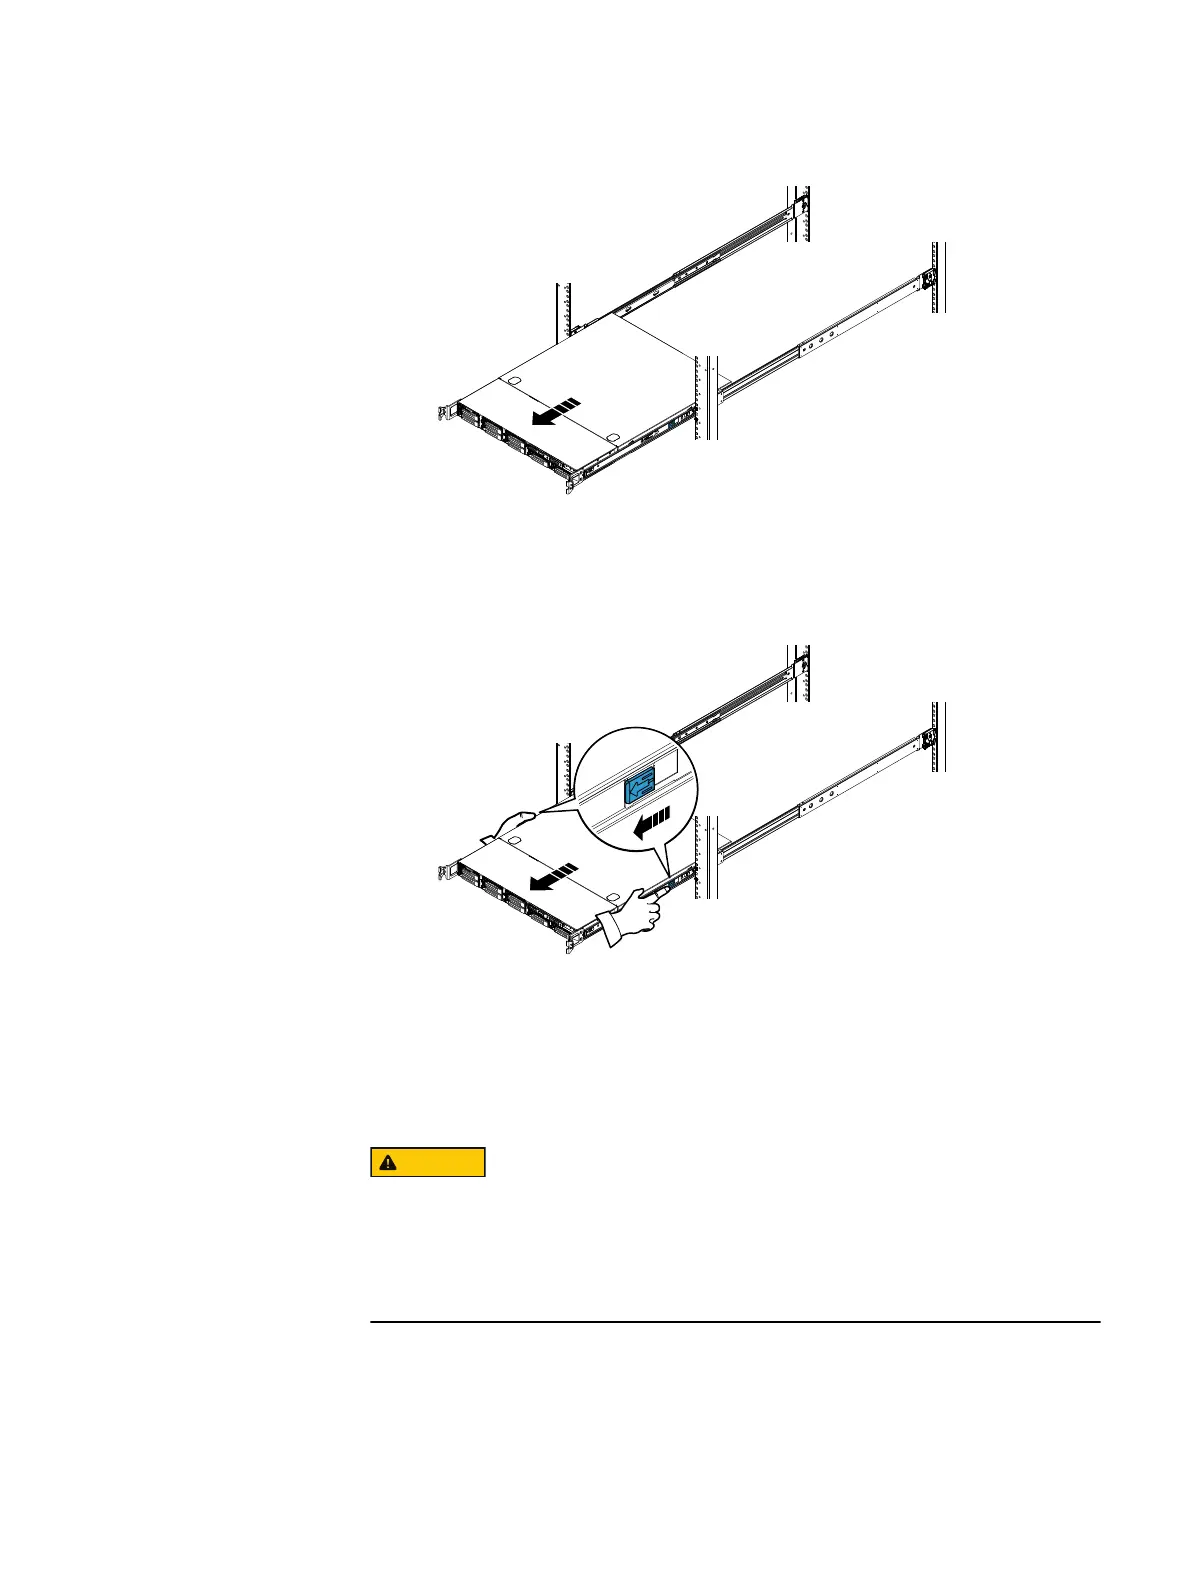
Figure 2 Sliding out the Control Station
b. On each inner slide rail, using your finger, pull the blue tab (embossed with an
arrow) toward you to release the rail lock as shown in
Figure 3 Unlocking the inner slide rail from the outer slide rail
c. Slide the Control Station and the attached inner slide rails out of the mini-rack.
5. Continue to slide the remaining components out of the mini-rack and stack them in
the reverse order of how they will be placed in your cabinet (Figure 4 on page 18).
Be sure to place the first removed component on an antistatic floor, mat, or
workbench pads.
When you install the components later (see Assemble components in your cabinet on
page 21), remember that these components are not interchangeable. Ensure that
you install the components in the following order: DPE, blade enclosure 0, optional
blade enclosures, CS0, and CS1 (optional). Otherwise, your storage system will not
operate properly.
Unpack your system
Removing mini-rack components 17

 Loading...


