Safety
information
Product
information
Mechanical
installation
Electrical
installation
Getting
started
Basic
parameters
Running
the motor
Optimization
NV Media Card
Operation
Onboard
PLC
Advanced
parameters
Technical
data
Diagnostics
UL listing
information
Unidrive M702 User Guide 27
Issue Number: 3
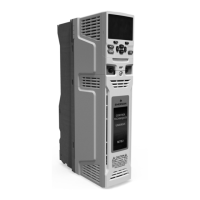
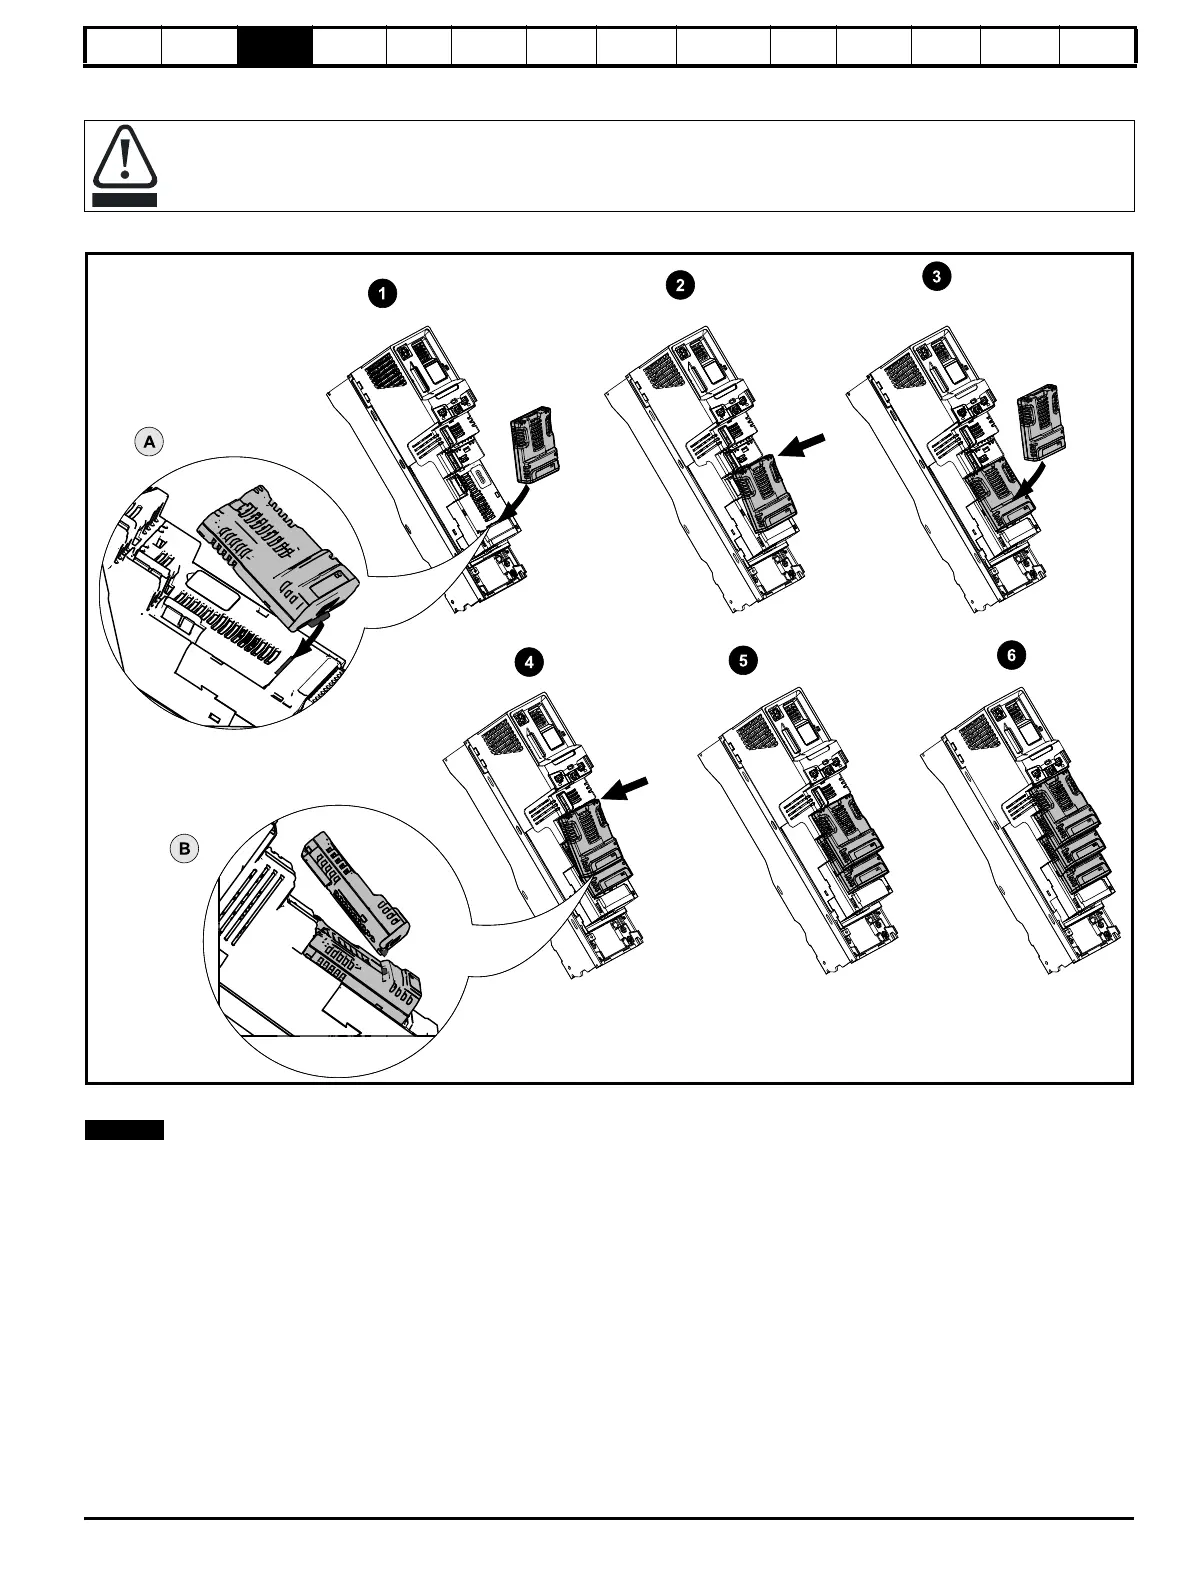
3.4 Installing / removing option modules and keypads
Figure 3-11 Installation of a standard option module
Installing the first option module
Option module slots must be used in the following order: slot 3, slot 2 and slot 1 (refer to Figure 2-2 Features of the drive on page 16 for slot
numbers).
• Move the option module in direction shown (1).
• Align and insert the option module tab in to the slot provided (2), this is highlighted in the detailed view (A).
• Press down on the option module until it clicks into place.
Installing the second option module
• Move the option module in direction shown (3).
• Align and insert the option module tab in to the slot provided on the already installed option module (4), this is highlighted in the detailed view (B).
• Press down on the option module until it clicks into place. Image (5) shows two option modules fully installed.
Installing the third option module
• Repeat the above process.
The drive has the facility for all three option module slots to be used at the same time, image (6) shows the three option modules installed.
Power down the drive before installing / removing the option module. Failure to do so may result in damage to the product.
 Loading...