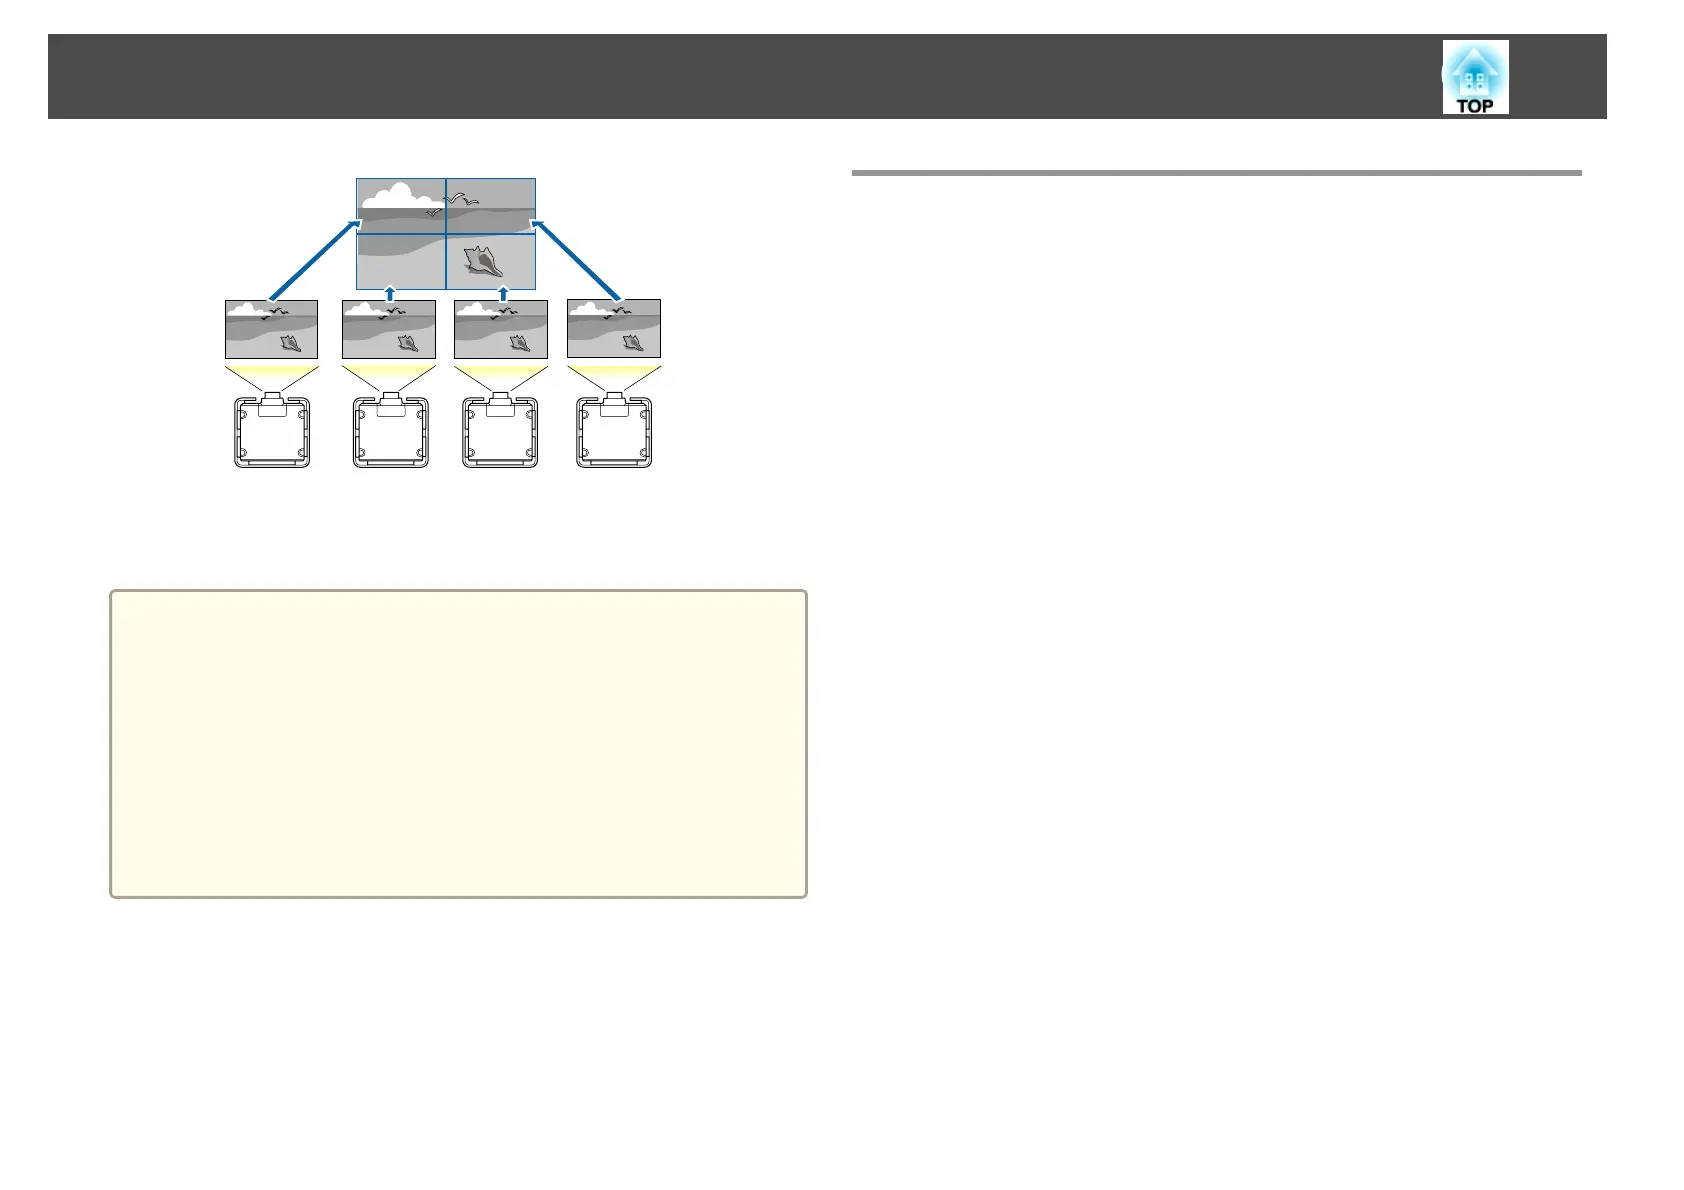
You can setup up to nine projectors to project one large and wide image.
You can adjust the difference of brightness and color tone between each
projected image to create a seamless screen.
a
• Set 4K Enhancement to Off.
• We recommend setting the focus, zoom, and lens shift at least
20 minutes after you start the projection, because images are not
stable right after turning on the projector.
• If the values for Geometry Correction are large, the image position
adjustment for overlapping images becomes difficult.
• The Test Pattern can be displayed to adjust the projection status
without connecting video equipment.
s "Displaying a Test Pattern" p.29
• If you project a dot by dot image that can be projected without
being enlarged or reduced, you can make adjustments precisely.
Adjustment Procedure
Adjusting automatically online
The arrangement for all projectors (Tiling) and adjustments for the images
(Screen Matching) are performed automatically using the projector set as
the master projector.
Advance preparation
(1) Connect to the network
- Connect all projectors to a network hub using LAN cables.
- Set the DHCP to On for all projectors, or check that IP addresses have been
assigned.
s Network - Network Configuration - Wired LAN - IP Settings
p.134
(2) Set an ID for the master projector and the remote control.
s "Set the projector ID" p.37
(3) Set Sleep Mode to Off
s Extended - Operation - Sleep Mode p.125
Adjusting projected images individually
(1) Unify the aspect ratio and size of the image
s "Screen Settings" p.28
s "Changing the Aspect Ratio of the Projected Image " p.71
s "Adjusting the Image Size" p.33
(2) Adjust the orientation and position of the image
s "Installation Settings" p.27
s "Adjusting the Position of the Projected Image (Lens Shift)" p.31
(3) Fine tune the focus and distortion of the image
s "Correcting the Focus" p.34
s
"Point Correction" p.65
Multi-Projection Function
83
 Loading...