Settings in Mac
A
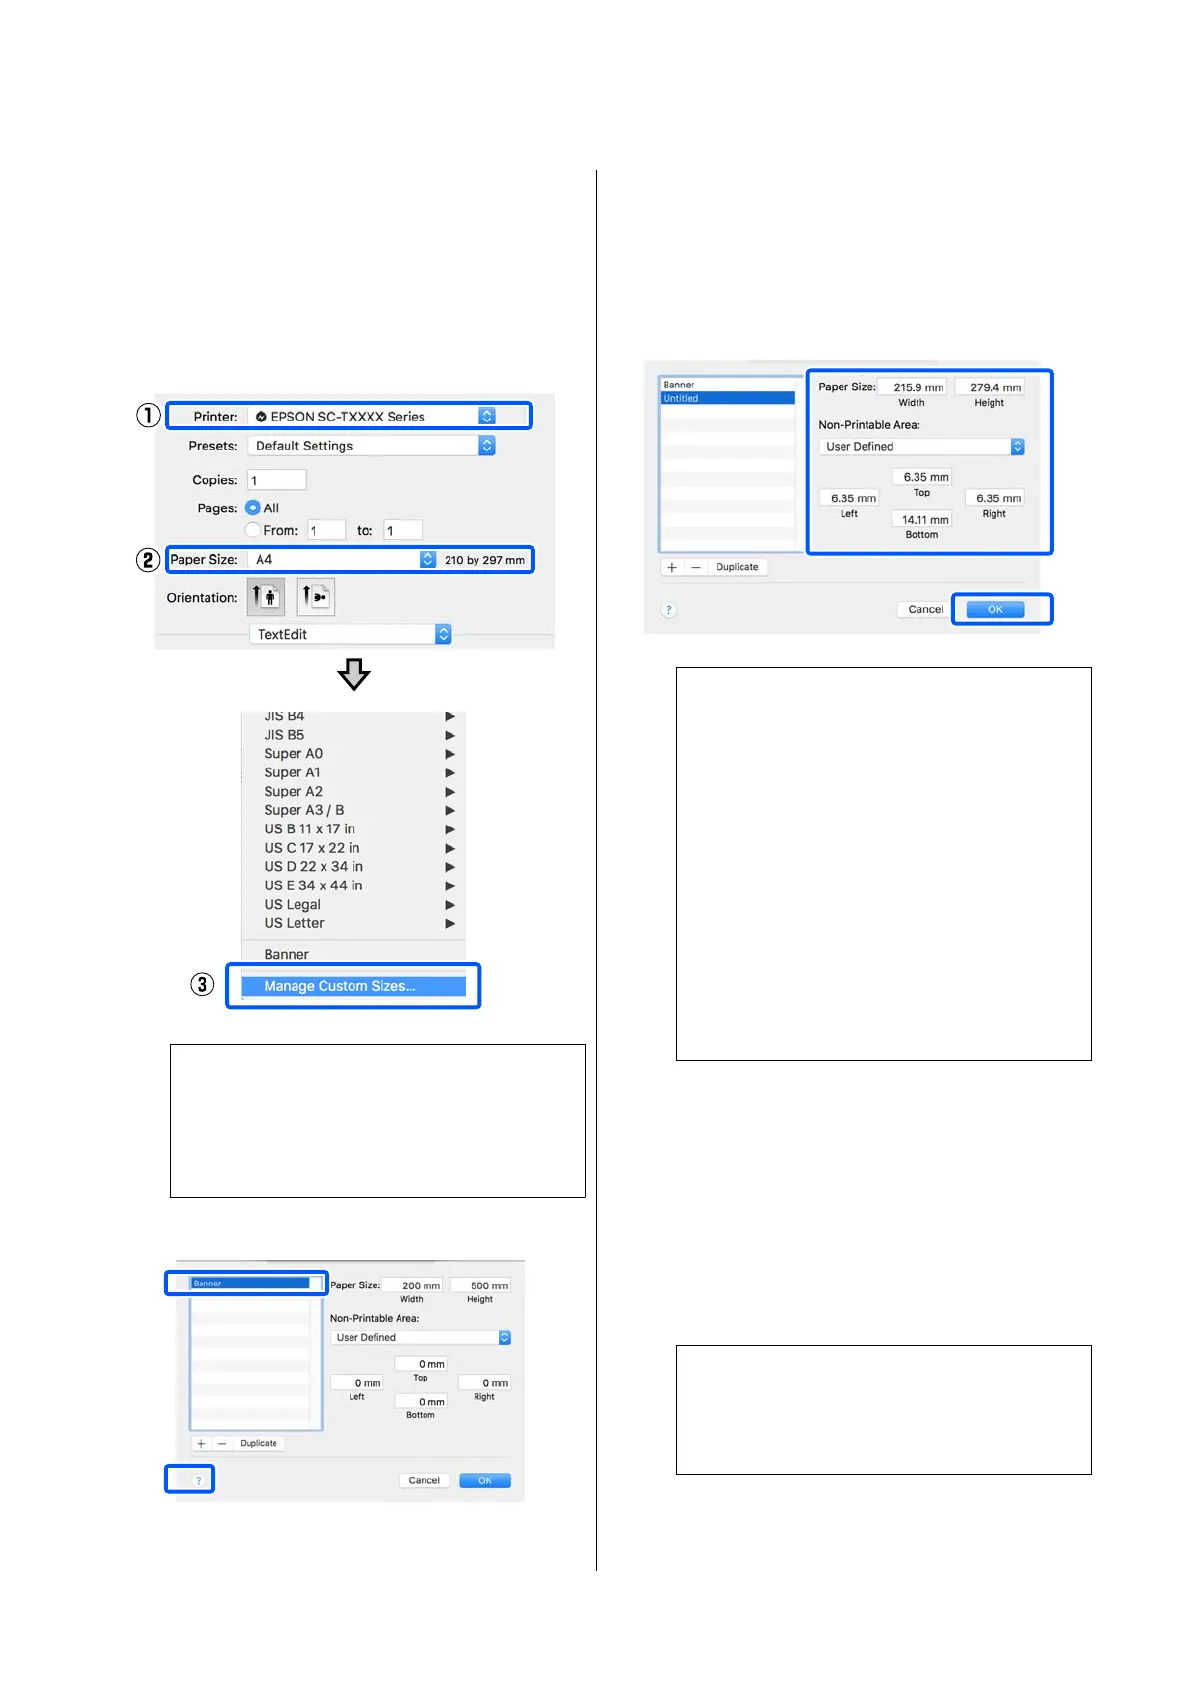
Open the page setup screen of the application
and check that this printer is selected in Printer
and then select Manage Custom Sizes from
Paper Size.
U “Basic Operating Procedures (Mac)” on
page 52
Note:
In the case of an application without a page setup
menu item, the paper size settings can be
displayed by opening the Print dialog box from the
Print menu item.
B
Click + and then enter the paper size name.
C
Enter values in Width and Height of the Paper
Size, enter the margins, and then click OK.
e ranges of page sizes and margin sizes that
can be specied dier depending on your
printer model and the settings on the printer.
U “Printable area” on page 163
Note:
❏ To edit a saved custom size, choose its name
from the list on the le.
❏ To duplicate a saved paper size, select its
name from the list on the le of the screen
and click Duplicate.
❏ To delete a saved paper size, select its name
from the list on the le of the screen and click
-.
❏ e custom paper size setting diers
depending on the operating system version.
See your operating system's documentation
for details.
D
Click OK to close the Custom Paper Sizes
dialog box. Also close the printer driver's dialog
box by clicking Cancel.
Registration of the custom paper size is now
complete.
E
Select the registered paper size in, for example,
the page size settings of the application and
then create the data.
Note:
If the registered paper size is not displayed in the
application, check whether it exceeds the sizes
supported by the application.
SC-T5100 Series/SC-T3100 Series/SC-T5100N Series/SC-T3100N Series User's Guide
Printing with the Printer Driver from Your Computer
66
 Loading...