3. Move the carriage to the center and set the thickness gauge on the fixed
position of the front paper guide; B as shown in Figure 5-1 on the next
page.
4. Move the carriage so that the printhead overlaps the thickness gauge.
5. Move the right parallelism adjustment bushing to the rear until the
thickness gauge moves with the carriage when you move the carriage
about 20 mm right and left (the gap will narrow).
6. From the point where the thickness gauge starts moving with the carriage,
move the gear of the right parallelism adjustment bushing one notch
toward you (the gap will widen)
7. With the PG lever pulled forward (gap is small), move the carriage right
and left to make sure that the thickness gauge does not move.
[LEFT PARALLELISM ADJUSTMENT]
8. Perform Steps 2 to 7 for the left parallelism adjustment bushing.
[CHECKING PARALLELISM]
9. Perform steps 1 to 4 again.
10. Make sure that the thickness gauge does not move right and left along with
the carriage when the carriage is moved about 20 mm.
11. Move the right parallelism adjustment bushing one notch to the rear (the
gap will narrow).Then check that the thickness gauge moves along with the
carriage. If the thickness gauge does not move, go back to Step 1 and
repeat the adjustment.
12. If the gap is adjusted correctly, move the right parallelism adjustment
bushing one notch toward you (the gap will widen).
[FIXING PARALLELISM ADJUSTMENT BUSHING]
13. Fix the right and left parallelism adjustment bushings with screws. (No.1
screw for each.)
When completing this adjustment, check the overlap amount of the printhead and head
cleaner.
1. Rotate the gear 73.6 and move the head cleaner to the printer rear side.
2. Move the carriage next to the head cleaner and make sure that overlap
between the tip of the printhead and cleaner head is more than 0.5 mm.
3. Then, rotate the gear 73.6 and return the head cleaner to the front position.
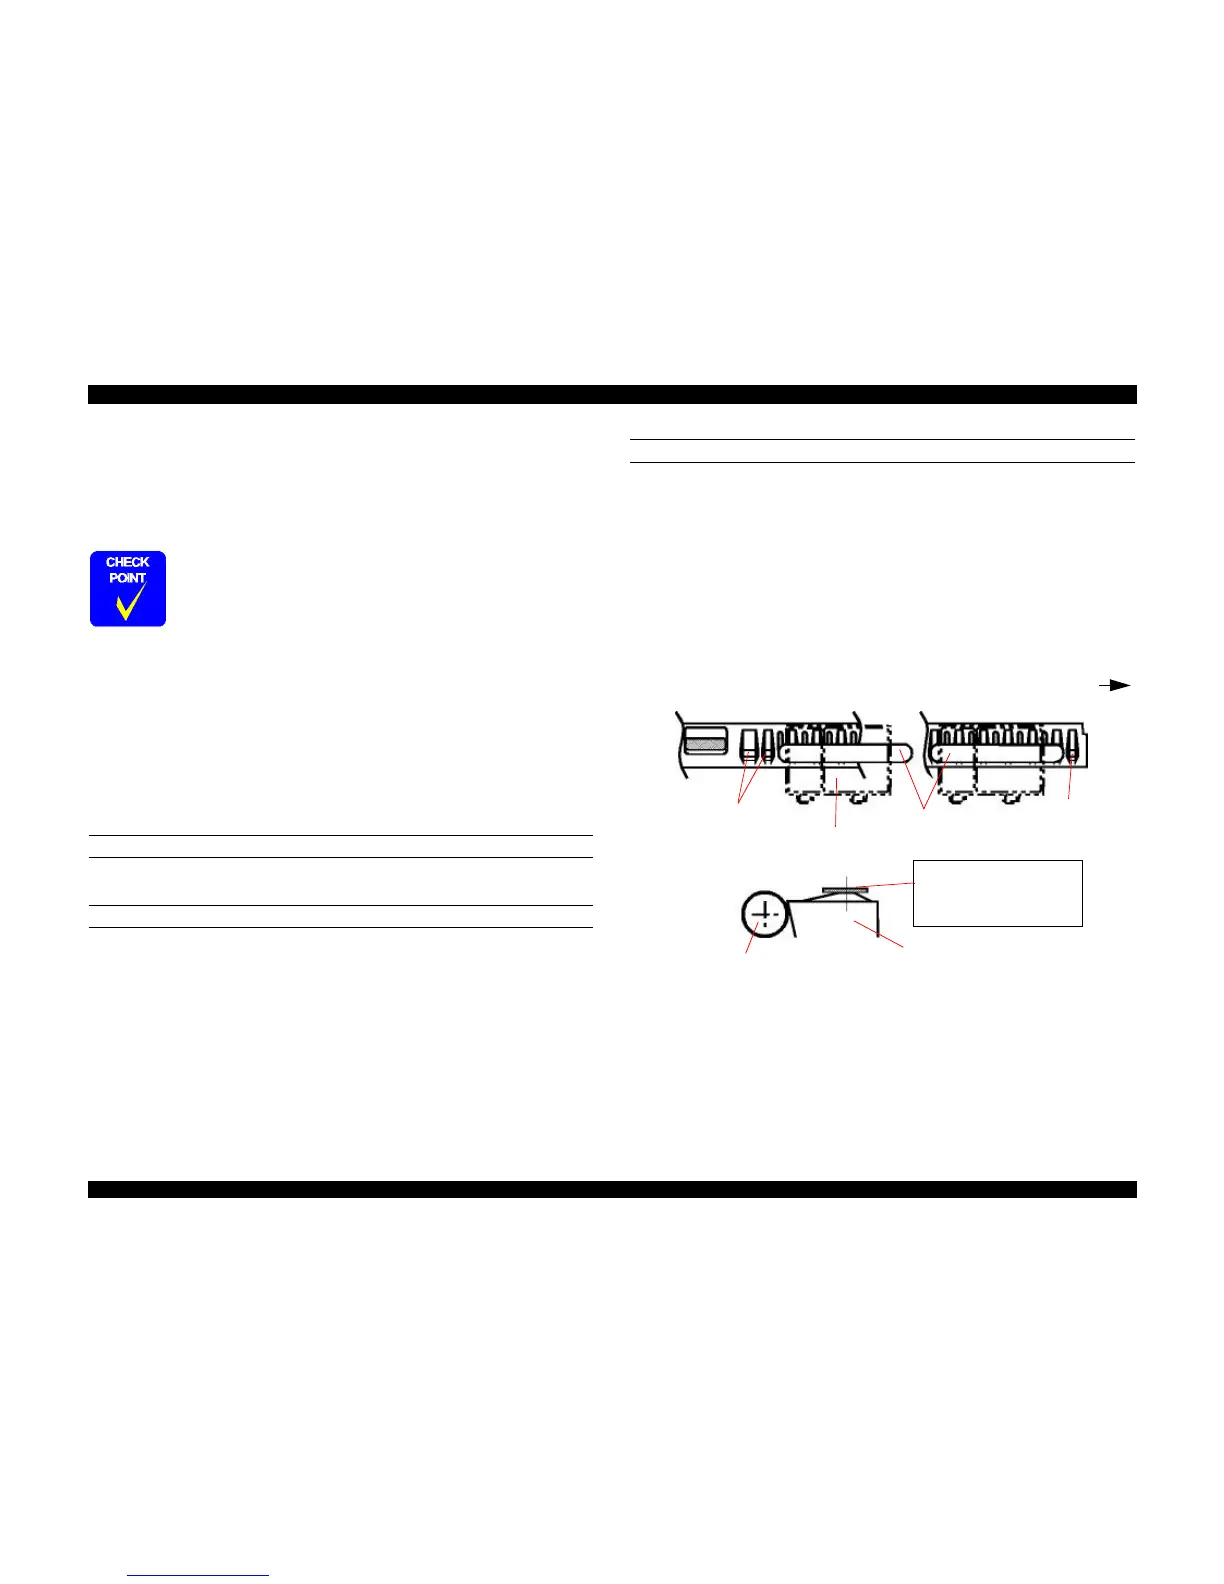
Figure 5-1. Setting the Parallelism-Adjustment Gauge
n Put the thickness gauge on the flat side of a ribbed section of the
front paper guide; B.
n To move the carriage, pull the timing belt with your hand.
Roller, Assembly, PF
Front Paper Guide; B
Put the gauge on a flat
surface, and then align the
center of the gauge with the
ribs.
Avoid the last
rib on right side
Thickness gauge
Carriage
assembly
Avoid last two ribs
on left side
Front Paper Guide; B
Right,
HP side

 Loading...


