To change the printout paper size during copying, press the Stop/Clear button until the
appropriate indicator combination activates, as described below.
Table 1-11. Copy button functions
Button Function
Operate
• Sets Local Copy Mode as the default.
Stop/Clear
• Stops the current copy job and ejects the paper during copying.
• Ejects paper during paper loading.
Copy
• The default setting for copying is B & W and 100%
Copy Mode
• Selects Grayscale, Black Text, or Color (Text & Graphics)
• First press = LED shows current status
• Multiple presses (within 5 sec.s) = moves up one setting each time
• Example
First time = Black Text LED activated (default)
Second time = Grayscale LED activated
Third time = Color Text & Graph LED activated
Fourth time = Black Text LED activated
Enlarge/Reduce
• Selects reduce or enlarge
• Default = 100%
• First press = LED shows current status
• Multiple presses (within 5 sec.s) = moves up one setting each time
• Example
First time = Enlarge/Reduce LED only (100%) activated (default)
Second time = Enlarge/Reduce and 70% LEDs activated
Third time = Enlarge/Reduce and 93% LEDs activated
Fourth time = Enlarge/Reduce and 141% LEDs activated
Fifth time = Enlarge/Reduce LED only (100%) activated
Table 1-12. Power-on functions for the Copy button
Button Function
Copy Prints a status sheet including firmware version and paper size.
Stop/Clear Changes printout paper size during copying (see below).
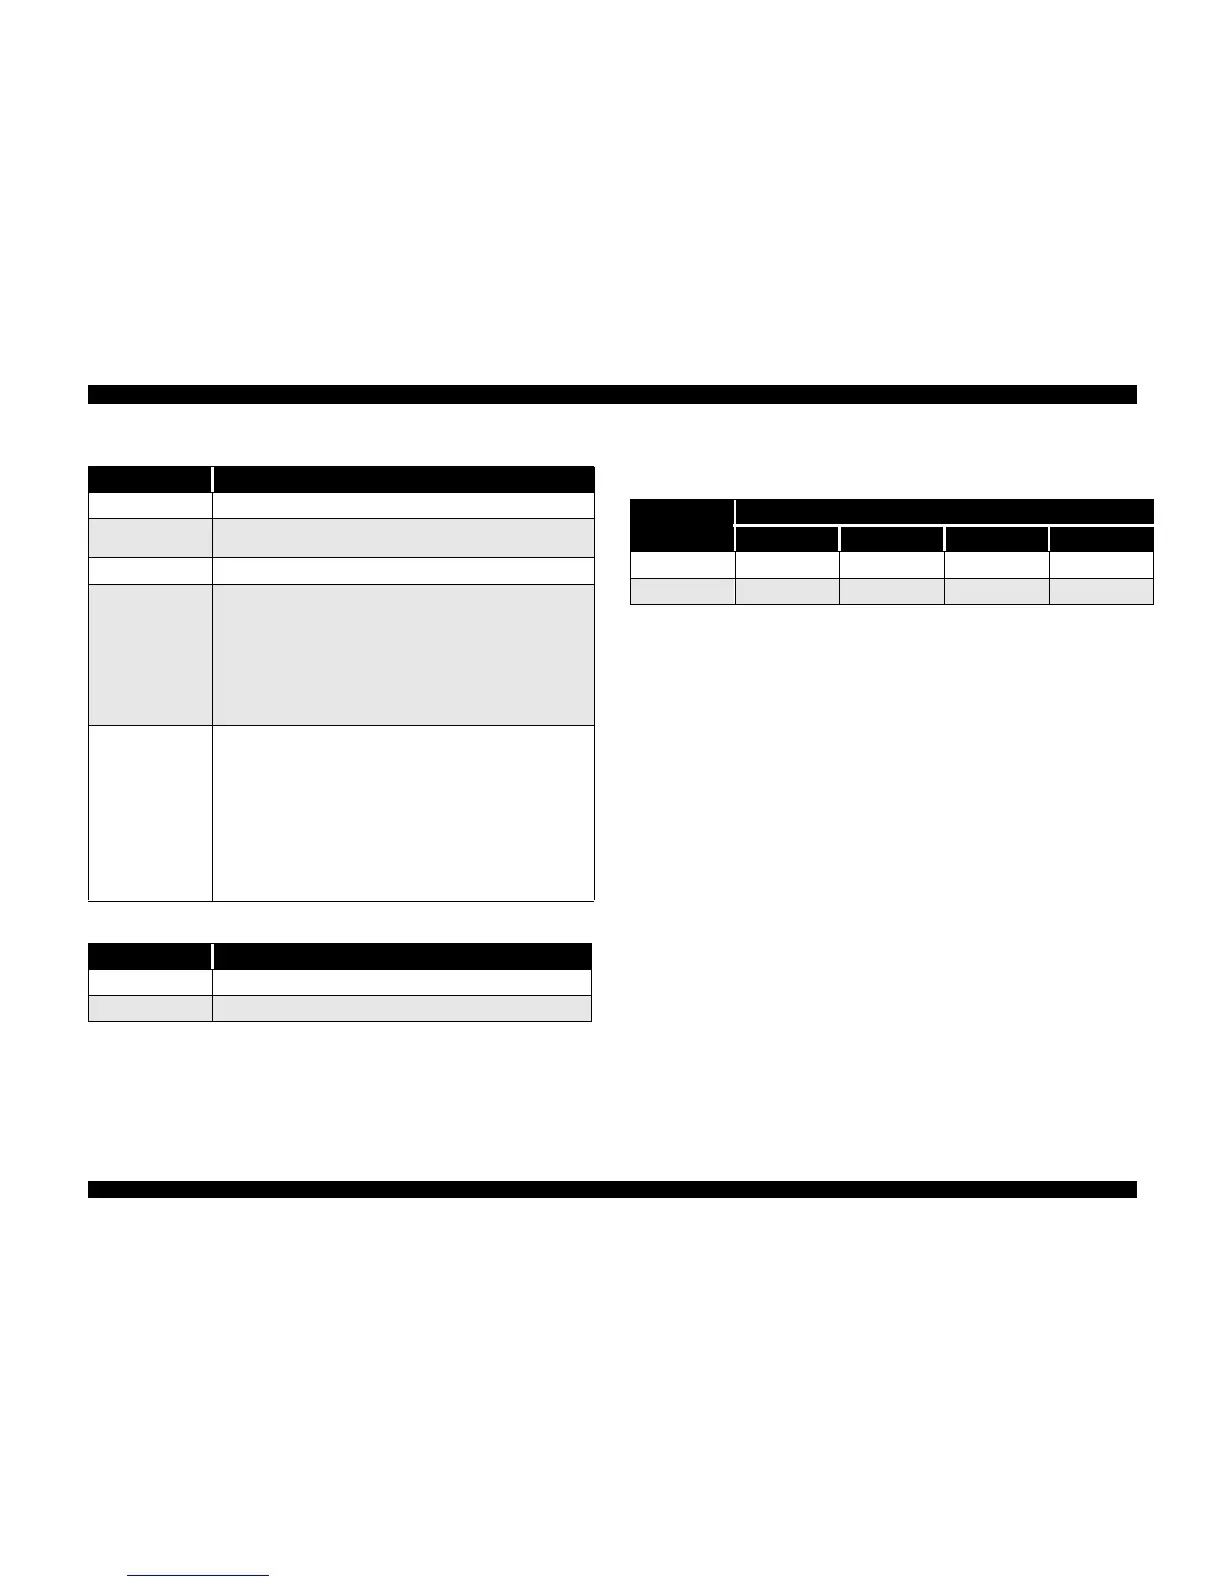
Table 1-13. Changing printout paper sizes during local copying
Paper size
Control Panel Indicators
Scanner Error Color Grayscale Black Text
A4 on on off off
Letter on off off on

 Loading...


