189
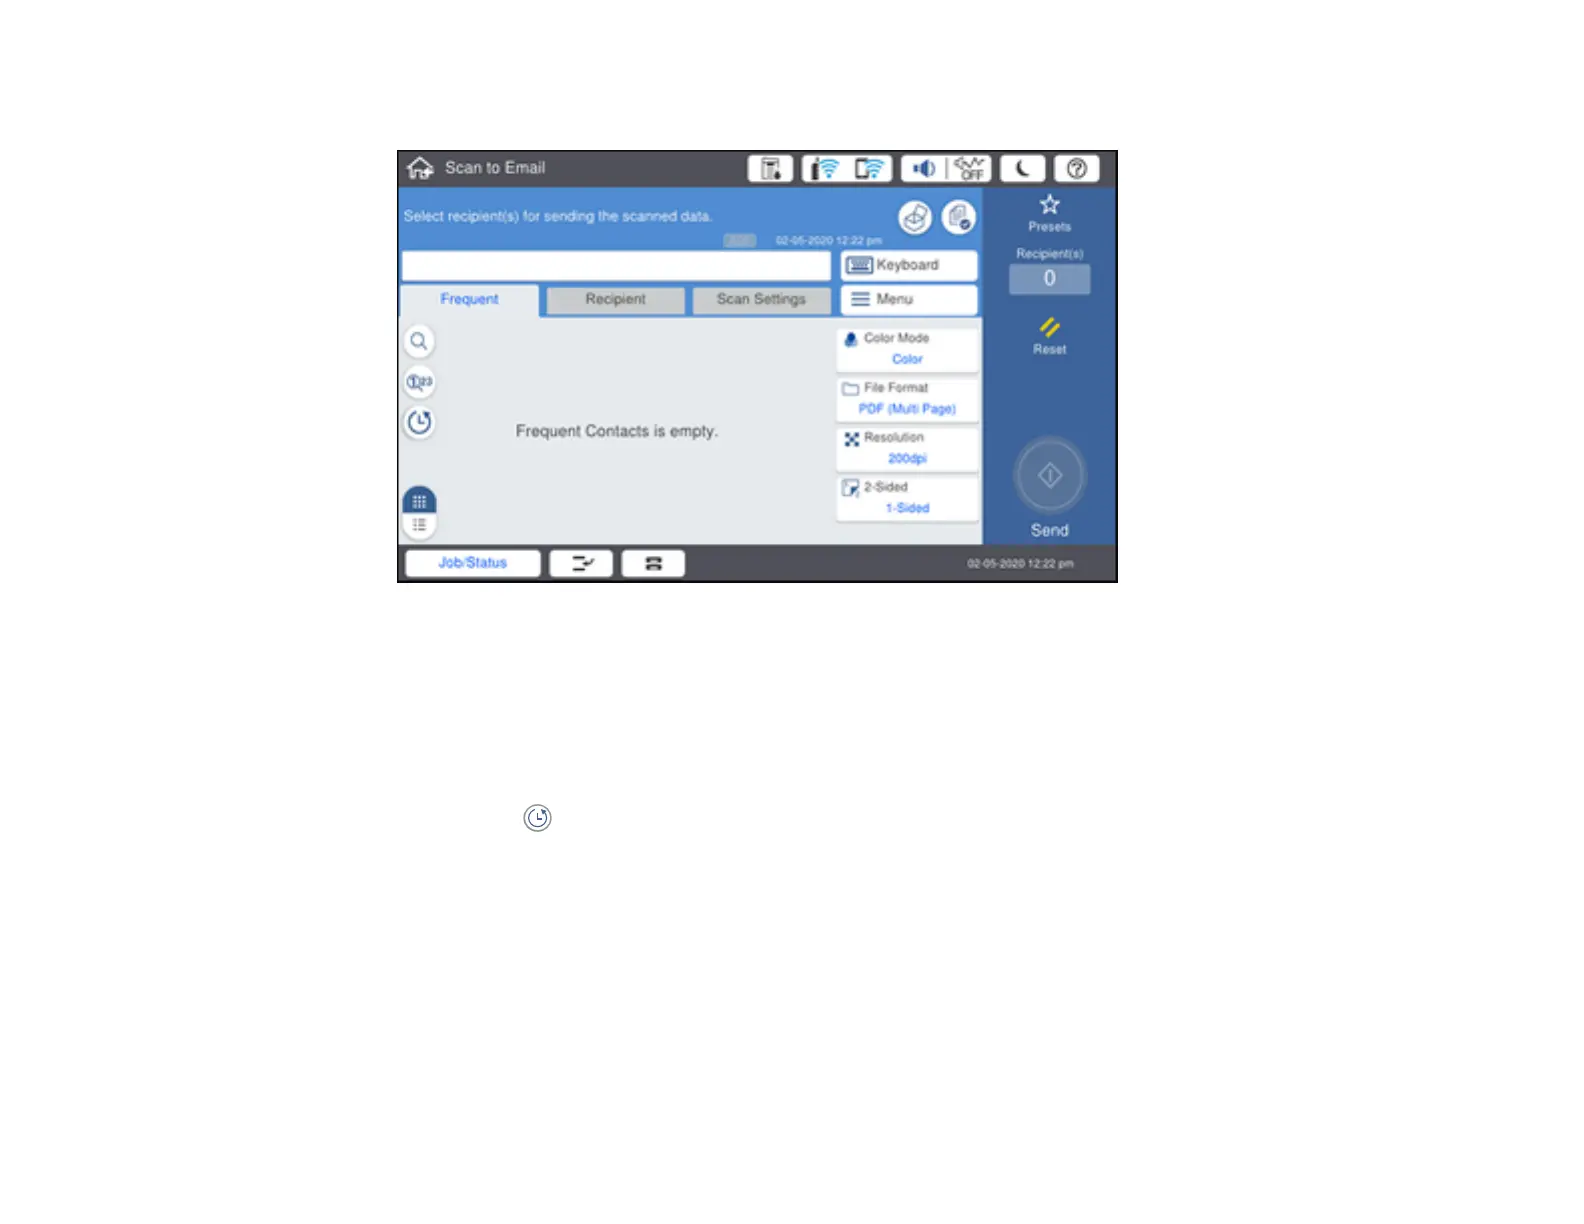
You see a screen like this:
5. Do one of the following:
• Select an email address from any of the displayed frequent contacts.
• Select Keyboard to use the on-screen keyboard to enter the email address for the recipient(s)
and select OK.
• Select Recipient and choose an email address from the list.
• Select the icon to choose an email address from your recent scan history.
6. Select Scan Settings.
7. Select File Format to choose the file format for your scan.
8. Scroll down to change the Subject and File Name, if necessary.
9. Select any additional scan settings as necessary.
Note: To save the scanned image to the product's hard drive, select File Storing and enable the
File Storing setting. Change any of the displayed settings as needed.