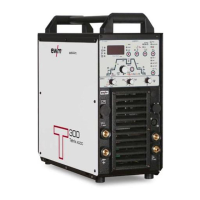
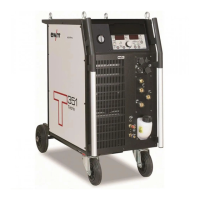
1 Preparation
• Switch off the welding machine.
• Unscrew the gas nozzle from the welding torch.
• Unfasten the tungsten electrode and extract.
2 Configuration
• Press the or (Tetrix Classic) push-button while simultaneously switching on the welding
machine.
• Release push-button.
• The required parameter can now be selected using the rotary knob.
3 Adjustment/measurement
• Applying slight pressure, press the welding torch with the collet against a clean, purged location on the
workpiece and then press the torch trigger for approx. 2 seconds. A short-circuit current will flow
briefly, which is used to determine and display the cable resistance. The value can be between 0 mΩ
and 60 mΩ. The new value is immediately saved without requiring further confirmation. If no value is
shown on the right-hand display, then measurement failed. The measurement must be repeated.
4 Restoring welding standby mode
• Switch off the welding machine.
• Lock the tungsten electrode in the collet again.
• Screw the gas nozzle onto the welding torch.
• Switch on the welding machine
5.22.3 Power-saving mode (Standby)
The power-saving function can be activated either by pressing the button for a longer time - See 4.8
Machine control – Operating elements chapter or by setting a parameter in the configuration menu (time-
based power-saving mode).
 Loading...