Design and function
Welding torch cooling system
099-000115-EW501
17.06.2015
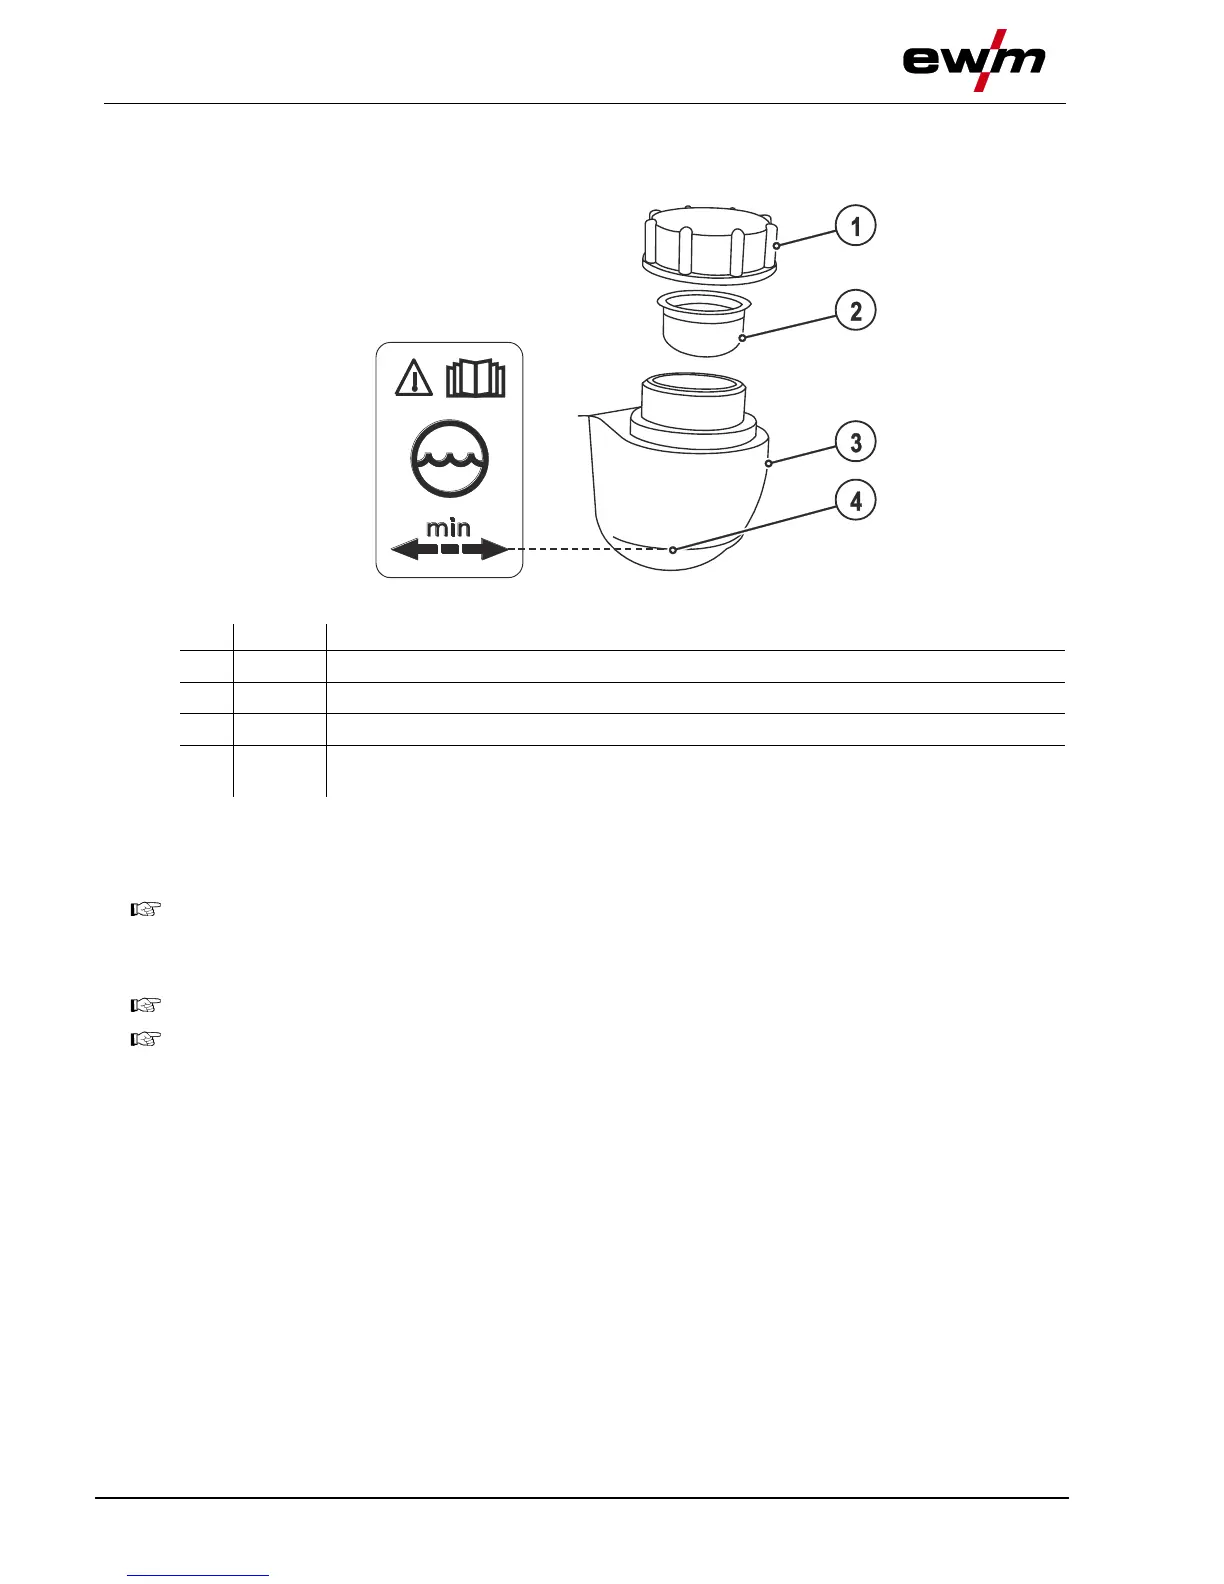
5.6.3 Adding coolant
The unit is supplied ex works with a minimum level of coolant.
Figure 5-5
"Min" mark
Minimum coolant level
• Unscrew and remove the coolant tank sealing cover.
• Check filter sieve insert for dirt, clean if necessary and reinsert into position.
• Top up coolant to the filter sieve insert, close sealing cover again.
After the initial filling, wait for at least one minute when the machine is switched on so that the
hose package is filled with coolant completely and without bubbles.
With frequent changes of torch and during the initial filling process, the cooling unit tank should
be topped up as necessary.
The level of coolant must never fall below the “min” mark.
If there is less coolant in the coolant tank than the minimum required you may need to vent the
coolant circuit. In this case the welding machine will automatically shut down the coolant pump
and signal an error, "- See 7 Rectifying faults chapter".