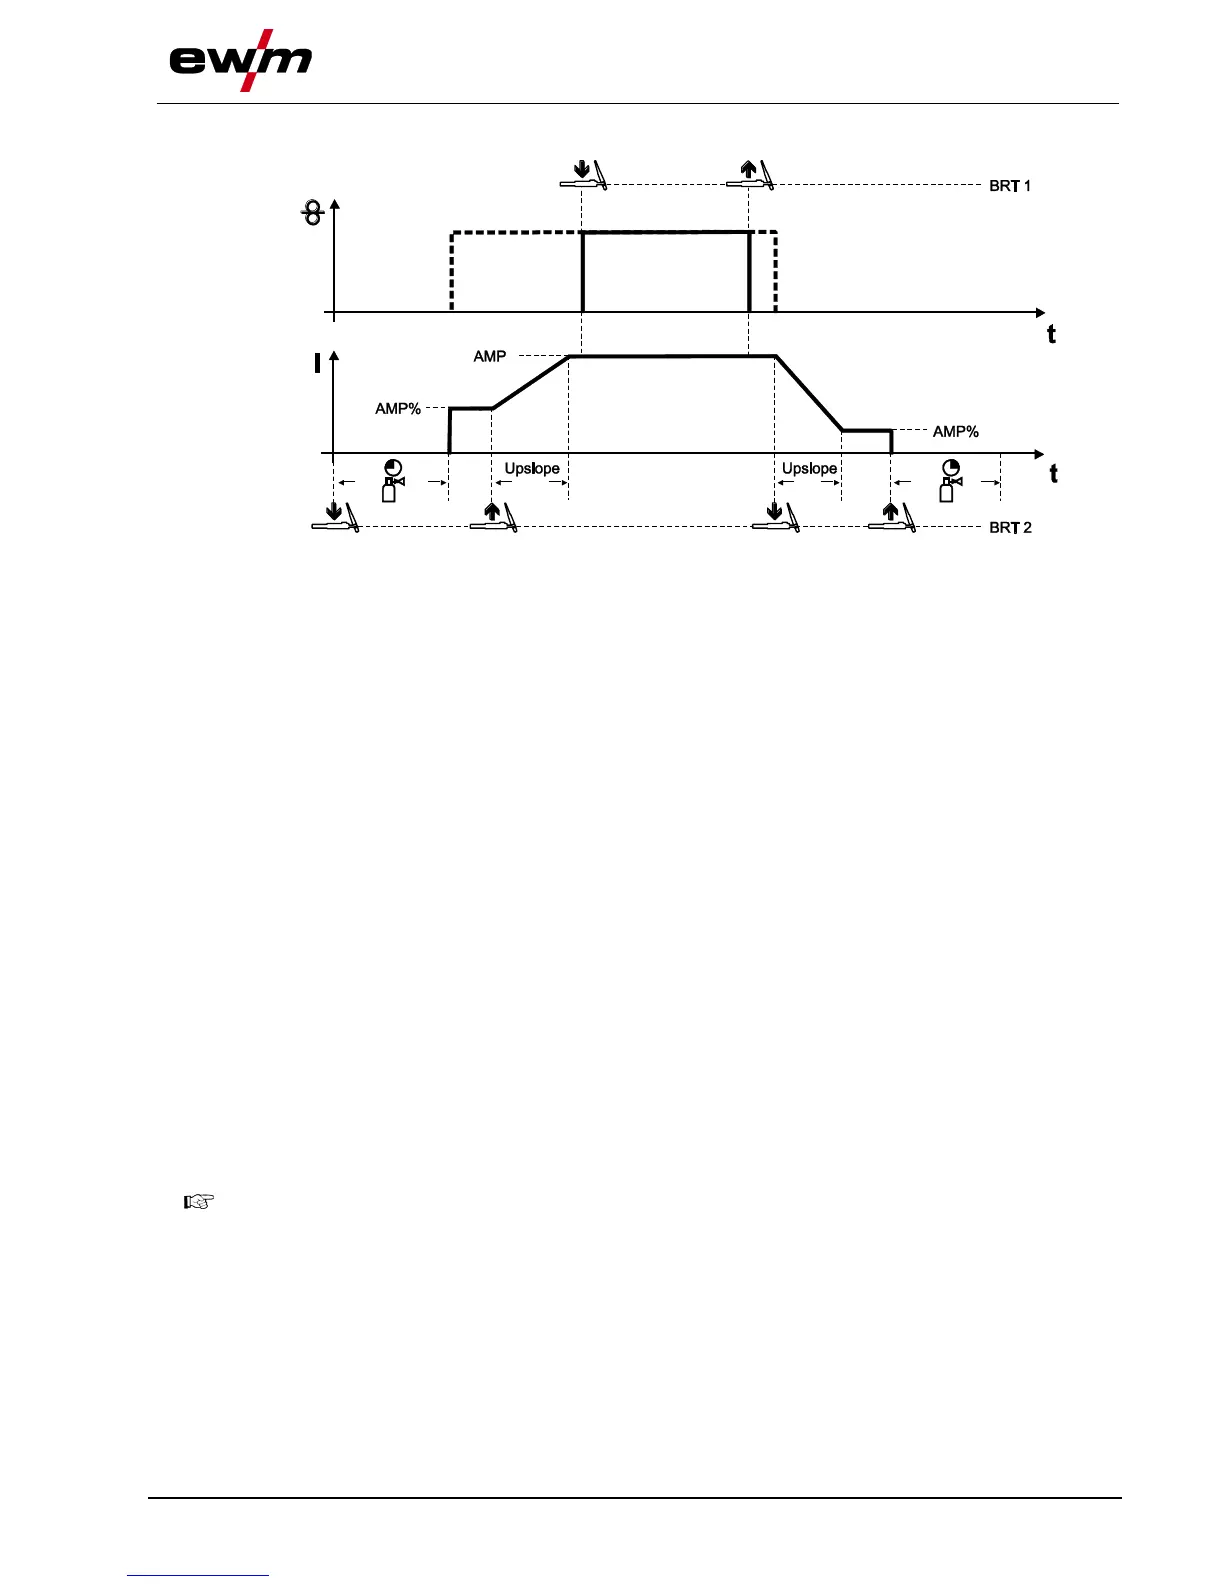
5.11.4.2 Non-latched mode
Figure 5-16
1st cycle (current)
• Press torch trigger 2 (BRT 2), the gas pre-flow time elapses.
• HF ignition pulses jump from the tungsten electrode to the workpiece. The arc ignites.
• Welding current flows and immediately assumes the set ignition current AMP%
(search arc at minimum setting). HF switches off.
2nd cycle (current)
• Release BRT 2.
• The welding current ramps up to the main current AMP in the selected up-slope time.
1st cycle (wire)
• Press torch trigger 1 (BRT 1).
Wire electrode is advanced.
2nd cycle (wire)
• Release BRT 1.
Wire electrode advance stops.
3rd cycle (current)
• Press BRT 2.
• The main current ramps down to the end-crater current I
end
(AMP%) in the selected down-slope time.
4th cycle (current)
• Release BRT 2. Arc extinguishes.
• Shielding gas continues to flow for the selected gas post-flow time.
Ending the welding process without down-slope time and end-crater current:
• Tap BRT 2 (tapping function).
Shielding gas continues to flow for the selected gas post-flow time.
Swiftly tap the torch trigger to change the function.
The torch mode set determines the operating mode of the tapping function.