FaroArm
®
Manual
January 2009
36
Chapter 1: Introduction to the FaroArm
®
3 Digitize eight points on the front of the calibration sphere with the
Laser Line Probe pointing in position #3, see Figure 1-33.
The digitized calibration points then calculate and the C
ALIBRATION
S
TATUS updates. If the probe passes, the current date and time is added
to the probe information. You can view the details for all probe
calibrations by clicking the VIEW LOG button. See “View Log” on
page 87.
You now have two probes to digitize your part. Use the PROBES
command to switch between the standard ball probe and the Laser Line
Probe.
N
OTE: If you remove the Laser Line Probe, you must re-calibrate the
standard ball probe to guarantee the accuracy of the measurements.
For more information, see “Calibrate Probe” on page 79.
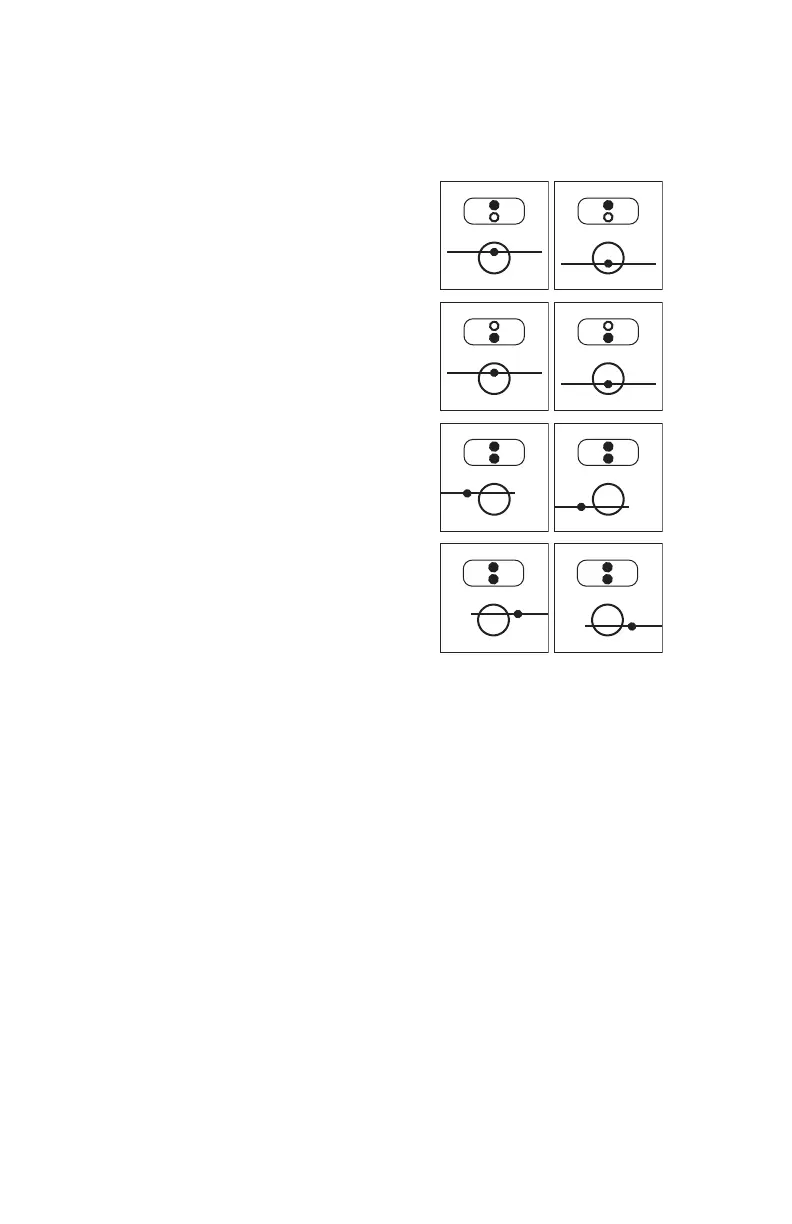
Digitize two points in the Near range
with the center of the laser. One point
on the upper half of the calibration
sphere and the other on the lower half.
Digitize two points in the Far range
with the center of the laser. One point
on the upper half of the calibration
sphere and the other on the lower half.
Digitize two points in the Center
range with the left side of the laser.
One point on the upper half of the
calibration sphere and the other on the
lower half.
Digitize two points in the Center
range with the right side of the laser.
One point on the upper half of the
calibration sphere and the other on the
lower half.
08M46E00_FaroArmUSB.book Page 36 Tuesday, February 17, 2009 1:42 PM