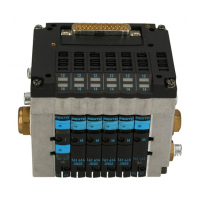
2.2.1 Fitting the pneumatic multiple connector plate
Proceed as follows:
• Make sure that your fastening surface can support
the weight of the pneumatic multiple connector plate
and the valve terminal fastened to it.
• Make sure that there is enough room to connect the
power cables and the pneumatic tubing.
• Cut out a section of the fastening surface in order to
connect the pneumatic tubing (dimensions see Figs.
2/5 and 2/6).
• Drill four mounting holes in the fastening surface.
The position and distances between these holes is
shown in Figs. 2/5 and 2/6.
• Fasten the standard design of the pneumatic multiple
connector plate with 4 M4 screws (CPV10/14), or
with 4 M5 screws (CPV18), and the extended pneu-
matic multiple connector plate with 4 M6 screws of
appropriate length to the fastening surface.
2. Fitting
CPV... 9802 2-11
 Loading...