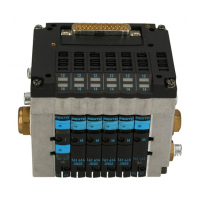
2.1.1 Fitting onto a wall
PLEASE NOTE
In order to fit the CP valve terminal onto a wall you
require the following fitting kit:
– for CPV10/14 terminals:
fitting kit CPV 10/14-VI-BG-RWL
– for CPV18 terminal:
fitting kit CPV18-VI-BG-RW
This kit consists of 2 profile sections and 4 self-
cutting screws.
Proceed as follows:
• Make sure that your fastening surface can support
the weight of the CP valve terminal.
• Make sure that there is enough room to connect the
power cables and pneumatic tubing.
• Screw the 2 fastening profile sections onto the valve
terminal with the screws specified in the table below
as shown in Fig. 2/1. With the CPV10/14 terminals,
make sure that the fixing bolts of the profile sections
grip into the groove on the valve terminal.
CP terminal Self-cutting screw Tightening torque
CPV10/14 M4 x 10 1.5 Mn
CPV18 M5 x 10 4 Nm
2. Fitting
2-4 CPV... 9802
 Loading...