FLAMIC S.R.L. 5 Via dell’Artigianato, 36035 Marano Vicentino (Vicenza) - Italy
52
Dough sheeter SF450 - SF500 - SF600 Operation and maintenance manual (translation of original instructions) – Ed. 10/2016
Rev.02 10/2017
All rights reserved. Reproduction in whole or in part of this manual is prohibited.
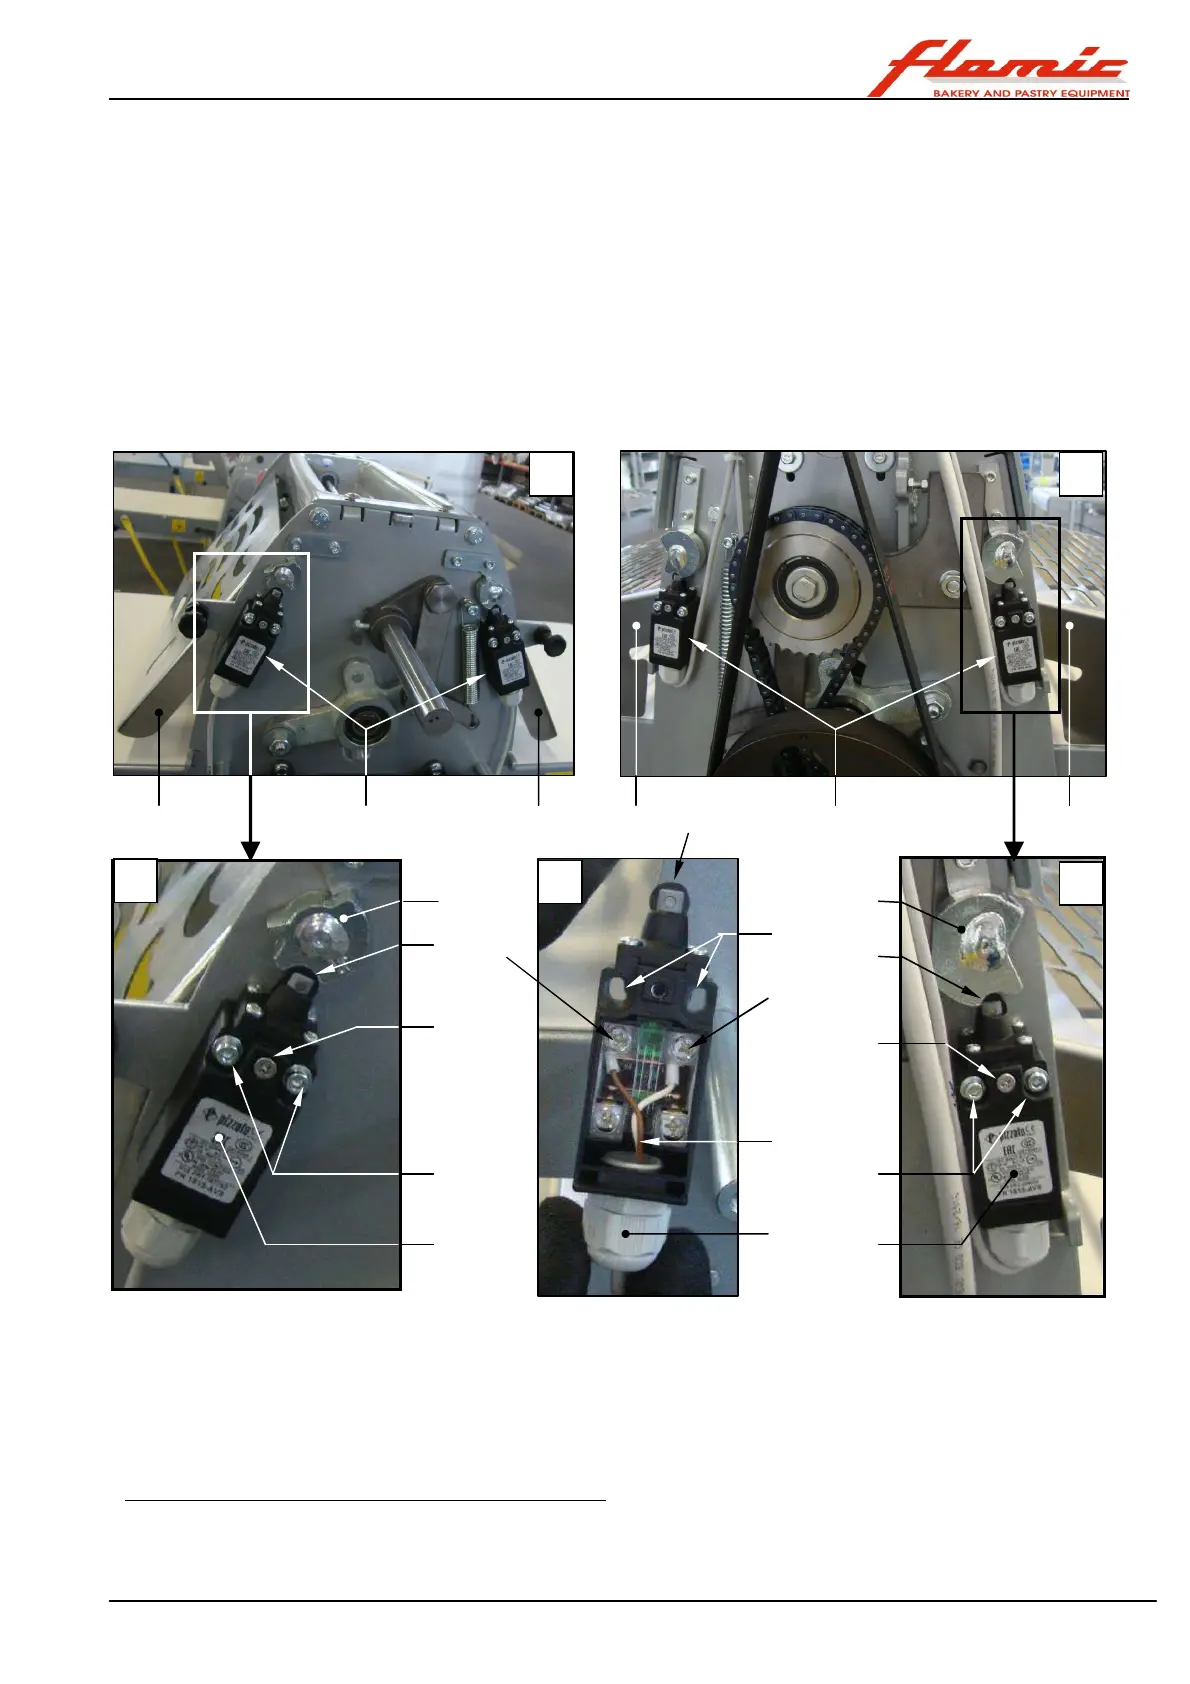
6. put some medium thread locking compound (4 LOXEAL 55-03 or equivalent) on the threads of the screws ref. 3
and, keeping the through holes ref. 9 of the micro switch aligned with the corresponding threaded holes in the
upright, insert the screws ref. 3 and tighten them until the micro switch ref. 1 is fixed in place. The physical
characteristics and performance of the new micro switch must be the same or better than the one that was
removed (same dimensions and same centre distance between the screw holes, stable closure of contacts with
guard lowered etc.). With the guard lowered completely the head ref. 10 of the micro switch must enter the recess
ref. 11 of the cam ref. 12 and must not be pressed.
7. Check that the micro switch is triggered (you hear a slight click) when the distance between the guard and the
conveyor belt is less than the maximum D
L
value indicated in section 5.2.2, part 1. If it doesn’t, loosen the screws
ref. 2 and move the micro switch (the screw holes ref. 2 allow slight adjustments to be made) until it does.
8. (mod. SF450) Install the casing of the upright on the side opposite the controls, the thickness adjustment handle
and the rack, following the instructions in section 4.6.1, from point 35 to point 46.
(mod. SF500 and SF600). Install the casing of the upright on the side opposite the controls following the
instructions in section 4.3.3
9. Repeat the check that was referred to in the previous point 7
Figure 44 - Safety micro switches associated with the interlocked guards in the rolling zone
4.10 CLEANING
Before starting, take the safety precautions described in section 4.1
To ensure that the machine is hygienic: clean it at the end of each day and/or each shift.
The machine should be thoroughly cleaned whenever you do not intend to use it for more than ten hours to
avoid biological hazards due to mould, bacteria etc. as well as to prevent the formation of deposits that are
difficult to remove. Cleaning should be carried out as follows:
- make sure that nobody is in the vicinity of the machine
- raise interlocked guards completely (see section 3.5)
if necessary, remove the cutting unit and the relative rollers, which can be washed separately with warm water
and a neutral dishwashing detergent, as long as they are well rinsed and thoroughly dried before they are
reinstalled on the machine.
A B
1 2 1 2 2 2
3 3
4
4
5 5
7
6
6
8
9
10
11
11
12 12
C
D
E