150718 PL YFLY rev A_Frame | Aug us t 7, 20 15 5:0 6 P M
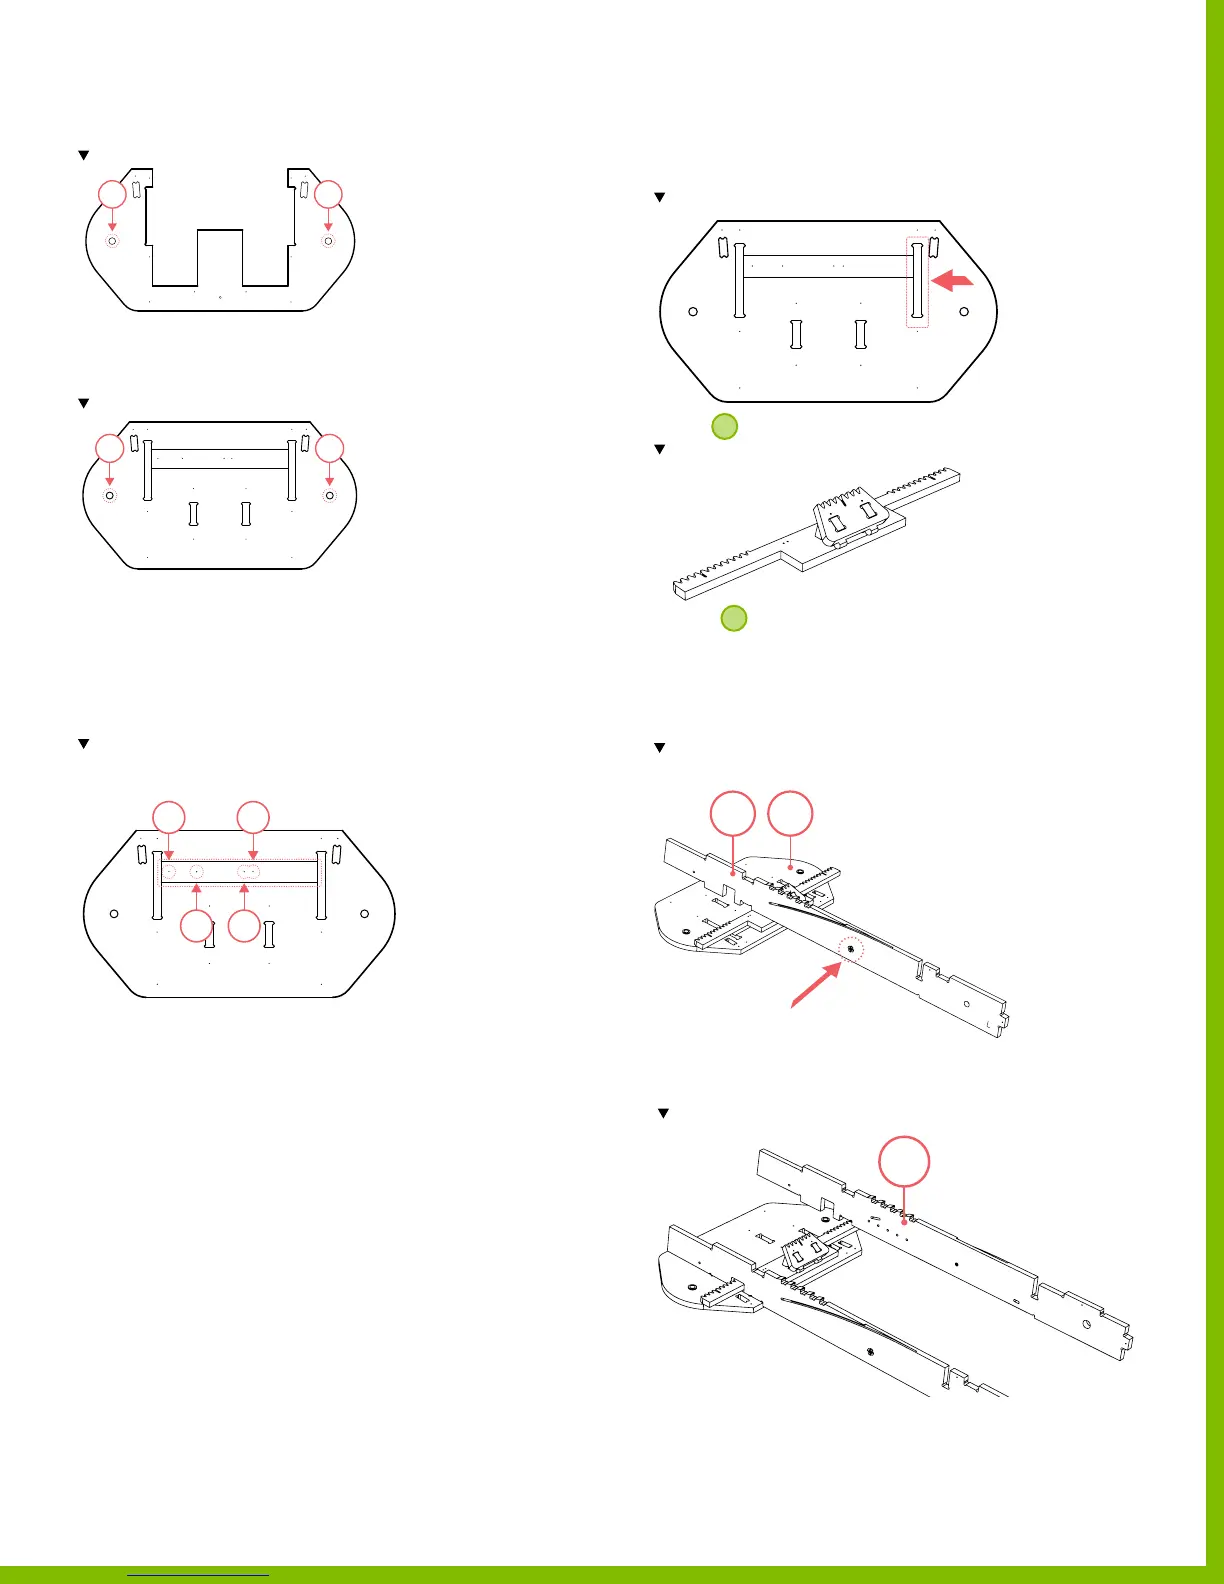
8. Press 2 bushings into part 45.
Note the location of the bushing on part 45
9. Using a hammer, tap the bushings until the top is ush
with the wooden part.
10. Press 2 bushings into part 44.
Note the location of the bushings on part 44
11. Using a hammer, tap the bushings until the top is ush
with the wooden part.
12. Install the drawer slide on part 44, by extending the slide
to its furthest extended position.
13. Align the 4 screw holes on the drawer slide with holes
found in the recess on part 44.
Note the location and position of the mounting holes. The drawer slide should t
into the recessed pocket on part 44.
14. Secure the drawer slide to part 44 using screws.
‒ Use a screwdriver and the screws provided in the
Slide Drawer Kit.
‒ Use 4 screws
‒ Total 4 locations
15. Test the drawer slide t by moving the
slide back and forth.
‒ Be sure there are no interferences between any
screw head and the slide.
16. Extend the drawer slide until the last two holes on the
drawer slide are accessible from the underside through
the slot located on part 44.
Note the location of the referenced slot on part 44.
Mount
1
to the drawer slide.
Note the correct assembly
17. Secure
1
using screws.
‒ Use the remaining screws included in the
Drawer Slide Kit.
18. Using a mallet, tap part 40 into the tab connections on
the left side of part 44.
Note the location and orientation of the tee nut on part 40;
the letter L should face inward to the centerline of the go-kart.
19. Using a mallet, tap part 41 into the tab connections on the
left side of part 44.
Note the letter L should face part 41, away from the centerline of the go-kart.
1 2
1 2
1
3 4
2
40
44
41
33
PlyFly Go‑Kart Instruction Guide • 2015 Release