9 Measurement
FLUXUS WD 9.4 Display of measured values
89
UMFLUXUS_WDV1-3EN, 2018-07-16
Input of the transducer distance
After precise transducer positioning, the recommended transducer distance is displayed in brackets again.
• Measure the transducer distance.
• Enter the measured transducer distance.
• Press ENTER.
The measurement is started. The measured values are displayed.
9.4 Display of measured values
The measured values are displayed during the measurement as follows:
By pressing key or , additional physical quantities can be displayed during the measurement, see Fig. 9.2.
• Press key to display the measured values in line 5. The designation of the physical quantity is displayed in line 4 by
pressing key for several seconds.
• Press key to display the measured values in line 4. The designation of the physical quantity is displayed in line 5 by
pressing key for several seconds.
Toggling between the channels
If the measurement is started on several channels, the display of the measured values can be adapted during the mea-
surement as follows:
AutoMux mode
If the AutoMux mode is activated, the measured values of all activated channels (measuring and calculation channels) are
displayed consecutively. The next active channel is selected after 3 s. The toggle time can be changed in the menu item
Special functions\Dialogs/Menus\Toggle time.
HumanMux mode
The measured values of one channel are displayed in the HumanMux mode. The measurement on the other channels
continues.
• Press key to display the next activated channel. The measured values for the selected channel are displayed.
Each measurement starts in AutoMux mode. Press key to toggle between the modes.
Status line
Important information of the running measurement is summarized in the status line. The quality and precision of the mea-
surement can be evaluated. Press key during the measurement to scroll to the status line.
Measurement\Transducer distance
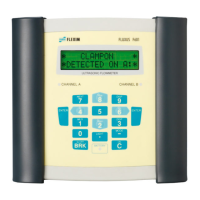
Fig. 9.2: Display of measured values
1 – channel, program branch, status indicators
2 – measurand and unit of measurement
3 – measured value
4 – display of further measured values
5 – display of further measured values
Fig. 9.3: Display of the status line
1 – status line