Victor Xu Page 43 12 Jan. 2011
Copyright 2011 © Shenzhen Runtianzhi Image Technology, Co., Ltd.
http://www.floradigital.com
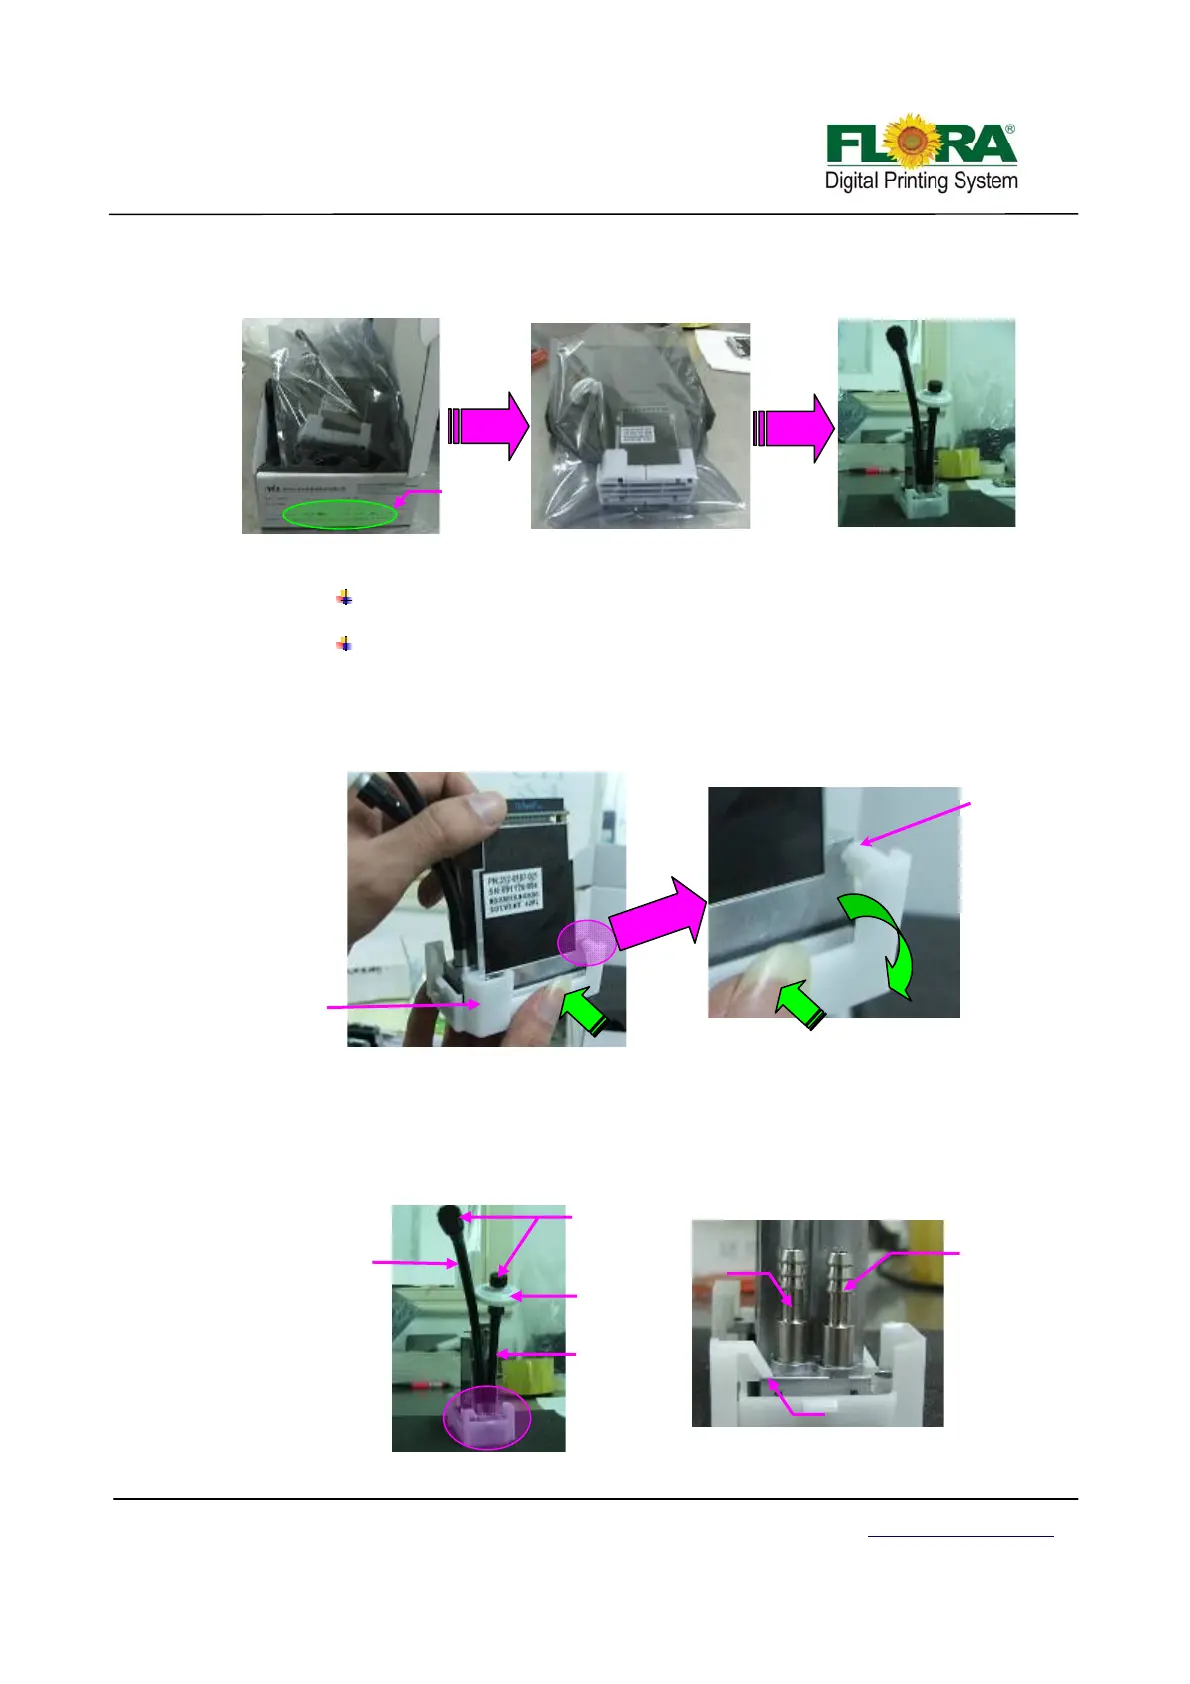
Open the anti-static plastic bag and remove the head.
Remove the head cap.
Note:
The head is pre-loaded with ink analog to prevent drying of the nozzles during
transportation.
The head is also equipped with a cap to protect the nozzle surface and prevent
drying of the ink analog.
¾ Hold the middle of both sides of the cap squeeze and twist the cap to release the
latch that holds the head as shown below.
¾ Take note each print head must have input and bleeding tubing. The input tubing
must be connected to the right port with disc 20µm ink filter. While the bleeding
tubing should be connected on the left port and must be closed using a connector
tube connector cap. See photo below.
How to unlock the latch of cap
Latch is
released
Press here
How to remove cap
Print head
Ca
Press here
The serial number
should match
Inlet
tubing
20µm ink
filter
Ink bleeding
tubing
Inlet
ort
Ink bleeding
r
Latch
Print head Inlet and Bleeding ports
Tube
Connector
ca