Remote Interface Setup
RS-232 Serial Interface 5
5-5
Set Up and Connect the Serial Interface
Refer to the specifications for the peripheral device, and proceed as follows to set up the
serial interface for the application:
1. With the 5730A Calibrator power off, connect a 9-pin D subminiature RS-232 null-
modem cable such as Fluke accessory RS43 to the rear panel RS-232 connector and
to the peripheral device.
2. Push to turn on the Calibrator.
3. Touch Setup Menu>Instrument Setup>Remote Port Setup>RS-232 Port Setup.
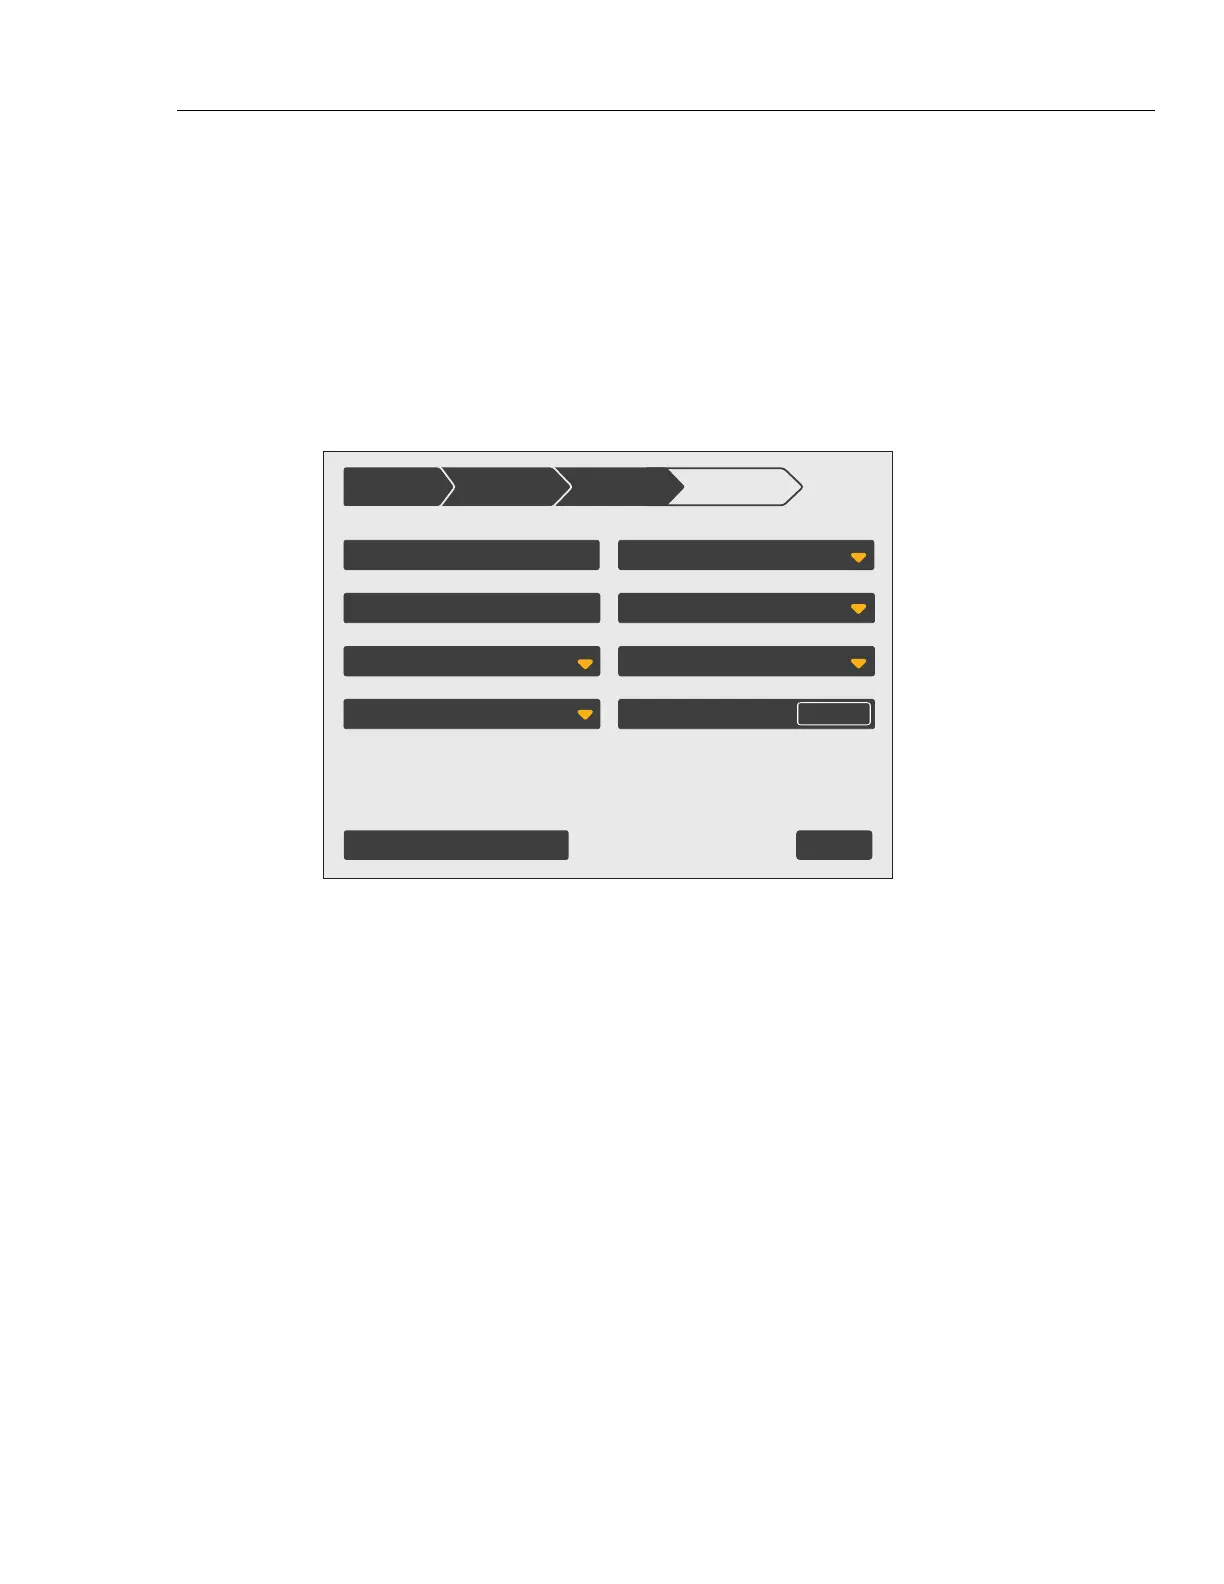
The display changes to:
Remote Port
RS-232
Setup
Exit
Instrument
Settings
Stop Bits 1
Port Stall XON
Restore Factory Defaults
Parity None
Data Bits 8
EOL CRLF
Remote IF Terminal
EOF 012 000
Baud 9600
Setup Menu
hhp149.eps
4. Touch Data Bits to set the number of data bits.
5. Touch Stop Bits to set the number of stop bits.
6. Touch Stall to select a method of stall control.
7. Touch Parity to select the parity mode.
8. Touch Baud to set the baud rate.
9. Touch EOL to set the EOL (End Of Line) character to CR, LF, or the string CR LF.
10. This step needs to be done only if setting up the interface for remote control of the
Calibrator. Touch one of the selections under Remote IF to set the label to
“Terminal” or “Computer.”
“Terminal” sets the remote port to expect a human operator to be using a terminal
attached to the RS-232 port to control the Calibrator. This setting has the same effect
as specifying TERM in the SP_SET or REM_MODE remote command parameter
string.
“Computer” sets the remote port to expect a computer to be controlling the Calibrator
over the RS-232 port. This setting has the same effect as specifying “COMP” in the
SP_SET or REM_MODE remote command parameter string.