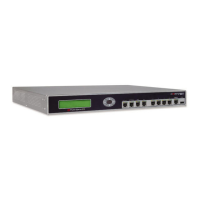
Example 3: FortiMail unit in DMZ Gateway mode deployment
FortiMail™ Secure Messaging Platform Version 4.0 Patch 1 Install Guide
116 Revision 2
http://docs.fortinet.com/ • Feedback
4 Select OK.
To add a dmz virtual IP for the protected email server
1 Go to Firewall > Virtual IP > Virtual IP.
2 Select Create New.
3 Complete the following:
4 Select OK.
Configuring the firewall policies
Create the following firewall policies:
• Allow SMTP_quar_services that are received at the internal virtual IP address, then
apply a static NAT when forwarding the traffic to the private network IP address of the
FortiMail unit.
• Allow FortiMail_incoming_services that are received at the wan1 virtual IP address that
maps to the FortiMail unit, then apply a static NAT when forwarding the traffic to the
private network IP address of the FortiMail unit.
• Allow FortiMail_outgoing_services from the FortiMail unit to the Internet.
• Allow SMTP traffic that is received at the DMZ virtual IP address, then apply a static
NAT when forwarding the traffic to the private network IP address of the protected
email server.
• Allow PO3_IMAP_services that are received at the wan1 virtual IP address that maps
to the protected email server, then apply a static NAT when forwarding the traffic to the
private network IP address of the protected email server.
To add the internal-to-FortiMail policy
1 Go to Firewall > Policy > Policy.
2 Select Create New.
3 Complete the following:
Name Enter a name to identify the virtual IP entry, such as
protected_email_server_VIP_dmz.
External Interface Select dmz.
Type Select Static NAT.
External IP
Address/Range
Enter 192.168.1.2.
Mapped IP
Address/Range
Enter 172.16.1.10.
Source Interface/zone Select internal.
Source Address Name Select internal_address.
Destination
Interface/zone
Select dmz.
Destination Address
Name
Select FortiMail_VIP_internal.
Schedule Select ALWAYS.
Service Select SMTP_quar_services.
Action Select ACCEPT.
 Loading...
