Quick Start Wizard Step 4: Adding protected domains
FortiMail™ Secure Messaging Platform Version 4.0 Patch 1 Install Guide
Revision 2 83
http://docs.fortinet.com/ • Feedback
Figure 32: Quick Start Wizard: Step 4 (server mode)
To add a protected domain
1 Select Add Domain.
A dialog appears that enables you to configure the protected domain. Its appearance
varies by the operating mode of the FortiMail unit.
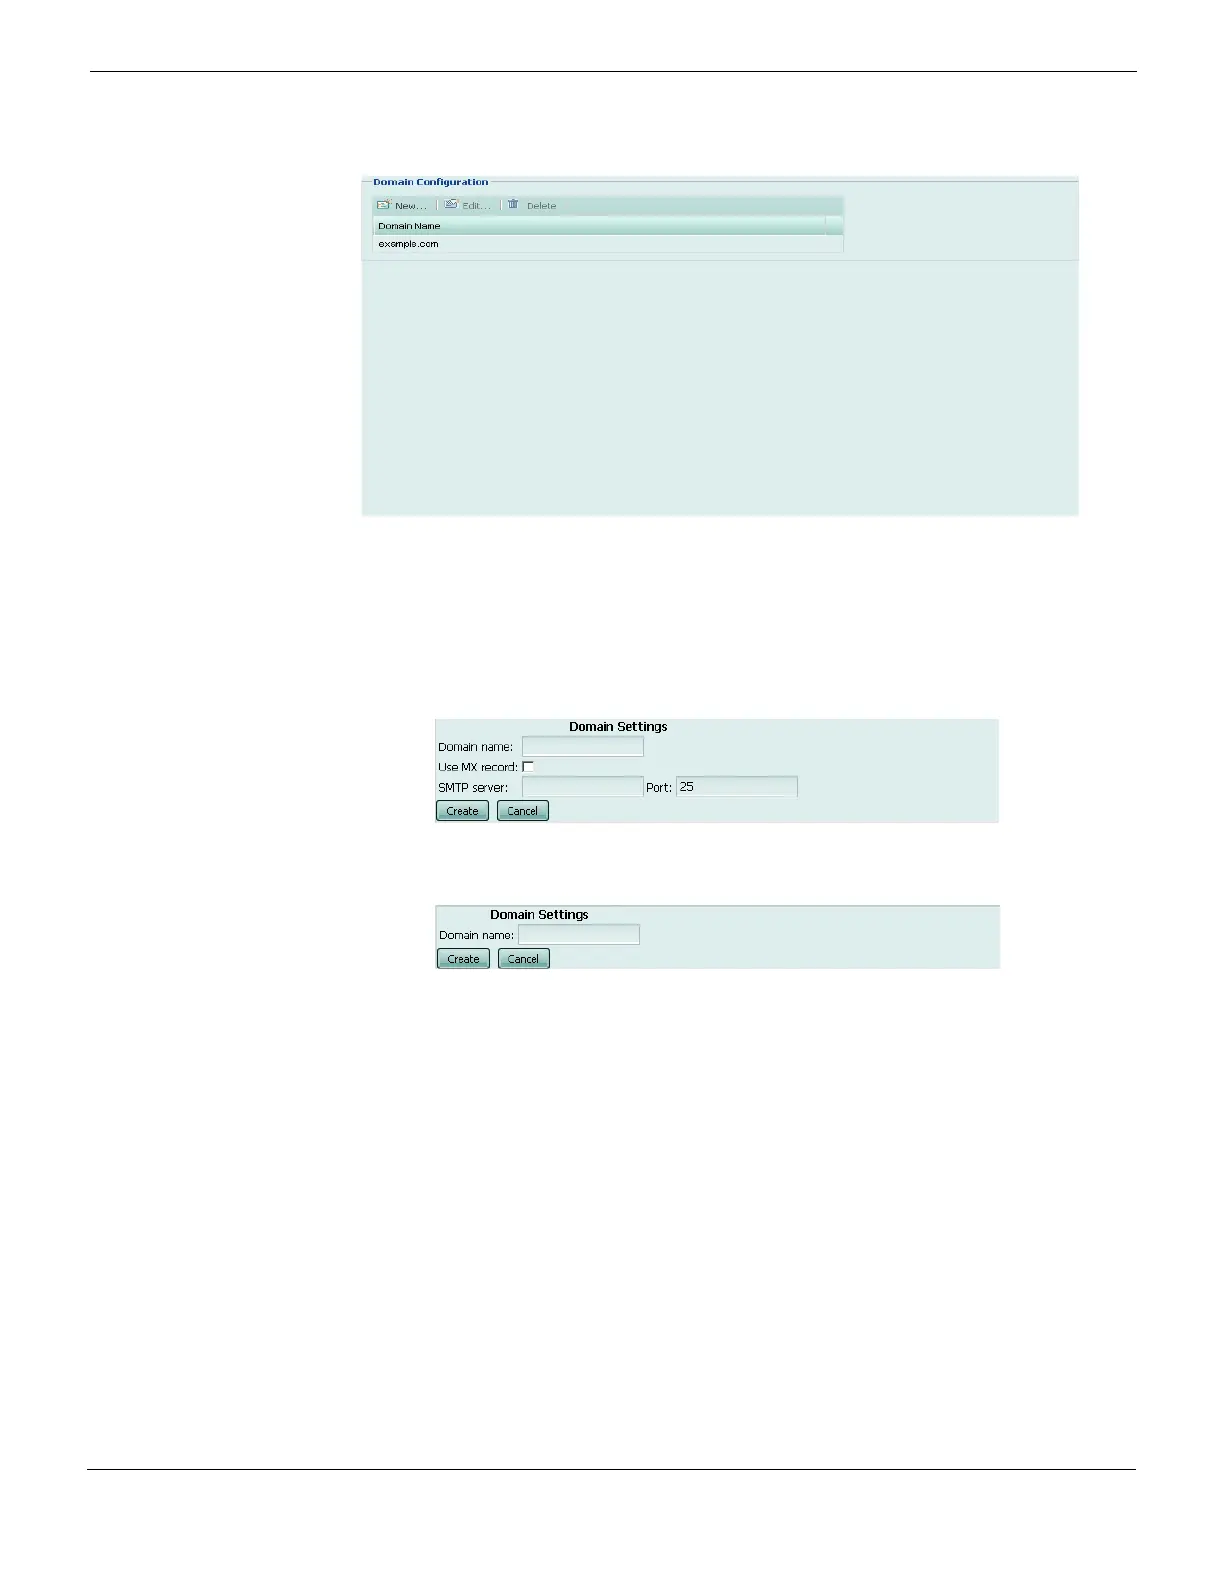
Figure 33: Quick Start Wizard: Step 4 dialog (gateway mode and transparent mode)
Figure 34: Quick Start Wizard: Step 4 dialog (server mode)
2 Configure the following, then select OK:
Domain FQDN Enter the fully qualified domain name (FQDN) of the protected domain.
For example, if you want to protect email addresses such as
user1@example.com, you would enter the protected domain name
example.com.
Use MX Record
(transparent mode and
gateway mode only)
Select to enable the FortiMail unit to query the DNS server’s MX record
for the FQDN or IP address of the SMTP server for this domain name,
instead of manually defining the SMTP server in the fields SMTP Server
and Fallback MX Host.
Note: If enabled, you may also be required to configure the FortiMail
unit to use a private DNS server whose MX and/or A records differ from
that of a public DNS server. Requirements vary by the topology of your
network and by the operating mode of the FortiMail unit. For details, see
“Configuring DNS records” on page 95 (gateway mode) or “Configuring
DNS records” on page 119 (transparent mode).
 Loading...