72
6
7
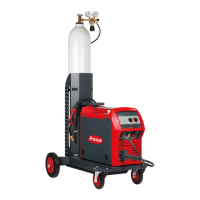
Setting the gas
pressure on the
welding torch
with gas cut-off
valve
Open the gas cut-off valve of the welding torch
- Shielding gas flows
Set the desired gas flow rate on the pressure regulator
Close the gas cut-off valve of the welding torch
TIG welding
6
CAUTION! Risk of injury and
damage from electric shock. As
soon as the power source is
switched on, the tungsten elec-
trode in the welding torch is live.
Make sure the electrode does not
touch any persons or electrically
conductive or earthed parts (e.g.
the housing, etc.).
1
2
3
Press the "Process" button to select TIG welding
Set the desired welding current
When using a welding torch with a torch trigger and TIG Multi Connector plug (with
2-step mode factory setting):
Place the gas nozzle down on the ignition location, ensuring there is a gap of approx.
2 to 3 mm (5/64 to 1/8 in.) between the tungsten electrode and the workpiece Gap
exists
Gradually tilt the welding torch up until the tungsten electrode touches the workpiece
Pull back and hold the torch trigger
– Shielding gas flows
Raise the welding torch and rotate it into its normal position
– The arc ignites
Carry out welding
1
2
3
4
5
6
7
3 4 6
 Loading...