136 232003110G (03)
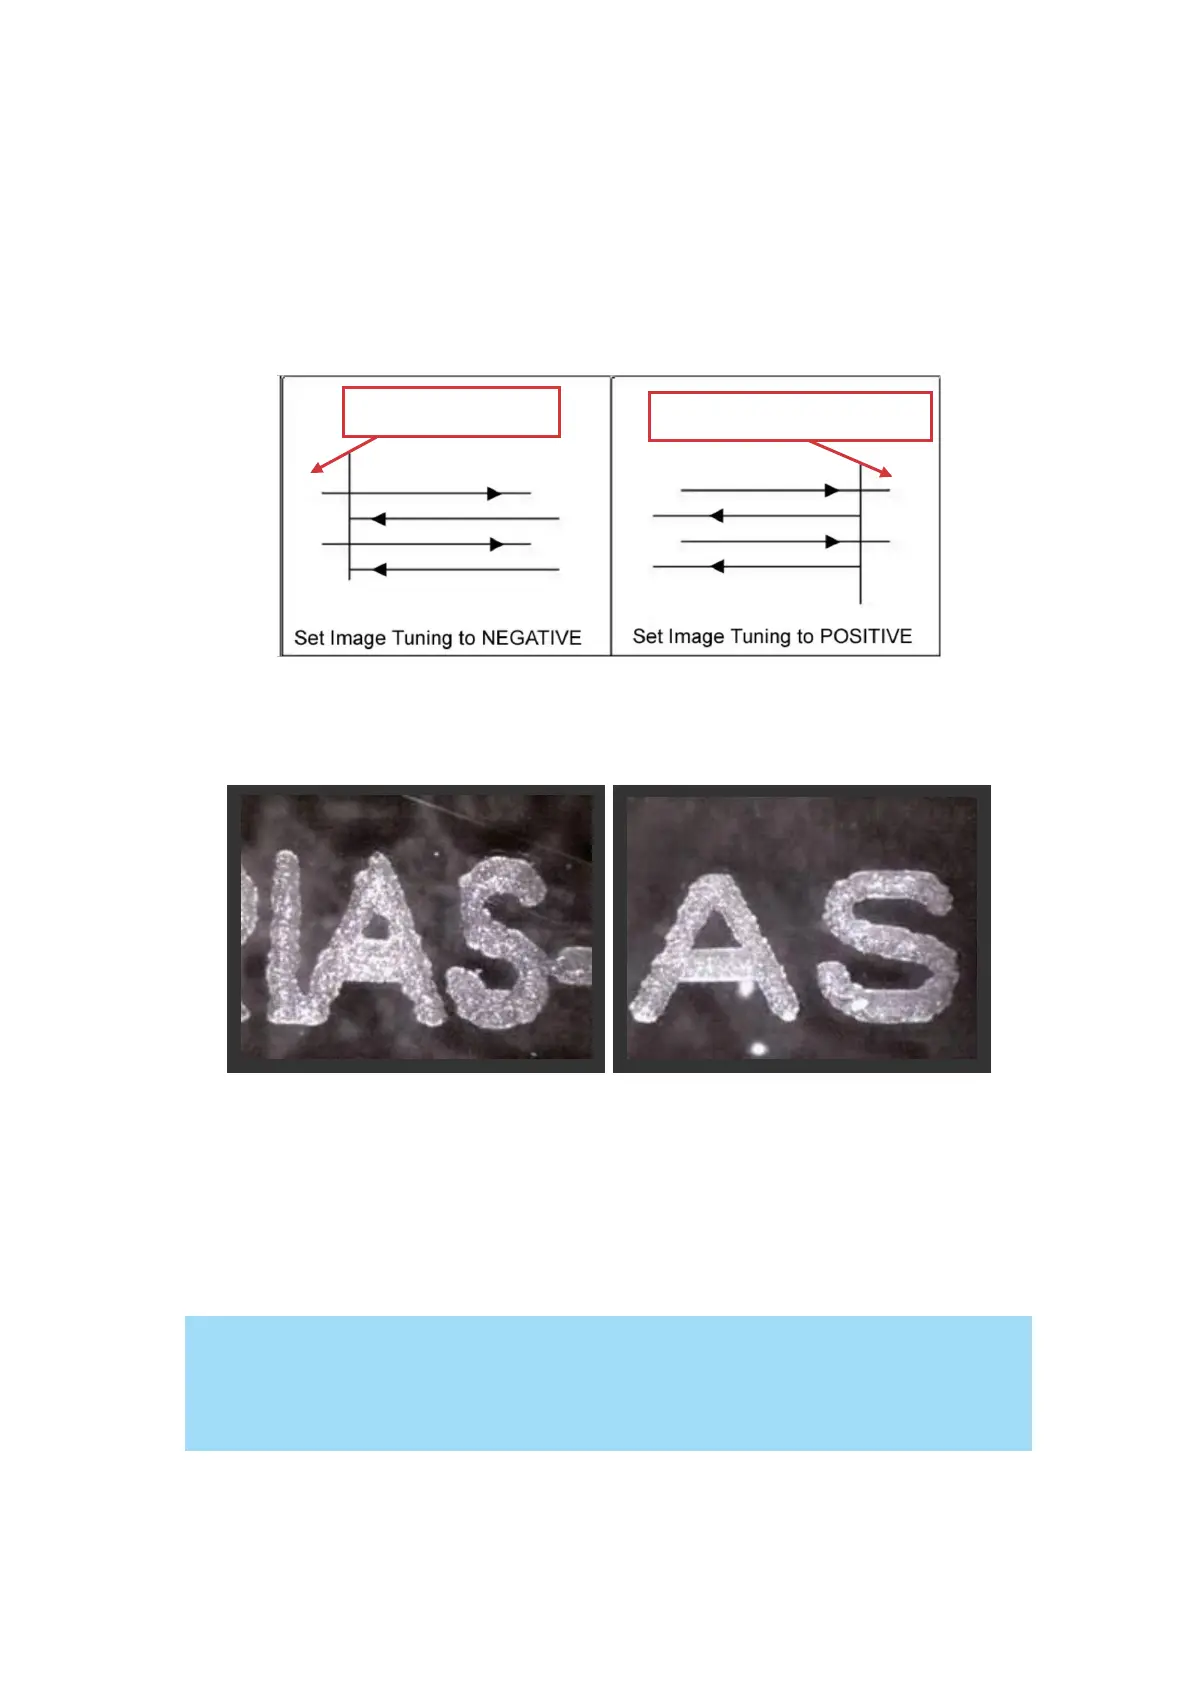
square and can be compensated for by the image tuning setting. In the diagram below, the
arrows refer to the direction the laser head is moving to generate that engraved line. If the first
and every other line protrude to the left of the square’s ideal edge, you will want to set the image
tuning to a negative value. If the first and every other consecutive line protrude to the right of the
square’s ideal edge, you will want to set the image tuning to a positive value. The further the
protruding lines are from the square’s ideal edge, the larger you will need to set the Image Tuning
value to compensate.
The following is an example that has the proper image tuning, and demonstrates this significance
when engraving fine, small, intricate text. The following two pictures show engraved text
magnified with no image tuning (left picture) and image tuning enabled (right picture).
Extend (Paper Page) [DEFAULT SETTING: Unselected]
If you are processing a very large area requiring the maximum work table area, you will want to
enable this mode. Enabling this mode will extend the S400 maximum work area to 40" x 24"
(1016 mm x 610 mm) from the default 36" x 24" (916 mm x 610 mm). This function is enabled at
the expense of some quality loss, usually on the left and right edges of your full-size engraving.
Usually the quality loss is minimal and may not be apparent, depending on your design.
With the Extend function enabled, the following functions are disabled: 3D mode
(Options Page), Stamp Mode (Options Page), SmartACT (Options Page), Disable Skip
White (Advanced), Auto Focus (Pen Page), and Rotary Fixture (Paper Page).