118 232003110G (03)
5.2.3.1
LaserPro
S400
Print
Driver
>>
Options
Page
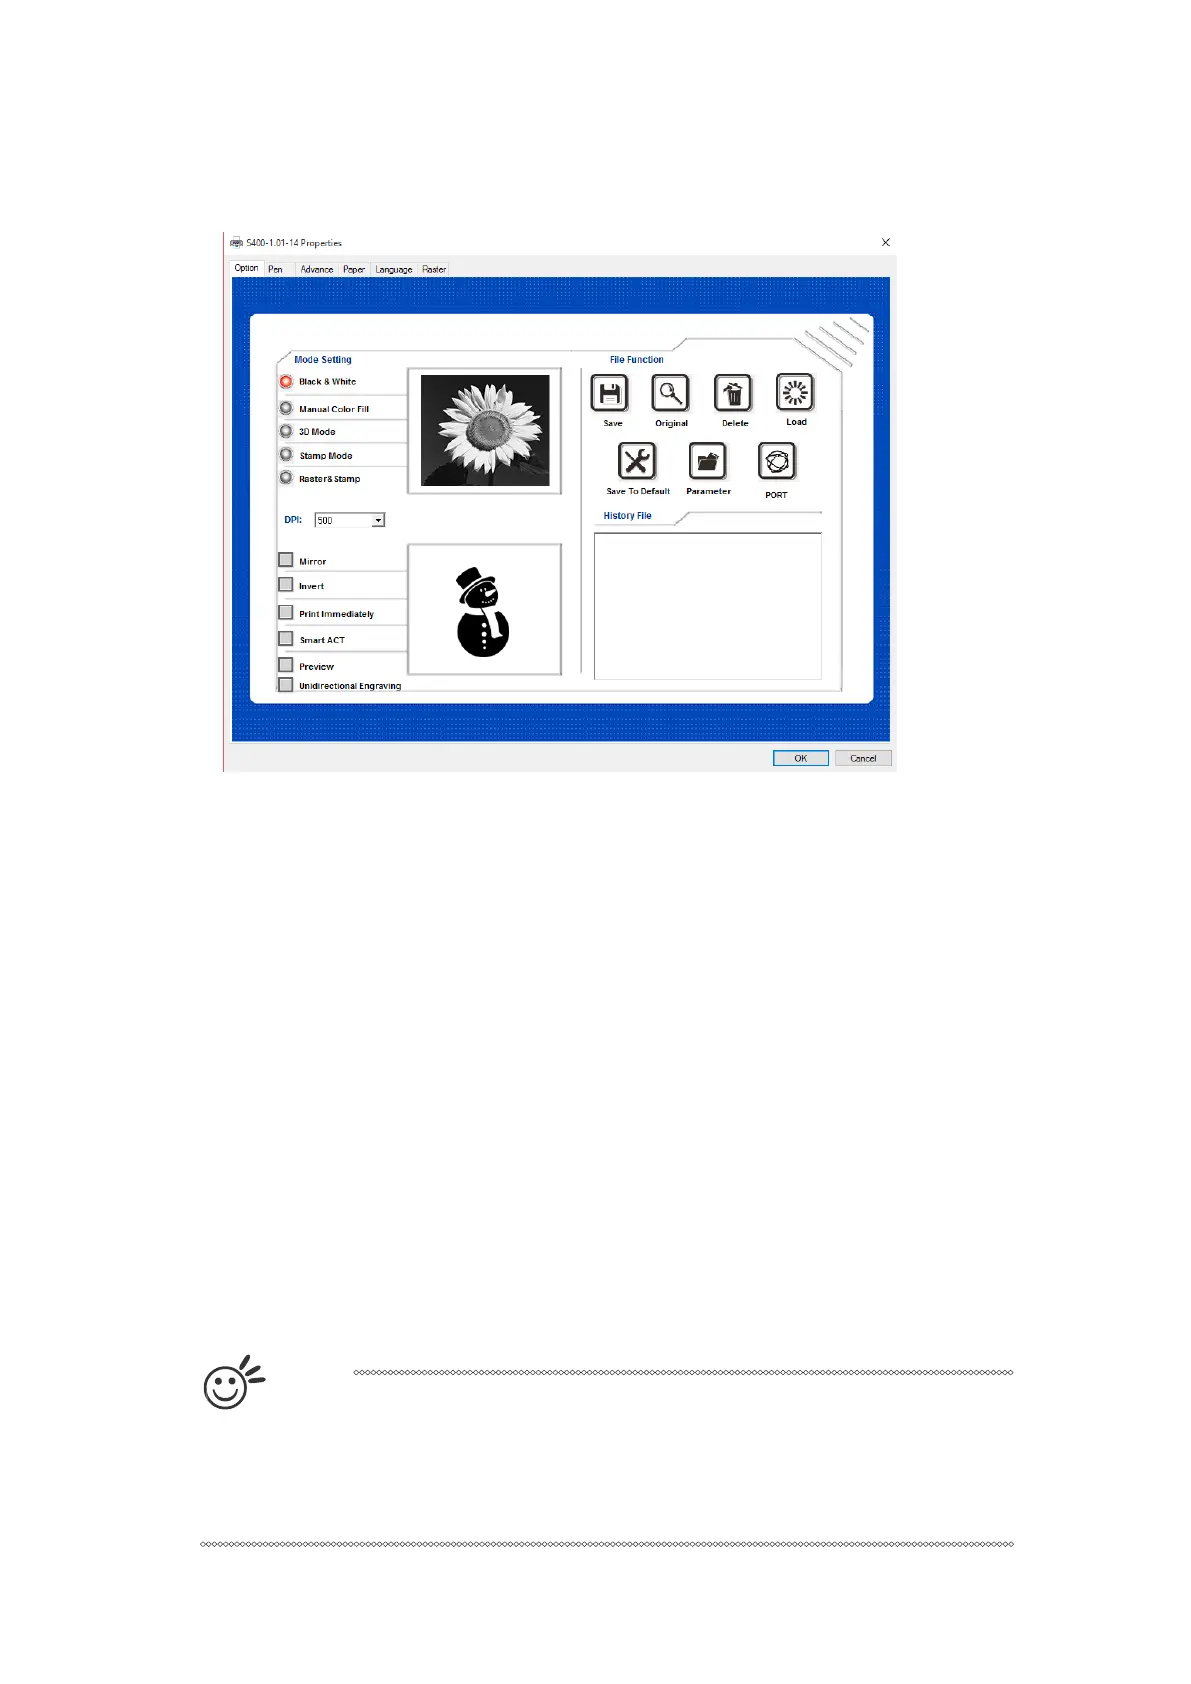
Mode Setting (OPTIONS PAGE) [DEFAULT SETTING: Black & White]
You can select from four primary mode settings, depending on your application or results you
would like to achieve.
Black & White:
Select this mode when using clipart images or drawings with several colors, shades of gray, or
many outlines. This mode outputs in a method similar to that of a black and white laser printer.
The GCC LaserPro print driver will interpret colored and shaded areas as 256-level shades of
gray by producing a halftone effect while engraving. Instead of engraving only solid lines, gray or
halftone areas will be a collection of dots with varying density.
The entire selected image will be engraved using a single set of power and speed settings (the
black pen from the PEN menu. Please refer to the next section of the detail regarding the PEN
functions). The resolution and depth of these halftone areas can be adjusted with the DPI setting
found on the Options page. Please note that selecting the Black & White mode will add a new
Raster page to the menu. The Black & White mode dithering settings can be changed from the
Raster page. (Please refer to the Raster section below for detail). Experiment with different
dithering settings to attain the desired results.
T
i
p
The Black & White mode interprets the processed image by the varying colors
and shades. For the best results, we suggest you convert the image to a
grayscale image with your graphics software prior to engraving in the Black &
White mode.

 Loading...
