146 232003110G (03)
2) Change the text fill color of the selected characters to white by left clicking on the white color
from the CorelDRAW Color Palette (located on the right hand side of the screen)
3) Change the outline color of the selected characters outline by right clicking on the desired
color from the CorelDRAW Color Palette.
4) Change the selected characters outline thickness to the thinnest width by right clicking on the
selected text select <Properties> → Click on the <Outline> tab and change the Width to its
thinnest dimension. Click on “OK” to apply the changes.
5) Now your string of characters has been properly designated as an area to be vector cut.
Simply “print” your job (output the file to the S400) and watch as your string of characters is
vector cut.
6.3 Vector and Raster
In some cases, you will want to process both raster engraving and vector cutting tasks within a
single project. For example, if you wanted to engrave a design onto a particular material and then cut
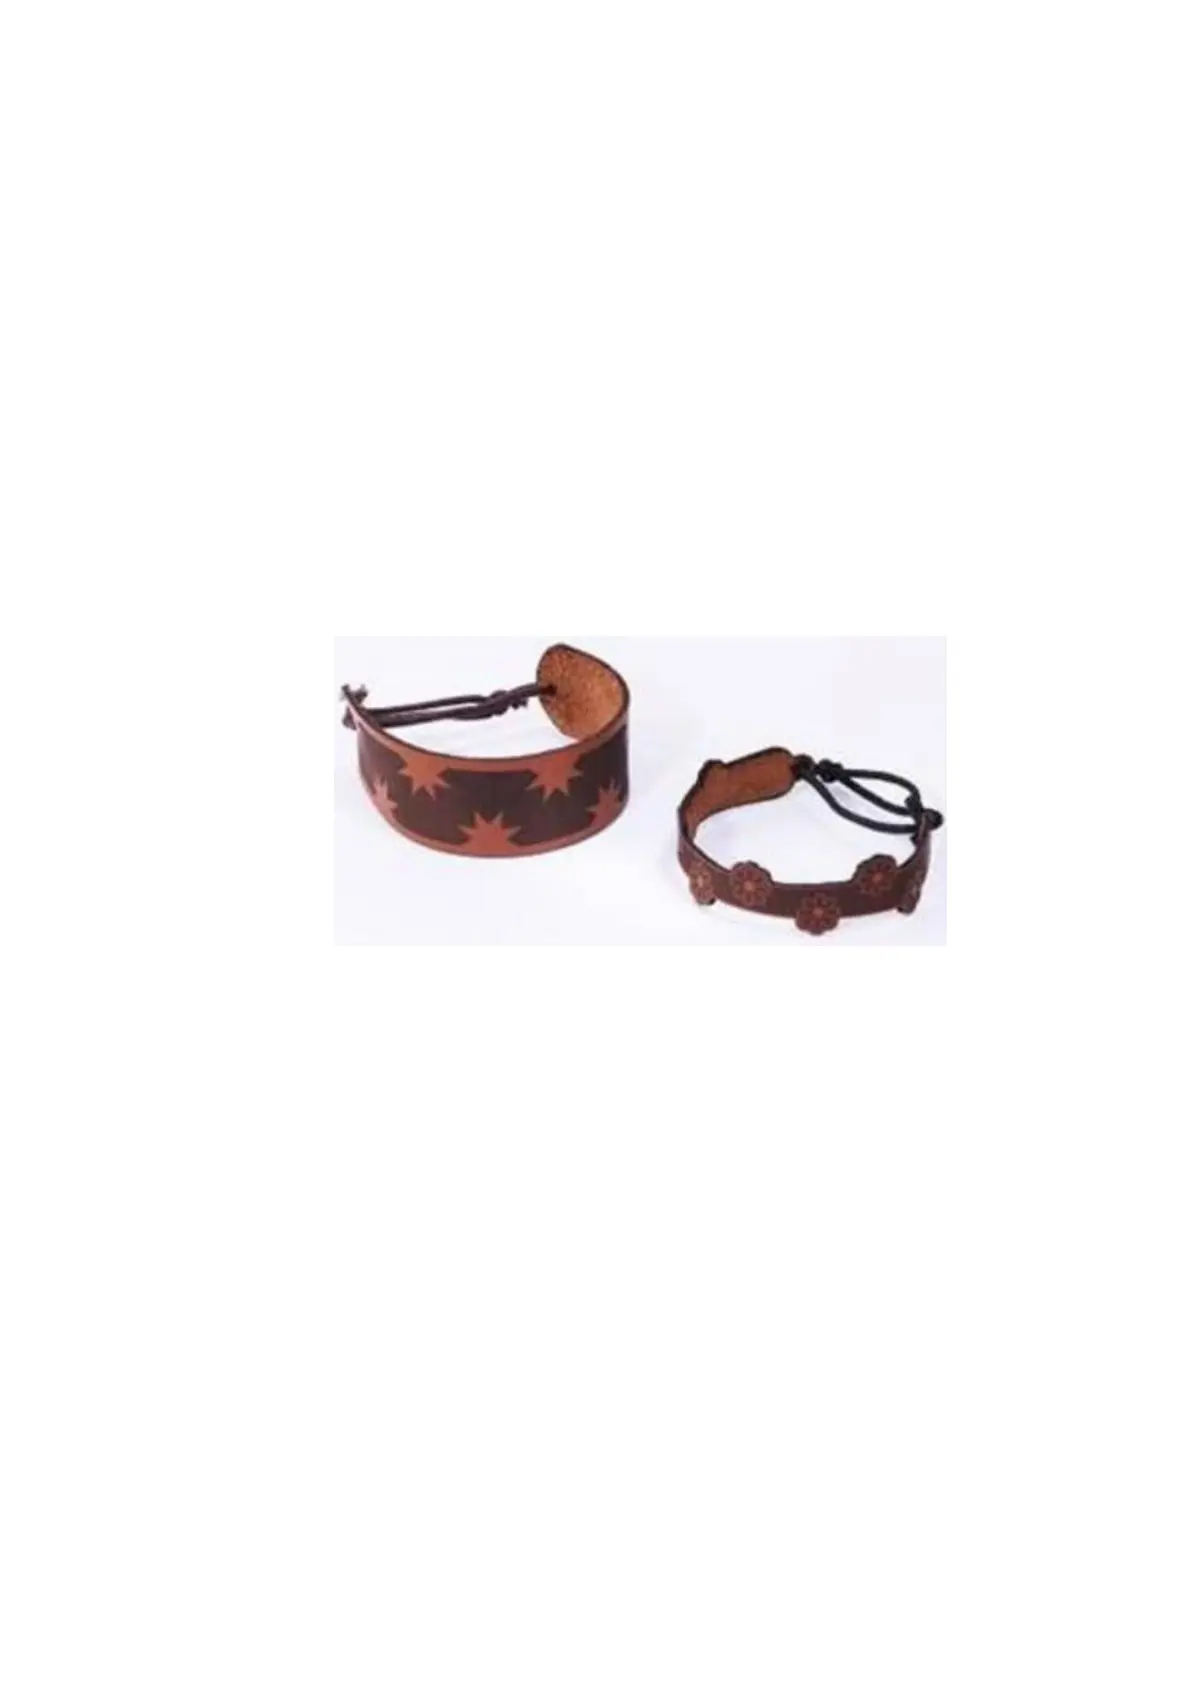
a particular shape around that engraving. The picture below is an example of engraving on a piece
of leather which has then been cut out: The picture below is an example of an engraving on a piece of
cork, which has then been cut out with a square shape:
In these situations when there are raster engraving and vector cutting operations on a single project,
the LaserPro S400 driver will interpret between raster sections and vector sections by the types of
lines and line widths of your design. Areas of your design with line widths set between 0.001" (0.025
mm), 0.004" (0.1 mm) will be designated for vector cutting, and the other areas will be designated for
raster engraving.