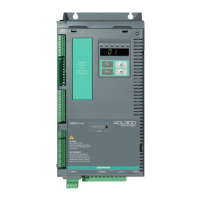
96 ADL300 • Quick installation guide - Specifications and connection
Step 2 - Setting motor parameters
Note! Def: The factory (default) setting depends on the size of the drive that is connected. These values refer to the ADL..-1055-BR
03.88.
Enter
Πo.
t8.
Enter
20.00.
Enter (x2)
03.4.0
▲
341 v
▼
339 v
Enter (x3s) Prg+
20.02.
Enter
88. 11.
08.88.
Enter
08.8.8.
▲
11,1 A
▼
10.9 A
Enter (x3s) Prg
20.04.
Enter (x2)
00.9.5
▲
96 rpm
▼
94 rpm
Enter (x3s) Prg
20.08.
Enter (x2)
00 1.2
▲
13
▼
11
Enter (x3s) Prg
20. 10.
Enter
88.50.
Enter
00.8.8
▲
50.01Nm/A
▼
49.99Nm/A
Enter (x3s) Prg
Set the plate data of the motor connected, following the instructions
.
Rated voltage [V]: the rated voltage of the motor indicated on the data plate.
Rated current [A]: motor rated current; approximately, the value should not be less than 0.3 times the rated current of the drive, output current
class 1 @ 400 V on the data plate of the drive.
Rated speed [rpm]: motor rated speed; see data plate.
Pole pairs: Number of motor pole pairs; see data plate.
Torque constant (KT): (KT) Ratio between the torque generated by the motor and the current required to supply it.
Note! When data entry is complete the Take parameters command is executed automatically (menu 14 MOTOR DATA, PAR: 2020). The motor data entered during
the STARTUP WIZARD procedure are saved in a RAM memory to enable the drive to perform the necessary calculations.
These data are lost if the device is switched off. To save the motor data follow the procedure described in step 9.
At the end of the procedure proceed to step 3. Press the Prg and keys.
Step 3 - Autotune with motor at stand-still or coupled to the load
The drive carries out the motor autotune procedure (real measurement of motor parameters).
Autotuning may take a few minutes.
Note! If this operation generates an error message (e.g. Error code 1), check the connections of the power and control circuits (see step 1 - Connections), check the
motor data settings (see step 2 - Setting motor parameters) and then repeat the guided Autotune procedure.
St.
iL
.
Enter
20.24.
Enter
8
E.
nt
.
Enter
do.nE.
C8 En.
88.8.0
...
8
6 5.ˉ
o8 En.
81.00.
do.nE.
(1) (2) (3) (4) (5)
(1) Press the Enter key to proceed to the autotune procedure.
(2) Press the Enter key to start the autotune procedure.
(3) Enable the drive by connecting terminal 9 on the I/O card (Enable) to terminal 12 (+24 V). To abort this operation,
press the Prg key.
(4) Once the drive is enabled the autotune procedure starts. This may take a few minutes, depending on the type of
motor being used.
(5) At the end of the procedure the following screen is displayed. After opening the Enable contact, proceed to step 4.
Press the Prg x2 and
keys.
Note! At the end of the autotune procedure there is a request to open the Enable contact (terminals 9 - 12); this results in the automatic execution of the Take tune
parameters command (menu 14 MOTOR DATA, PAR: 2078).
The calculated parameters are saved in a RAM memory to enable the drive to perform the necessary calculations. These data are lost if the device is
switched off. To save the motor data follow the procedure described in step 9.
 Loading...
