Vandal Proof IP Dome (Part I)
14
7. Insert the camera to the ceiling with the plastic screws moved inward.
Figure 14-12
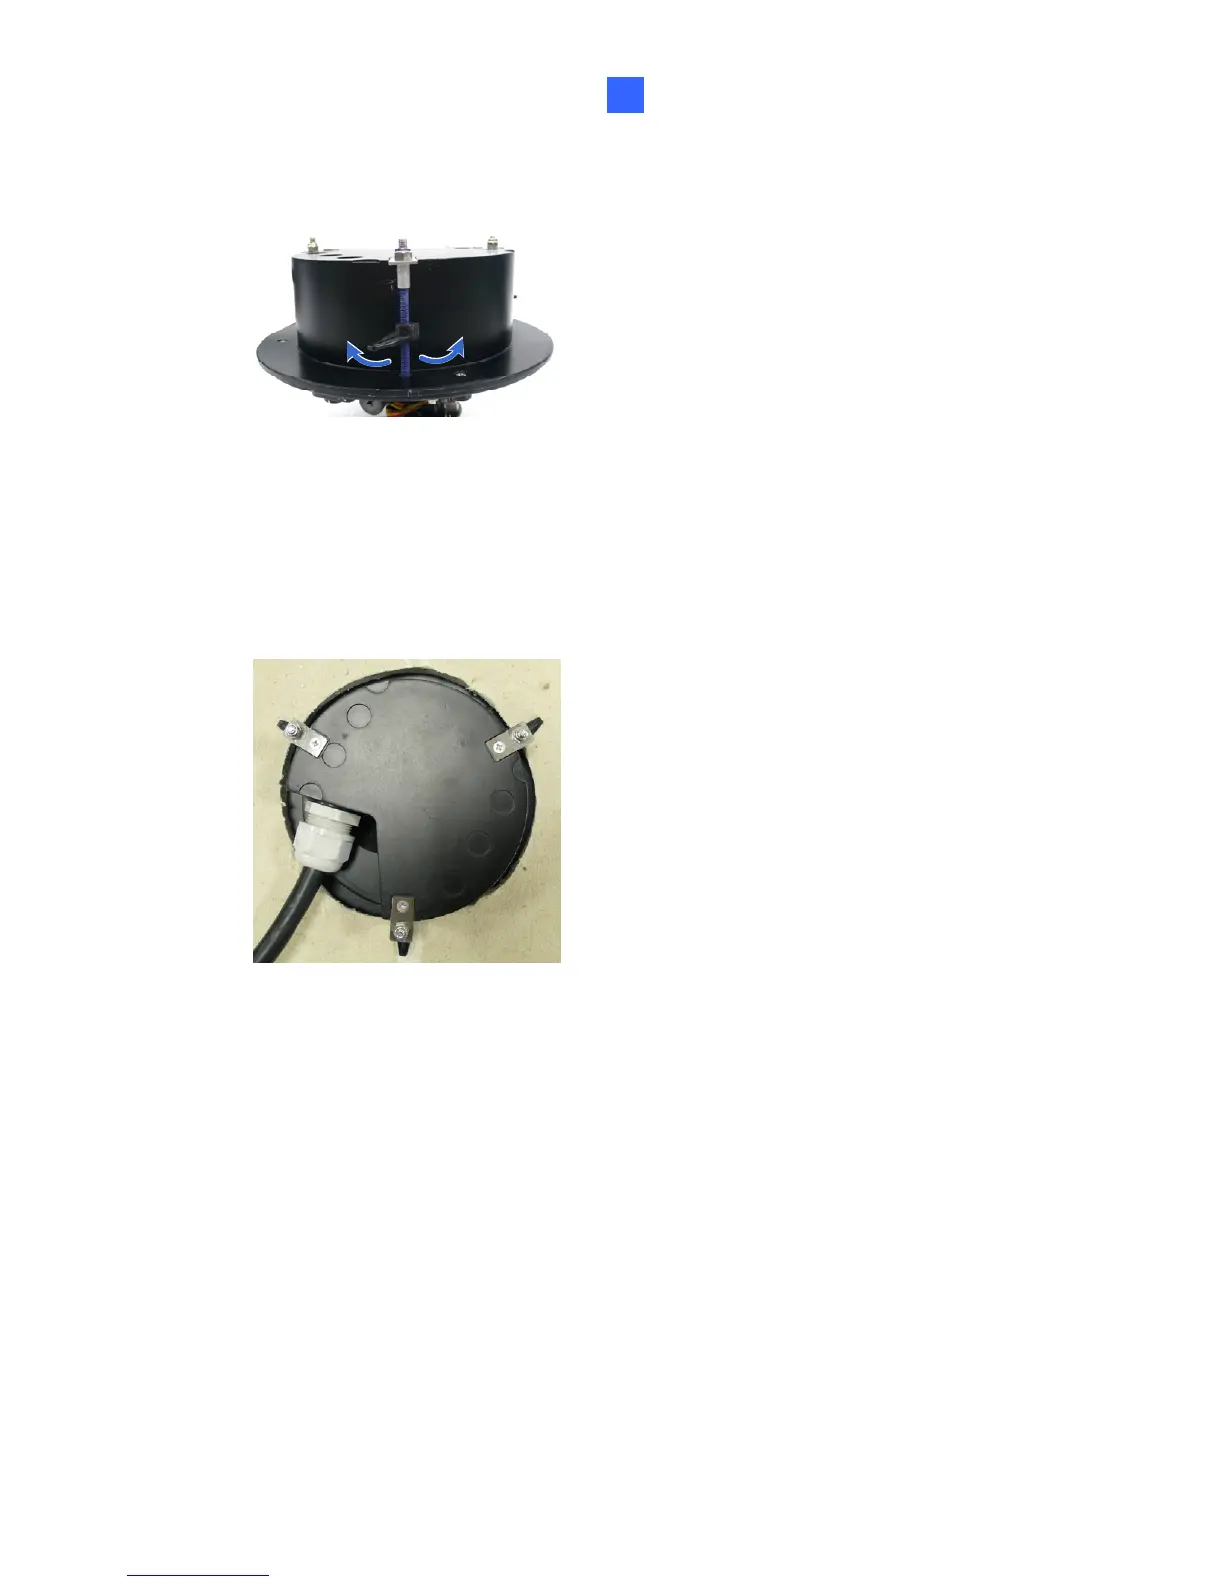
8. Move the blue screws out and rotate the blue screw with a screw
driver until the plastic clip and the bottom of the camera body clamps
the ceiling tightly.
Figure 14-13
9. Connect the network, power and other cables to the camera. See
14.5 Connecting the Camera.
10. Access the live view. See 19.1 Accessing the Live View.
11. Follow steps 9 to 10 in 14.4.1 Hard-Ceiling Mount section to adjust
the angle, focus and zoom of the camera.
12. Follow steps 11 to 13 in 14.4.1 Hard-Ceiling Mount section to secure
the thread lock, replace the silica gel bag and secure the housing
cover.
205
 Loading...