Plotter Adjustment 59
8. Replace the rear cover.
9. Load paper in the plotter.
10. Turn on power. Run a multiple line test plot.
11. If symptoms persist, turn the plotter power off.
12. Rotate the cam shaft by hand until the lift fork is at its lowest
position. Continue to rotate the cam shaft in the same direction. Do
this until the lift fork starts to lift upward from the spindle. Then
rotate the cam shaft back until it is approximately halfway between
the highest and lowest positions.
13. At its lowest position, the lift fork should touch the top of the
spindle. If the lift fork appears to be adjusted correctly, go to step
17.
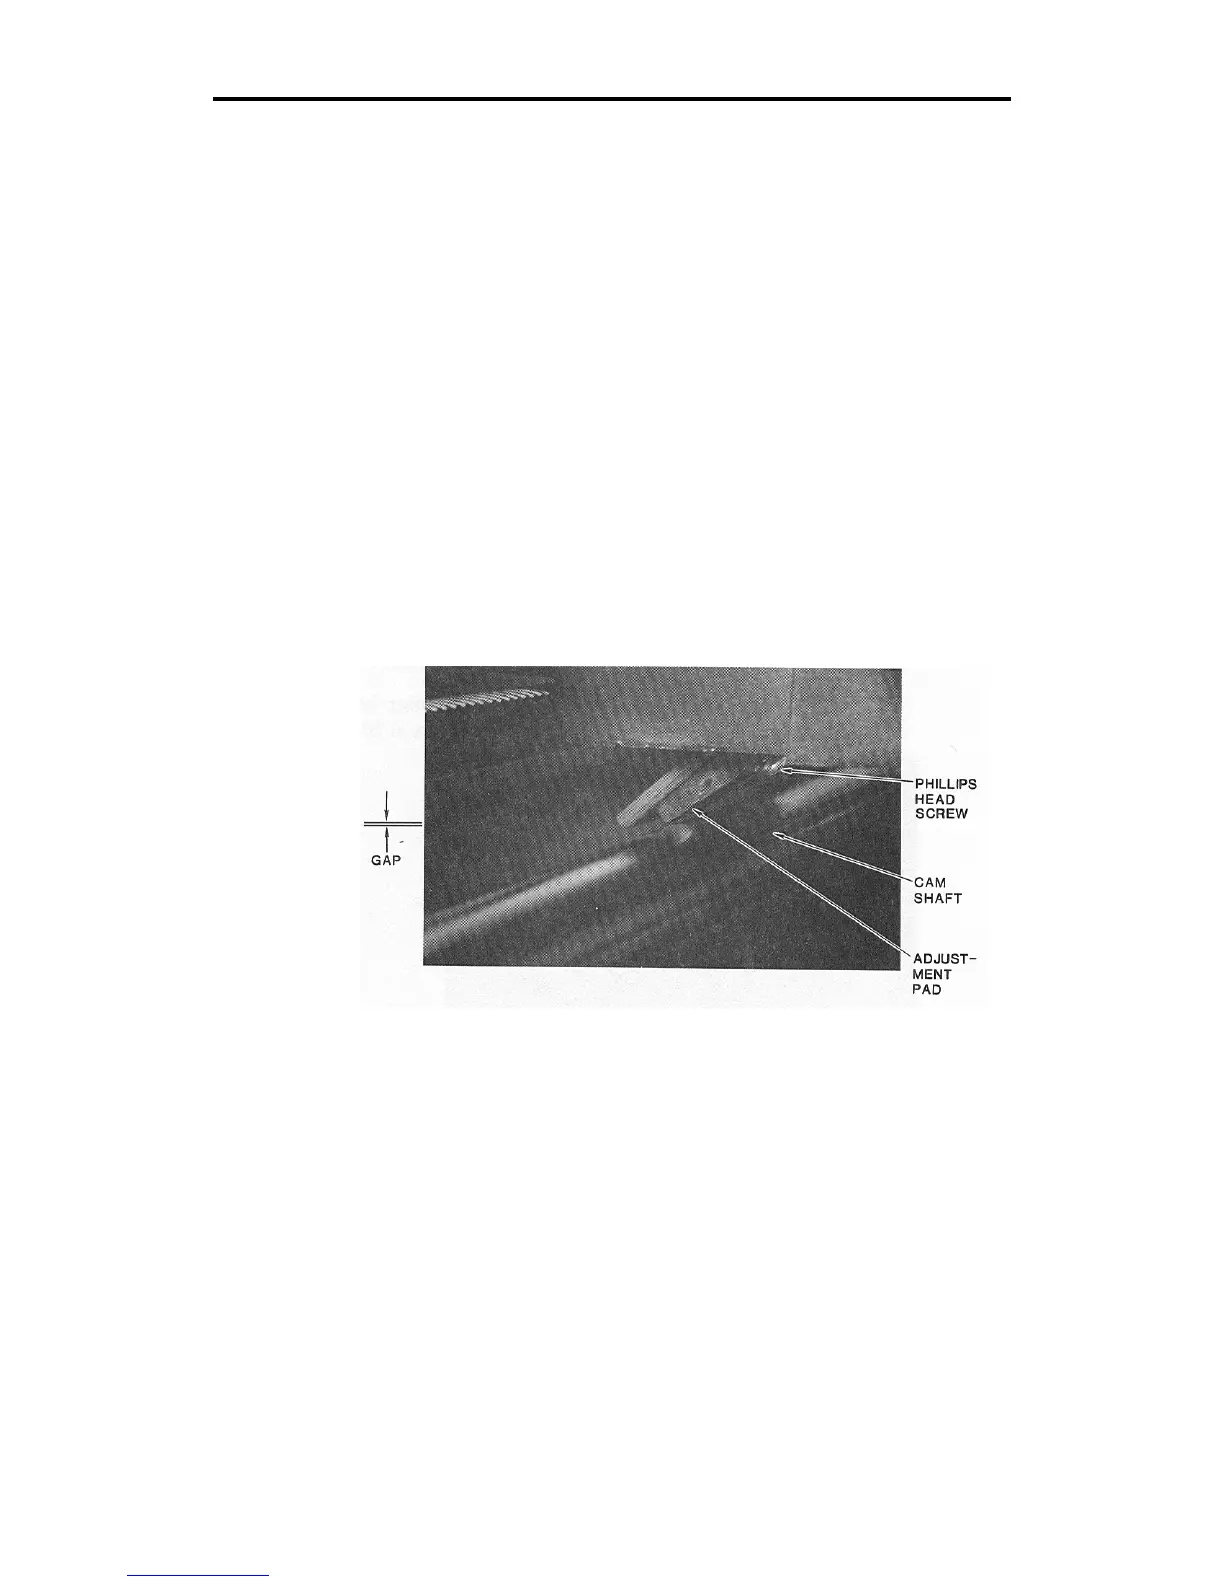
14. If the lift fork does not touch the top of the spindle, or if it does not
lift up when the cam shaft is rotated to either side, locate the screw
in the center of the adjustment pad.
15. Loosen the screw in the center of the adjustment pad with a Phillips
head screwdriver.
If the lift fork does not touch the top of the spindle, slide the adjustment
pad upward.