39
Chapter 3 Installing System Components
3.1 Installation of CPU
Install the processor:
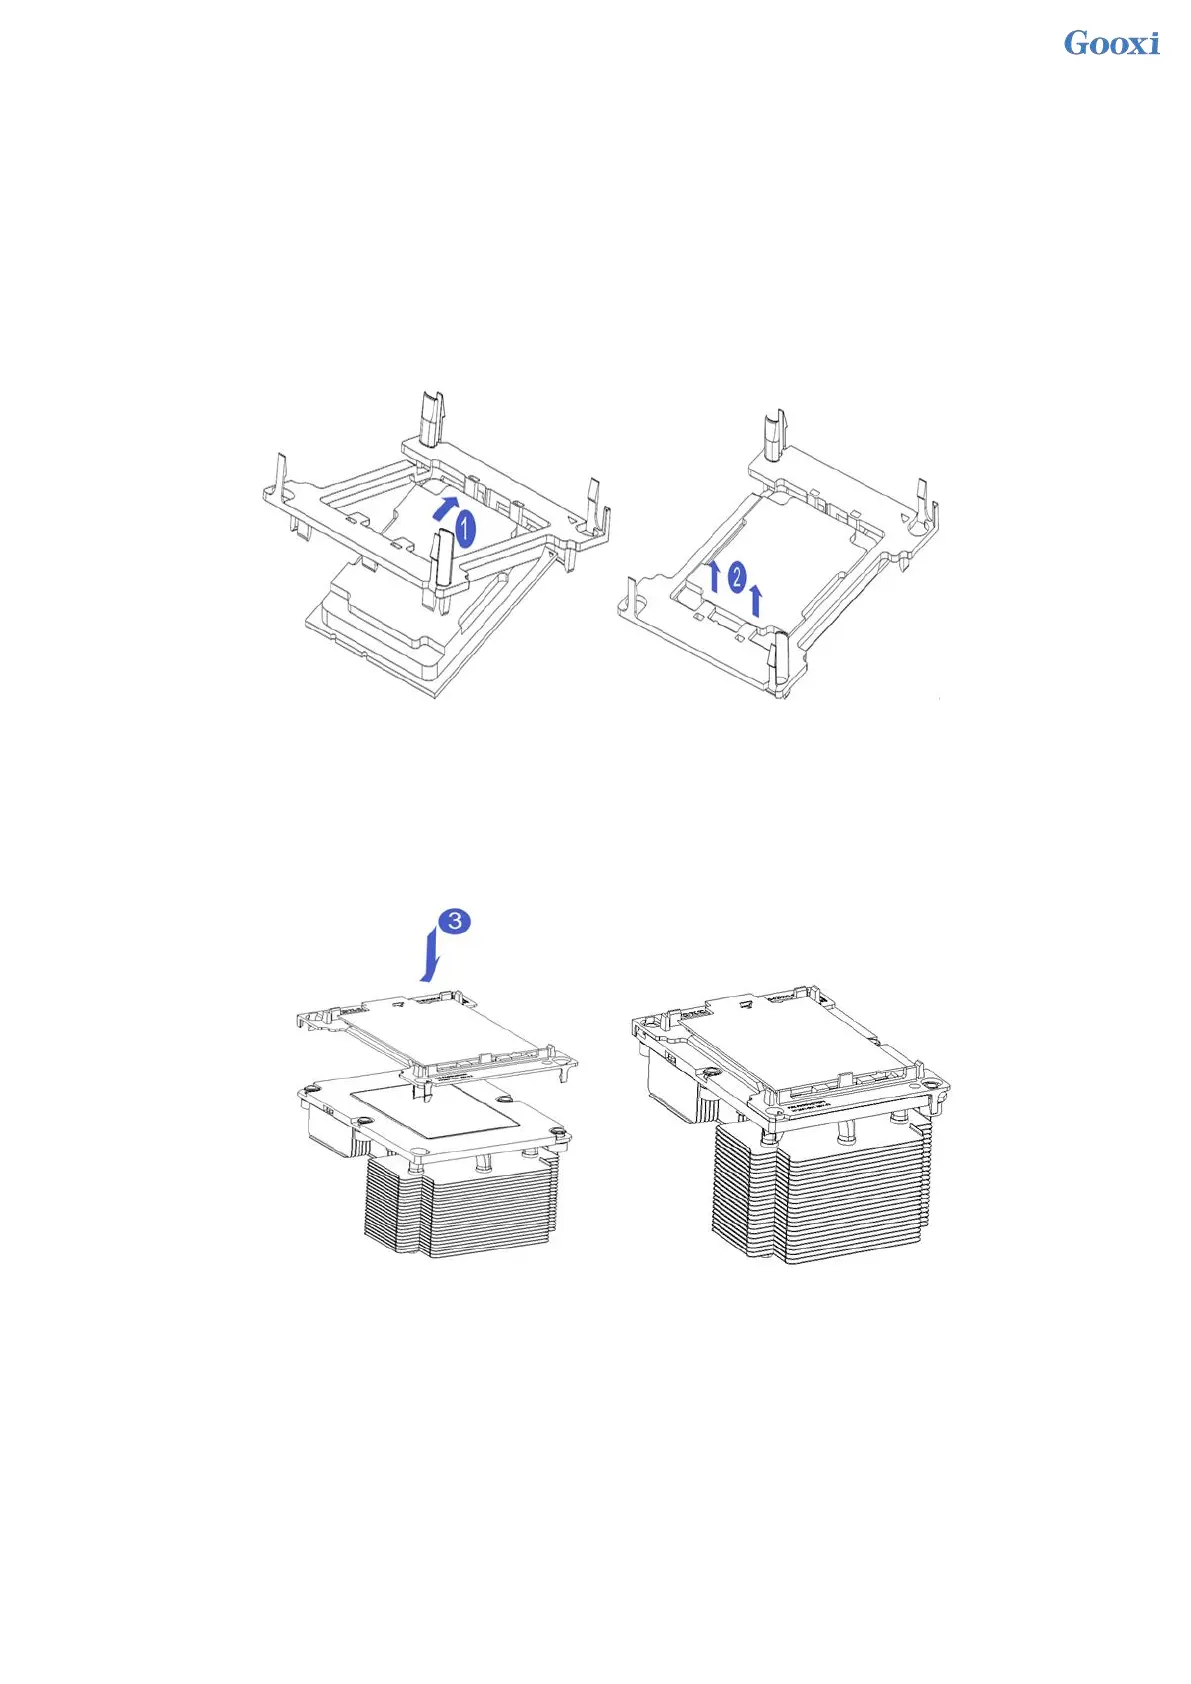
Step 1: CPU Installation
1. Tilt the CPU angle as shown in the figure, align the A1 corner (triangle mark), and clamp it on one end of the
clamping piece.
2. Direction, press the other end of the clamping piece to fix the CPU to the clamping piece.
Figure 3-1
Step 2: Install the CPU on the heat sink, and ensure that the surface of the CPU and heat sink is clean and free
of oil and foreign matter. (As shown below)
1. Smear about 0.4ml of thermal grease on the CPU and smooth it evenly.
2. Align the A1 corner (triangle mark), and buckle the CPU on the heat sink.
Figure 3-2
3.2 Installation of heat sink
installation steps:
1. Remove the processor blank (as shown in the figure below)
 Loading...