44
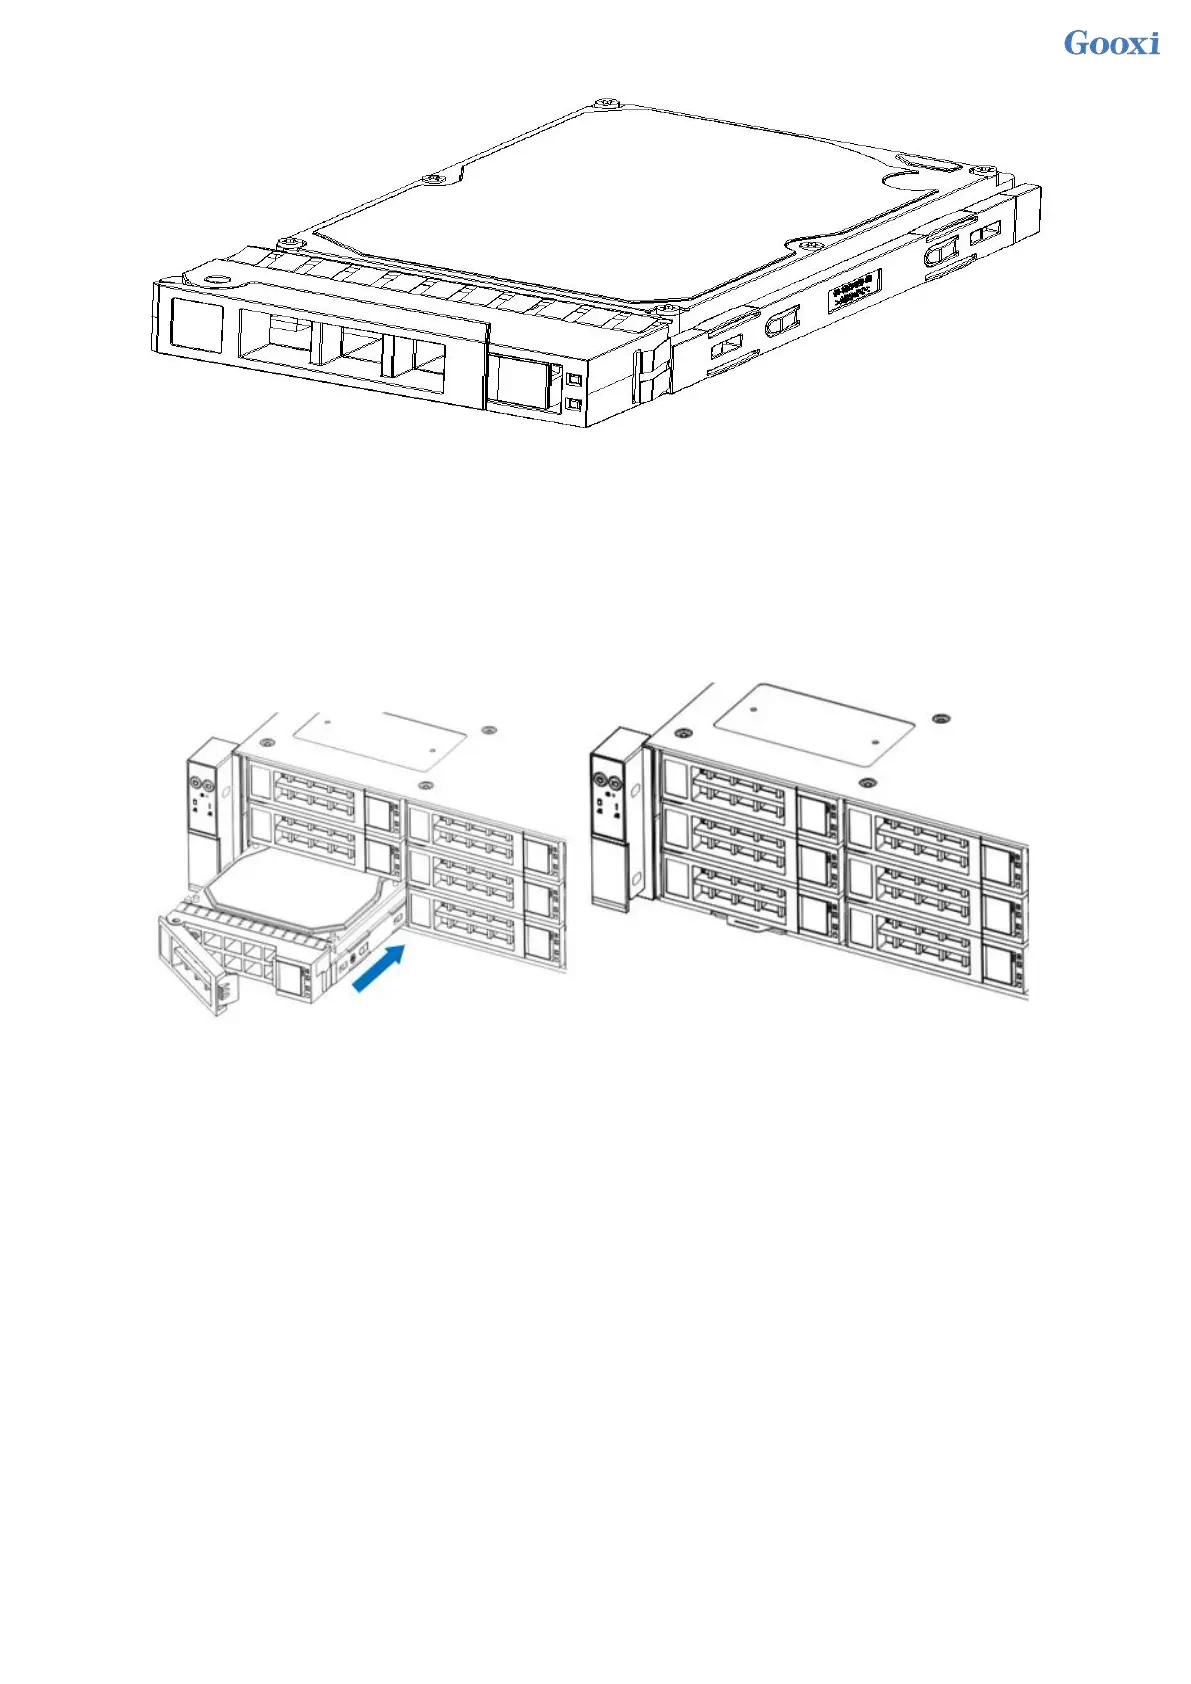
Figure 3- 9
HDD Tray Assembly Installed into Chassis
1. With the hard drive wrench open, push it into the chassis
2. When the hard disk gold finger touches the backplane device, turn the wrench in the direction of the arrow
3. Schematic diagram of hard disk installation in place
Figure 3- 10
3.5 Front hard disk backplane installation
Front hard disk backplane installation:
1. The gourd holes and hanging holes on the left and right sides of the disk backplane are aligned with the
pegs of the hard disk frame, and advance in the direction of the arrow.
2. After the hard disk backplane is pushed into place, press the backplane down until all the hoist nails and
hanging holes on both sides are in place.
3. Flip the fixing parts on the left and right sides of the hard disk backplane, and lay the fixing parts flat.
 Loading...