3-14 Published 08-25-09, Control # 077-04
ELECTRICAL SYSTEM RT9130E SERVICE MANUAL
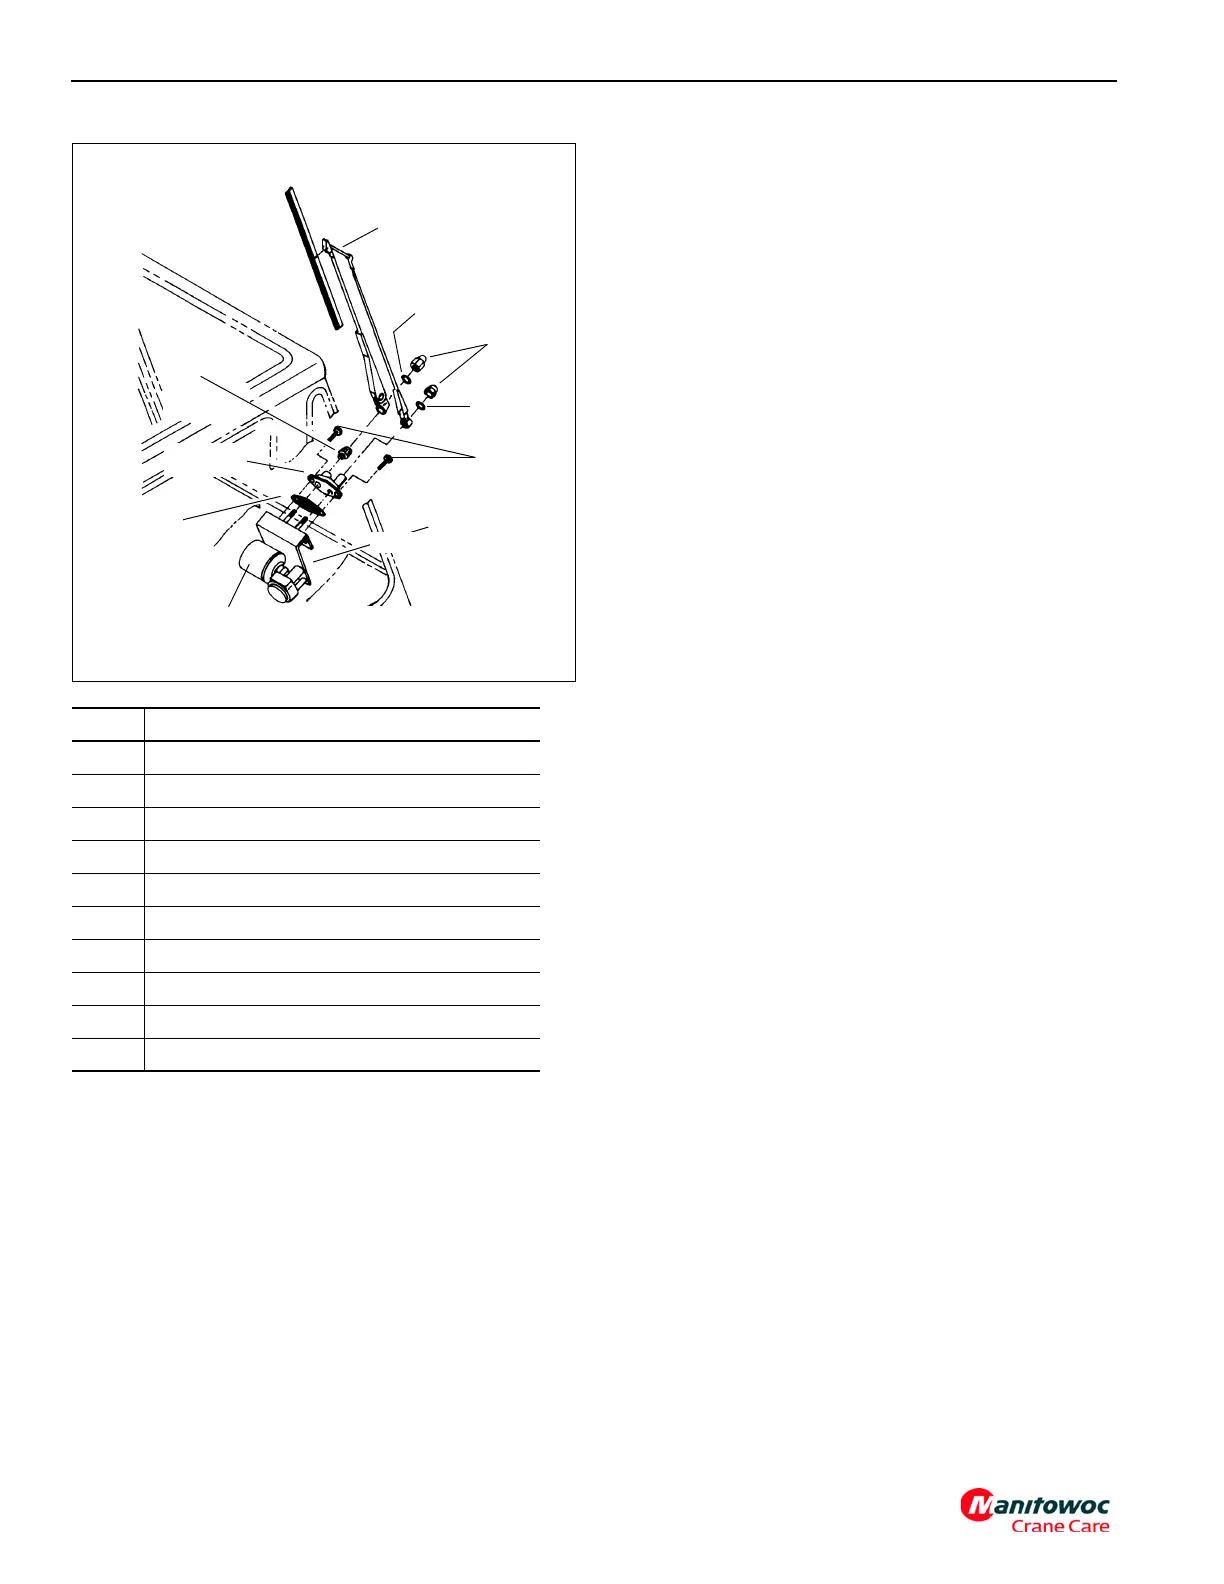
Installation
1. Verify the pivot shaft and the wiper motor kit link and
crank are in place on the motor bracket. (Washers and
clip springs fasten the link to the pivot pins on the crank
and the pivot shaft. The pivot shaft’s pivot pin mounts in
the hole nearest the end of the pivot shaft’s lever.)
2. Connect the wiper motor to the motor bracket with
screws and washers. Connect the wiper motor’s shaft to
the wiper motor kit crank with the nut and washer.Secure
the adapter and the gasket of the pantograph adapter kit
to the cab exterior with capscrews and lockwashers.
3. Install the motor bracket and attached parts in the cab
interior with attaching hardware. Ensure the pivot shaft
sticks through the hole in the pantograph adapter kit.
NOTE: Take care not to damage any parts while moving
the bracket and attached parts around the steering
column.
4. Secure the pivot shaft to the pantograph adapter with the
pivot shaft kit’s nut and washers. Install the flanged
sleeve on the pivot shaft.
5. Install the wiper arm on the shafts of the pantograph
adapter kit and the pivot shaft kit. Secure the wiper arm
to the pantograph adapter kit shaft with the kit’s own
washer and cap nut. Secure the wiper arm to the pivot
shaft with the pivot shaft kit’s own tapered sleeve,
washer, and cap nut.
6. Connect the wiper arm’s washer hose to the washer
nozzle fitting assembly.
7. Connect the electrical leads to the wiper motor as
marked before removal.
8. Connect the batteries.
Check
1. Squirt some cleaning fluid onto the windshield with the
windshield washer.
2. Operate the windshield wiper and verify it works.
Replace wiper blade as needed if it streaks or otherwise
wipes poorly.
Windshield Washer Assembly Replacement
Removal
1. Disconnect the batteries.
2. Locate the windshield washer container and pump on
the left rear side of the cab.
3. Tag and disconnect the pump’s electrical lead and
ground wire.
4. Disconnect the hose from the windshield washer pump.
Point it so it won’t spill cleaning fluid. Catch cleaning fluid
from the windshield washer container with a suitable
container.
5. Remove four self tapping screws securing the
windshield washer container to the cab. Remove the
windshield washer container and pump.
6. Remove pump and pump seal from container.
Item Description
1
Windshield Wiper Arm
2 Washer
3Nut
4 Washer
5Screw
6 Mounting Bracket
7Motor
8 Gasket
9 Mounting Plate
10 Serrated Collar
FIGURE 3-11
3653
1
2
3
4
5
6
7
8
9
10