Published 08-25-09, Control # 077-04 8-29
RT9130E SERVICE MANUAL UNDERCARRIAGE
4. Extend the outrigger slightly to facilitate attaching a
lifting device to the outrigger beam.
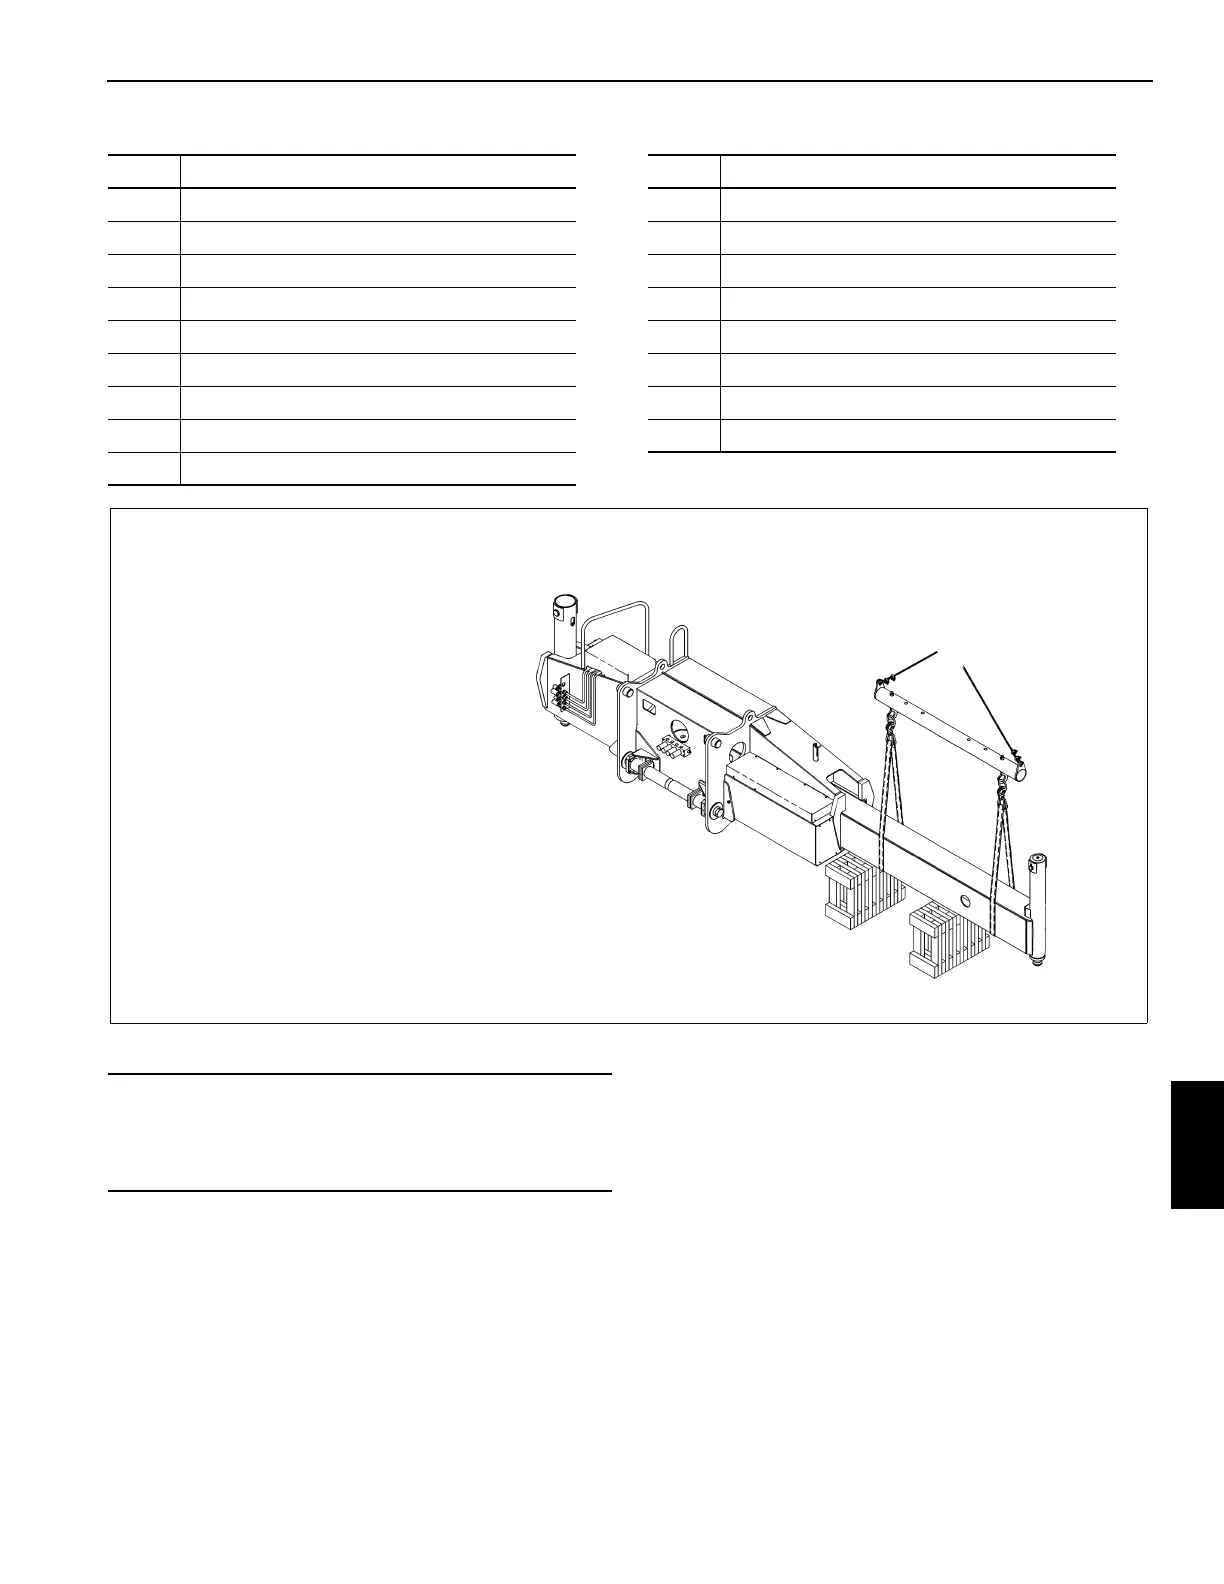
5. Place blocking material under the outrigger beam
(Figure 8-21).
6. Tag and disconnect the hydraulic lines at the cylinder
barrel end of the extension cylinder. Cap all lines and
fittings.
NOTE: Do not allow the end of the outrigger extension
cylinder to fall when the cylinder mounting shaft is
removed. Use blocking to limit the drop or an
adequate soft support to cushion any distance the
rod will drop,
7. Remove the cotter pin and clevis pin securing the
cylinder barrel end of the extension cylinder to the
outrigger housing. Carefully extend the outrigger beam
until the extension cylinder is free of the housing and
carefully lay the end of the cylinder on the bottom of the
outrigger beam or leave on blocking.
8. After attaching a suitable lifting device of straps or belts
instead of chains to prevent nicking the bottom edges of
the outrigger beam, pull the outrigger beam out of the
outrigger box, re-adjusting the lifting attachment to
Item Description
1 Retainer Pin
2 Cotter Pin
3 Extend Port
4Retract Port
5 Clevis Pin
6 Cotter Pin
7 Outrigger Box
8 Locknut
9 Lockwasher
Item Description
10 Extension Cylinder
11 Wear Pad
12 Setscrew
13 Stabilizer Cylinder
14 Cover Plate
15 Nut
16 Cotter Pin
17 Capscrew
NOTE: Outrigger removal and installation similar for both
front and rear outriggers.
Lifting belts or straps should be used for lifting
purposes so as to avoid nicking or scratching the
bottom edges of the outrigger beam.
6120-1
FIGURE 8-21
DANGER
Be sure any blocking material used is capable of
supporting the weight of the outrigger beam. Do not allow
it to tilt or slide.
6