from handswitch
5 pole 180º fitted
on the back
White
Brown
Brown
Green
3
2
1
4
Male plug
on the back
5 pole 180º fitted
PO 10 A
for handswitch
5 pol plug
5 pol plug
Female plug
Male Molex
Female Molex
PC board:
2
Yellow
Gray
White
3
Green
Brown
4
1
Diode (+)
GND (÷)
Shift
24V + DC
Not in use
5
5
Yellow
Gray
24V DC
X2
X2X5
24v AC
Switch
LS1
1
1 1 5 3 4
2
2 2
1 5 3 4 2
X1
2
1
X3
1
4
24V AC
1
LS2
LS2 LS1
2
X4
X5
GND
GND
starting position after a specified period
ASTABLE: Turn table returns automatically to
Brown
Black
Blue
Blue
Green
Blue
Yellow
Orange
Red
switch
Hand
Max.
Min.
10 SEC.
Timer
Astable
SW1
OFF
LOCK
ON
BIST.
ASS.
Eg.: Bistable
combi lock
End stop 1
End stop 2
SW2
1
2
1
2
Motor
P010A
Endstop LS2 (pos. x4) tobe replaced by endstop LS1 (pos. x3)
and motor lines GREEN/BLACK in pos. x5 are replaced.
CHANGE OF STARTING POSITION OF TURN TABLE
© Guldmann GB-1394/11/08
74
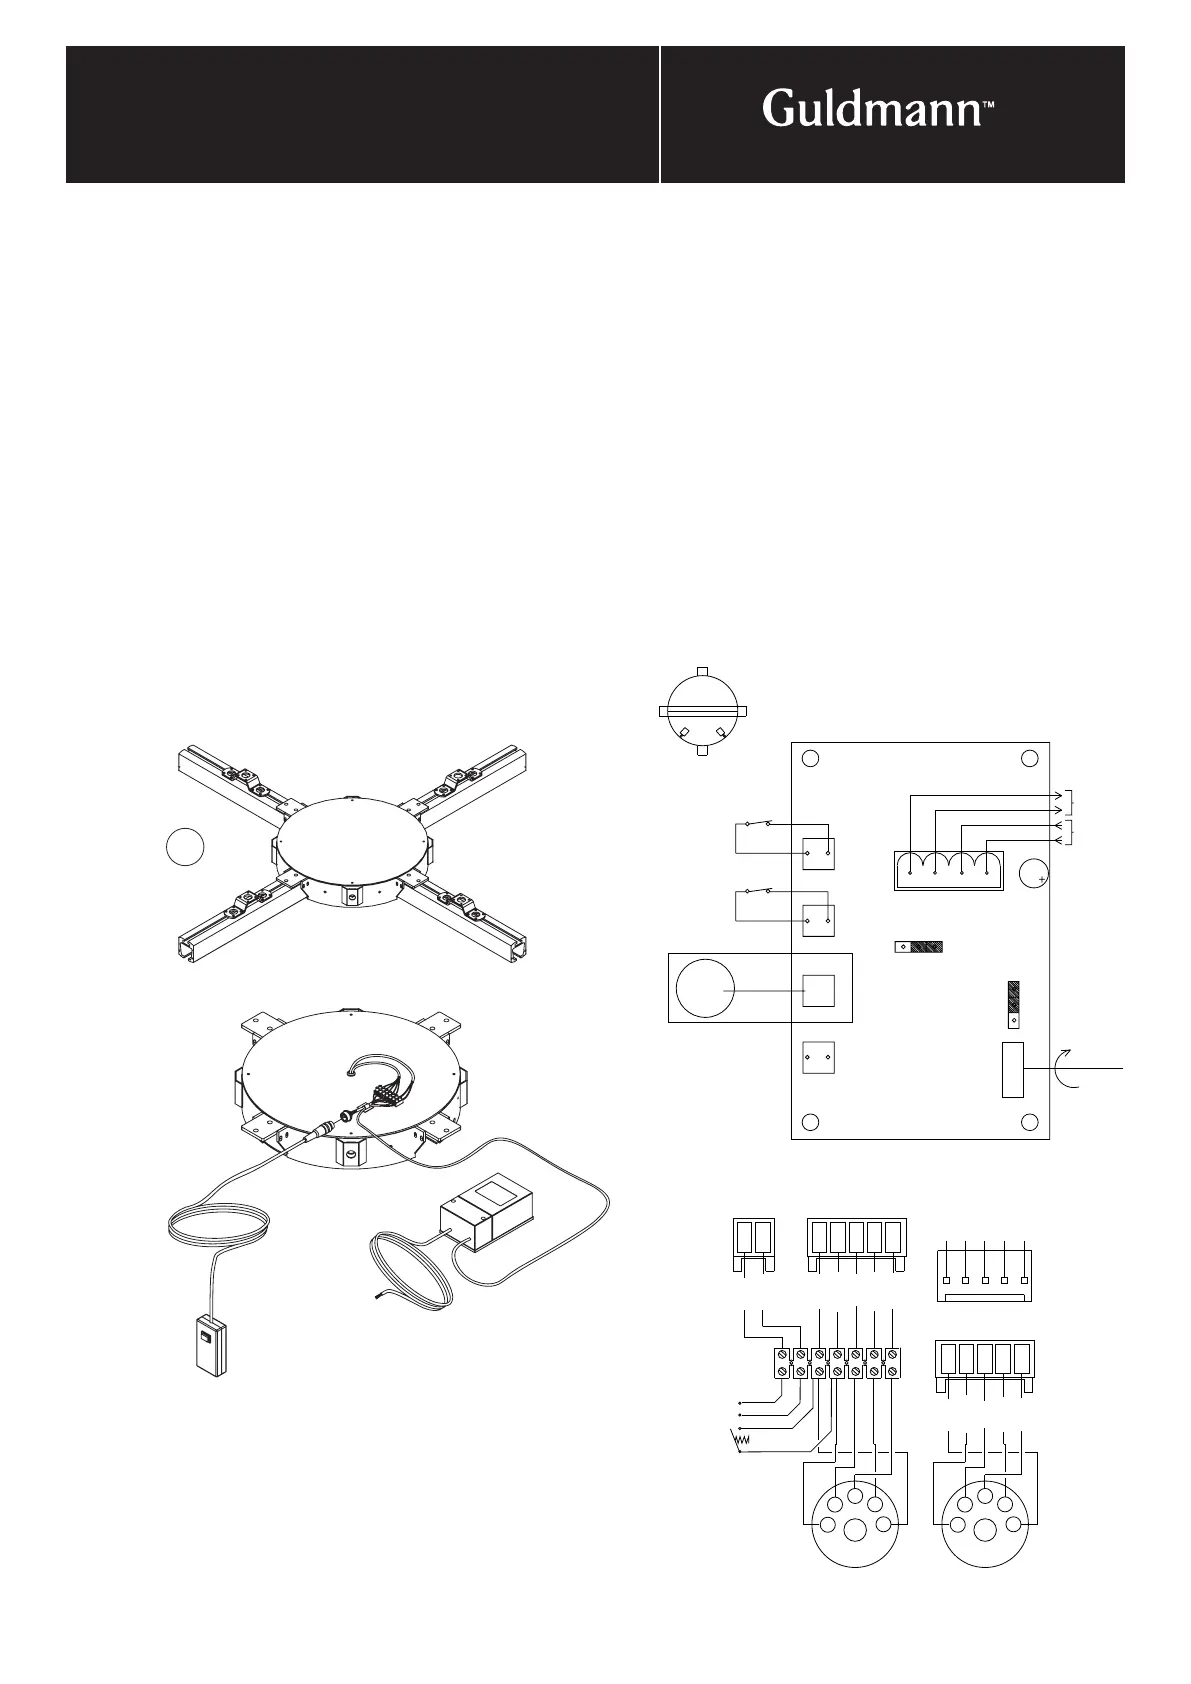
4. electrIcal connectIon
Turntable
The turntable is typically used in corridors where there are
rooms on both sides and where the doors face each other.
The turntable is electrically operated and requires a
24 V AC transformer.
The turntable is installed as described:
1. Mount the rails on the turntable and tighten securely.
2. Position and fit the GH ceiling brackets as close as
possible to the turntable. Maximum distance from the
turntable is 300 mm (12").
3. During the fitting it is important to use a straight rail so
that the rails on both sides of the turntable are aligned
with each other.
4. Connect the transformer to the crown sleeve located on
top of the turntable. Use the two connectors farthest to
the right – brown/brown and blue/blue.
5. The transformer must be concealed as much as possi
-
ble, and wires must be drawn on top of the rails.
6. Fit the wire and the connector for the hand control and
transformer on top of the turntable. Fit to the top of the
turntable using the enclosed cable straps with tape.
7. The hand control is connected to the female connector
on top of the turntable.
8. Check that the turntable stops as it should, in line with
the straight railsfter at drejeskiven stopper korrekt ud for
de lige skinner.