© Guldmann GB-1394/11/08
47
3. InstallatIon
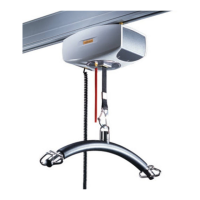
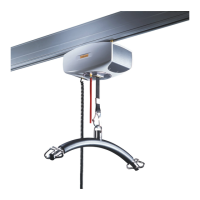
Ceiling installation, bracket assembly
Ceiling types: All types
Bracket types: Extended bracket, free length.
Std. extended bracket
The bracket is mainly used in rooms with a high ceiling to
bring the rail system down to a normal height of fitting and
use.
• Mark the position where the bracket is to be fitted and
at the same time measure the length of the extended
bracket.
The measurement is performed using laser equipment.
The laser is set to the height where the rail is to be fitted
(upper edge of rail). Then measure down at each fixing
point from the ceiling to the upper edge of the rail.
• Now size the threaded rods and the pipes to the correct
length for each fixing point. Remember to allow for the
space required by the upper and lower ceiling brackets.
• The extended bracket is then assembled prior to
installation. The top and bottom ceiling brackets
are tightened against pipes to create a firm bracket.
Remember the guide bushing around the ceiling
bracket.
• Now the extended bracket is ready to be fitted.
All brackets are fitted before the rail is installed.
• The fitting of extended brackets in the ceiling is carried
out according to the procedure described under GH
ceiling brackets. For further information, refer to the
individual type of ceiling.
• The rail is fitted to the extended bracket in the same
way as described under GH ceiling brackets.
• When using a standard extended ceiling bracket the
procedure is the same, i.e. the brackets are assembled
prior to fitting and then fitted to the ceiling as one
bracket.
• After mounting the system it may be necessary to
stabilise it by fitting GH stabilising brackets as side or
inclining support.
• Fit a brackets around the pipe that hangs down, and
then measure towards the wall or ceiling.
• Cut the pipe to the right lenght, and fit it to the
”u-brackets” at the extended bracket and at the
wall/ceiling.
• Fasten the fittings to the wall or ceiling depending on
the wall/ceiling’s texture; see the respective types.
Fitting of brackets