Wheel Angle Sensor Installation
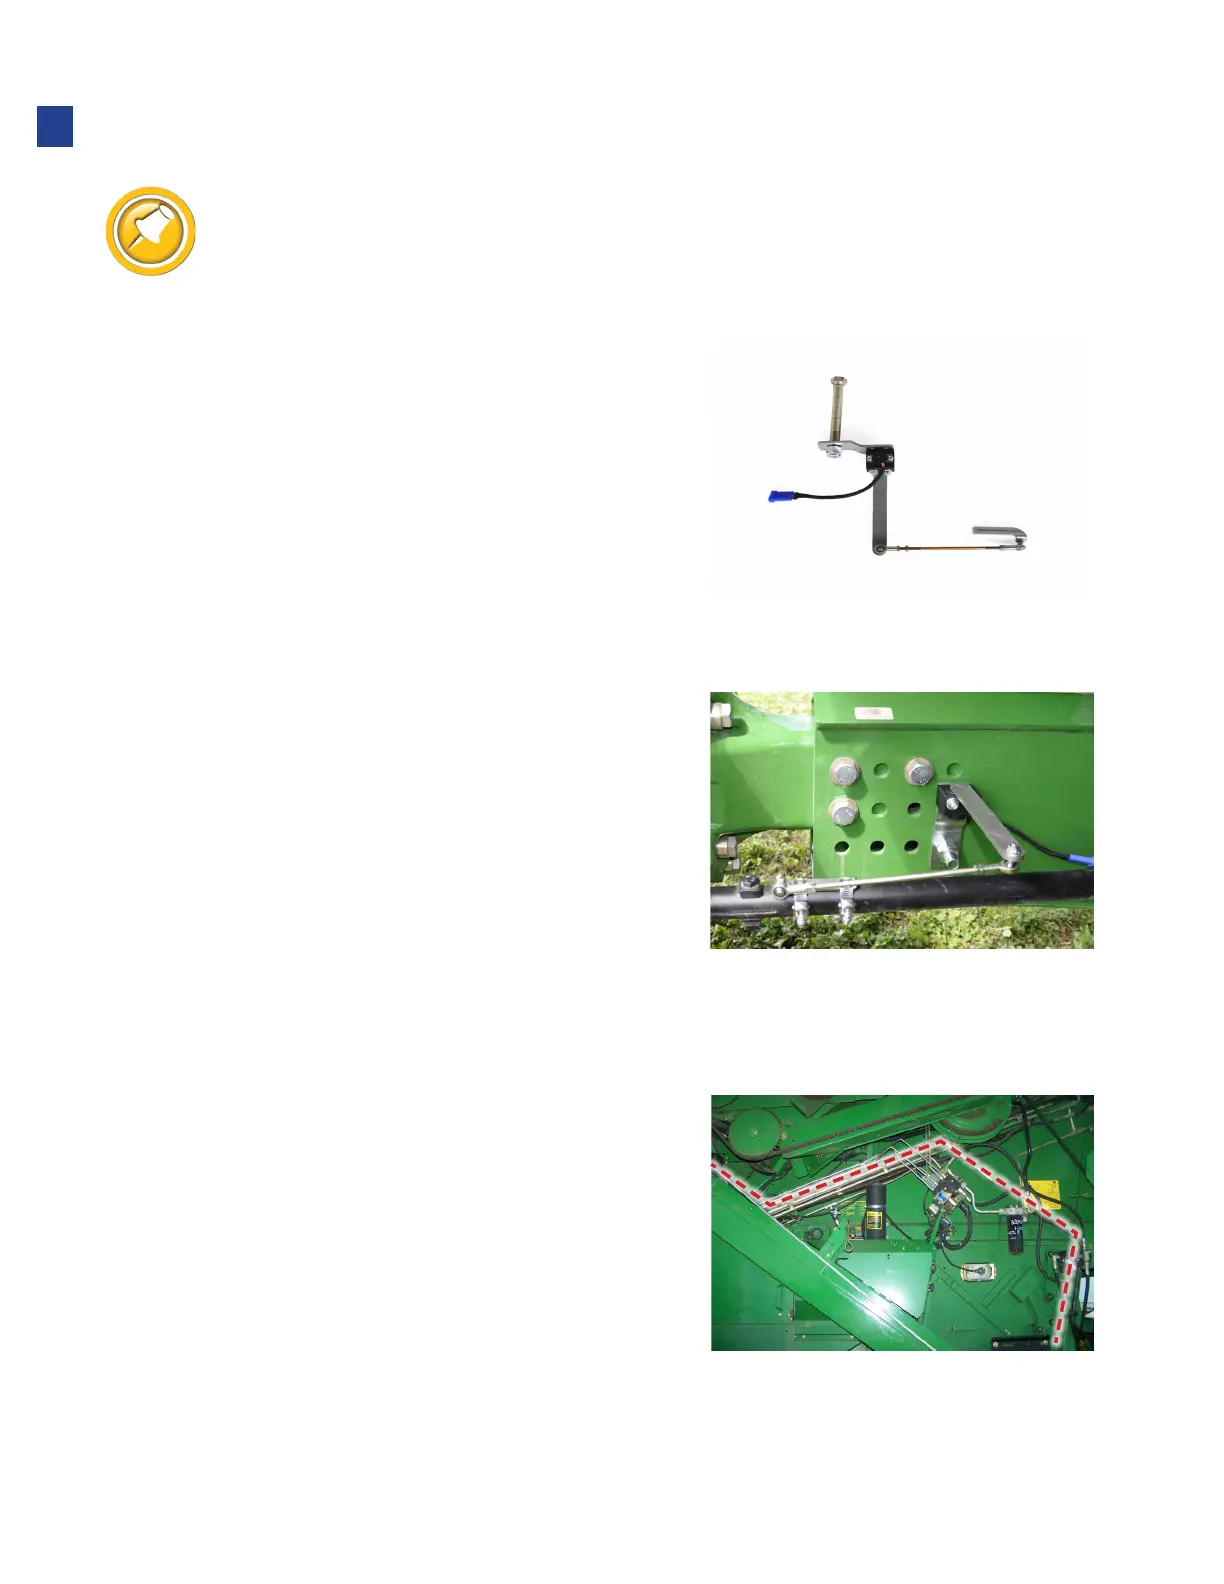
A typical installation of the wheel angle sensor is shown below. If the combine has a rear axle
option different than the one shown, it may be necessary to install the sensor or linkage in a
different way. The linkage must always clear obstructions; the block is preferably mounted
with the sensor on top of the block.
1. Choose an installation location where sensor and
linkage will be out of the path of travel of the tie rod
and components will be out of the flow of chaff as
much as possible.
2. Fasten sensor block to mounting bracket using
5
/
16
”
by 2¼” bolts. Attach bracket to rear axle using
existing or supplied hardware.
3. Loosely fasten clip to tie rod using provided clamps.
•
Orient the clip in such a way that the
linkage will be generally level
4. Install linkage between clip and swing arm as shown.
5. Slide clip along tie rod so that swing arm points straight
forward when wheels are pointed straight ahead.
6. Start machine – slowly turn steering wheel
fully left and fully right while observing
sensor and linkage to make sure it clears any obstructions and does not bind.
•
Voltage on sensor should be 2.5V with wheels centered
7. Tighten clamps.
8. Route 33’ WeatherPack extension harness
from Y705 to rear wheel angle sensor.
•
3 pin WeatherPack
•
Y705 should be just outside cab access panel
•
Follow existing wiring or hydraulic hoses
along right side of machine
16
Installation