Troubleshooting—Sensors and Harnesses
To properly test the wiring and sensors on the header, follow the
steps below in order. Use a Volt Meter as needed.
The sensor connector pattern is as follows:
•
Pin A is Ground (Black or Lt Blue)
•
Pin B is Signal (White)
•
Pin C is 5V (Green or Pink)
A very common problem during install is to reverse the wires at the connector after
removing the plug to route the cables. Make sure that the wires/voltages are as shown.
If A & C are reversed, the sensor output voltage will be 4.7V and not change.
The following requirements must be met before testing:
•
Key on, combine engine running
•
Header connected
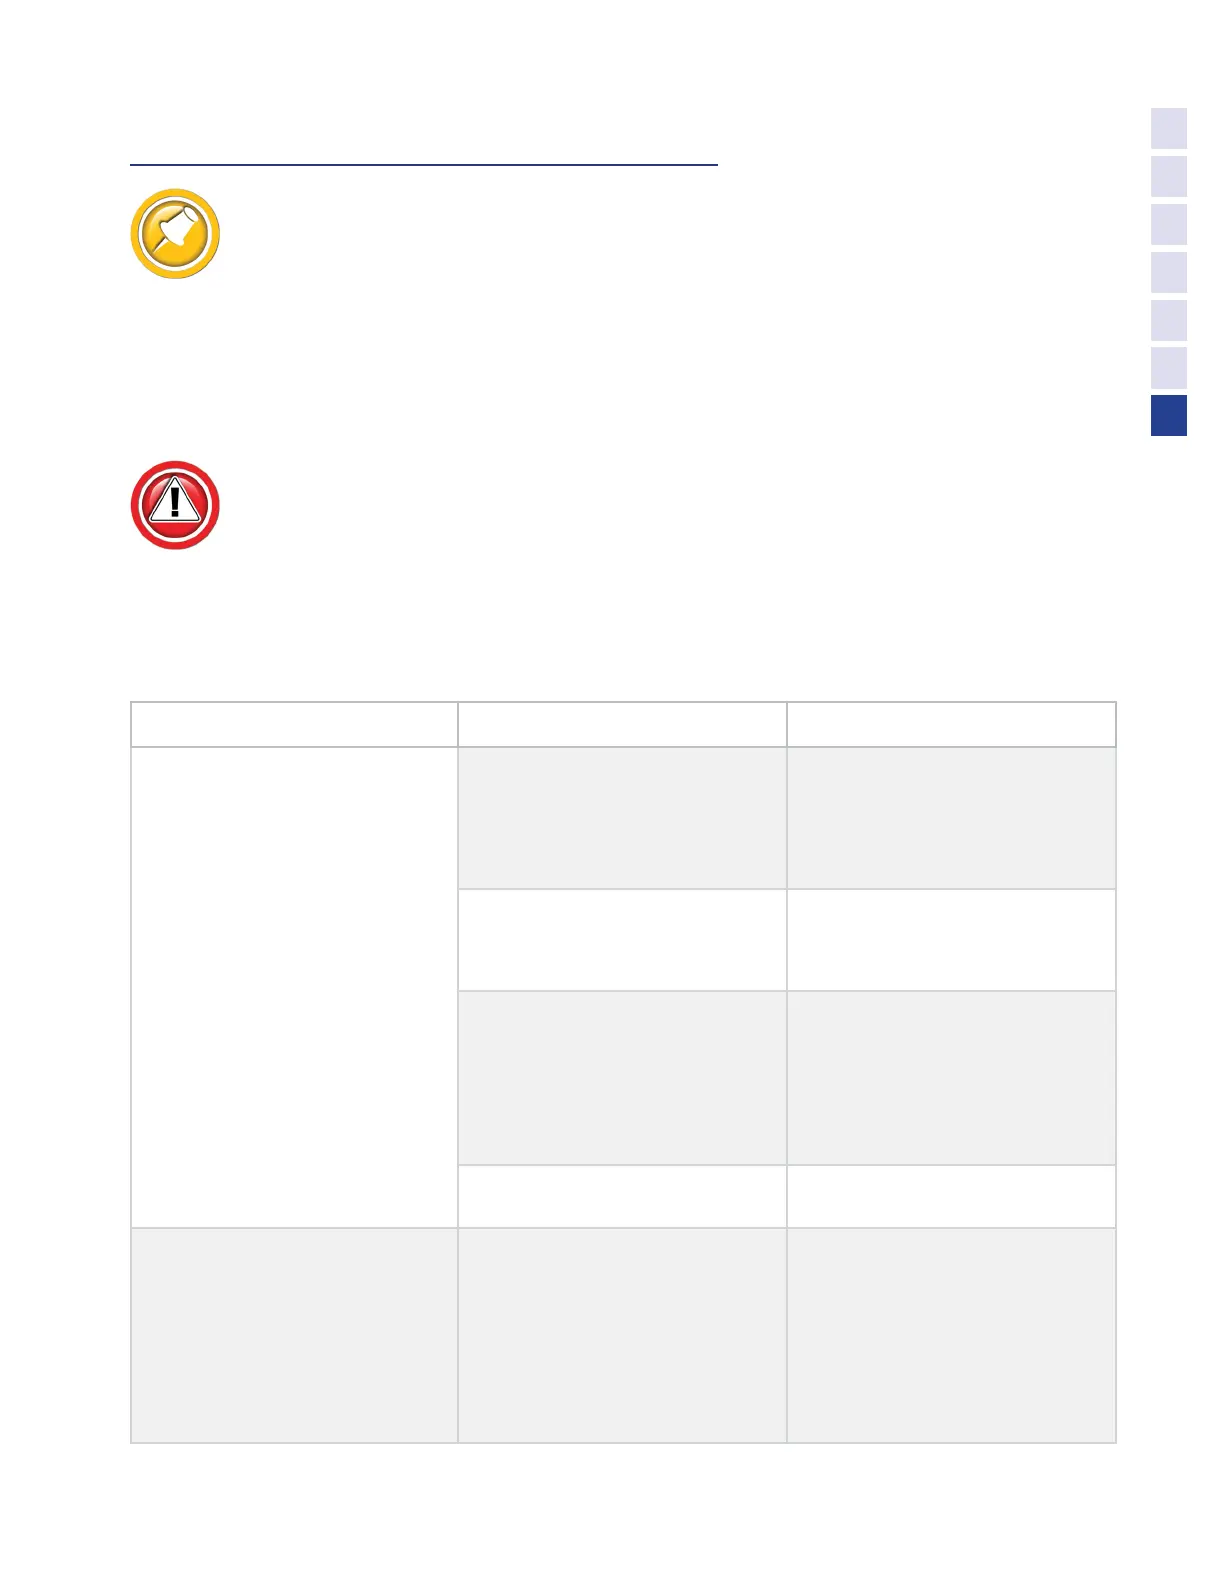
Error Code Problem Solution
Bad Harness Wiring
Disconnect Sensor Plug
(Measure voltage on harness plug at
sensor)
Measure C to Frame Ground
Voltage should be
5V
If not, check harness for continuity or
short on
5V wire
Check Combine
5V source
Measure C to A
Voltage should be
5V
If not check harness for continuity on
ground wire
Check combine sensor ground source
Jump C to B in harness plug
“Sensor” voltage should be
5V
(For Insight systems, see “Diagnostics/
Display Sensor Voltages”. For all
others, use Combine Diagnostics*)
If not check signal wire for broken
harness or bad connection
All of the above are correct Harness & combine connections pass
test.
If you have a Headsight Sensor tester,
use it to test the sensor. For all other:
Verify sensor is connected to extension
harness
Sensor voltage should be
0.5- 4.5V
(For Insight systems, see “Diagnostics/
Display Sensor Voltages”. For
all others, use Combine Specific
Diagnostics)
If sensor cannot be adjusted to achieve
a voltage within the range, replace
sensor.
43
Diagnostics