22
|
HEAT-TIMER CORP.
059305–00 REV. E
04 INSTALLATION INSTRUCTIONS
120 VAC
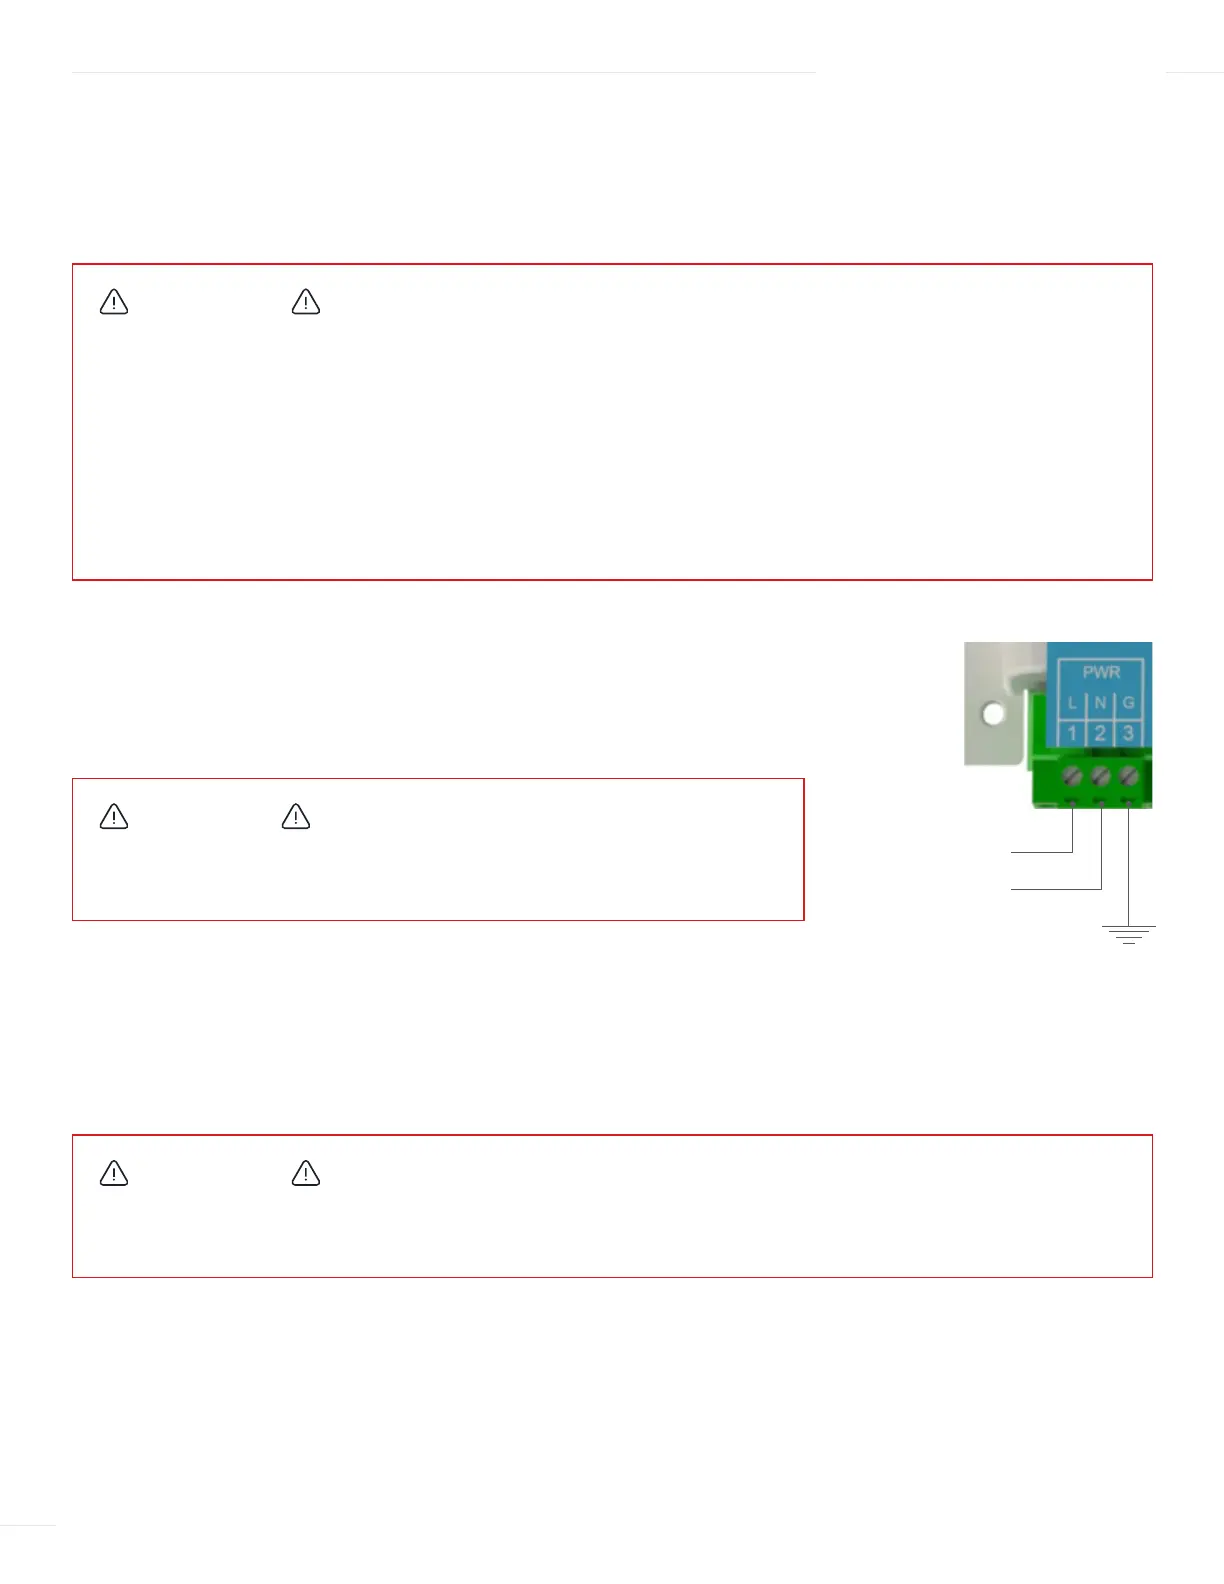
Earth ground
WIRING THE ETV PLATINUM PLUS
POWER INPUT WIRING
1 De-energize the circuit that will provide power to the ETV by turning off the appropriate
circuit breaker.
2 Run the 120Vac power wiring through one of the knockouts located on the bottom of
the ETV Platinum Plus enclosure.
3 Connect the hot line to terminal 1 on the ETV Platinum Plus module.
4 Connect the neutral line to terminal 2 on the ETV Platinum Plus module.
5 Connect terminal 3 on the ETV to earth ground. DO NOT use the
neutral line as the earth ground!
WARNING
ELECTRICAL SHOCK HAZARD! For your safety, to avoid the risk of electric shock, disconnect electrical power to the
device before servicing or making any electrical connections. DO NOT re-connect electrical power until ALL wiring is
completed. Failure to do so may result in severe personal injury or death.
Use a separate circuit breaker for the control. Do not share the control power with other major equipment, pumps, or
motors. Heat-Timer recommends the installation of a surge suppressor and a power switch before the power
line connection.
Follow all local and state electrical codes when installing this unit. All wiring must meet or exceed local, state, or federal
codes and requirements.
WARNING
ELECTRICAL SHOCK HAZARD! To avoid the risk of electric shock, DO NOT re-connect electrical power until ALL wiring to
the ETV is completed. Failure to do so may result in severe personal injury or death.
CAUTION
The input power wires must be N.E.C. Class 1. Class 1 voltage wiring must use a
different enclosure knockout and conduit than any sensor wiring.
L
N