059305–00 REV. E
HEAT-TIMER CORP.
|
13
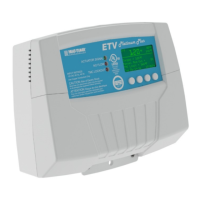
02 INSTALLATION INSTRUCTIONS
The ETV Platinum Plus installation process consists of the following basic steps:
1 Initial installation (See “Design Considerations” on page 13).
• General piping—unions, isolation valves...
• Locating and installing the sensor(s).
• Piping the optional HTLV (High Temp Limit Valve). Reference the appropriate HTLV installation manual for additional
instructions
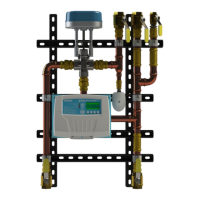
2 Installing the ETV mixing valve(s) (See page 16)
3 Mounting the ETV Platinum Plus Module (See page 20).
4 Mounting the Actuator to the mixing valve
5 Connecting the ETV Platinum Plus wiring (See “Wiring the ETV Platinum Plus” on page 22).
• Power wiring
• Output wiring
• Input wiring
6 Optionally connecting the ETV Platinum Plus to a communications network (See “Communications Wiring” on page 32).
Reference the ETV Platinum Plus Remote Communication manual for addition information.
7 Calibrating the Actuator (Refer to page 35).
8 Completing initial programming of the ETV Platinum Plus (Refer to page 43).
REQUIRED MATERIALS
(NOT SUPPLIED)
The following materials/tools are required for installation, but are not supplied:
• General hand tools (screwdrivers, wire strippers, power drill, etc.)
• General plumbing tools (wrenches, pipe cutters, etc.)
• 18 AWG cable (Heat-Timer P/N 703001–01 or equivalent #18/2 cable)—used for ETV Platinum Plus wiring.
DESIGN CONSIDERATIONS
When installing the system, certain design considerations must be taken into account. These include:
• General Piping Guidelines (isolation valves, drain cocks, unions, etc...)
• Sensor Probe Locations
• Optional HTLV (High Temp Limit Valve) Piping
• Building recirculating loop
• Thermal Trap or proper use of check valves
• Dual/Parallel ETV Valve Piping
See “Piping Diagrams” on page 36 for more information.