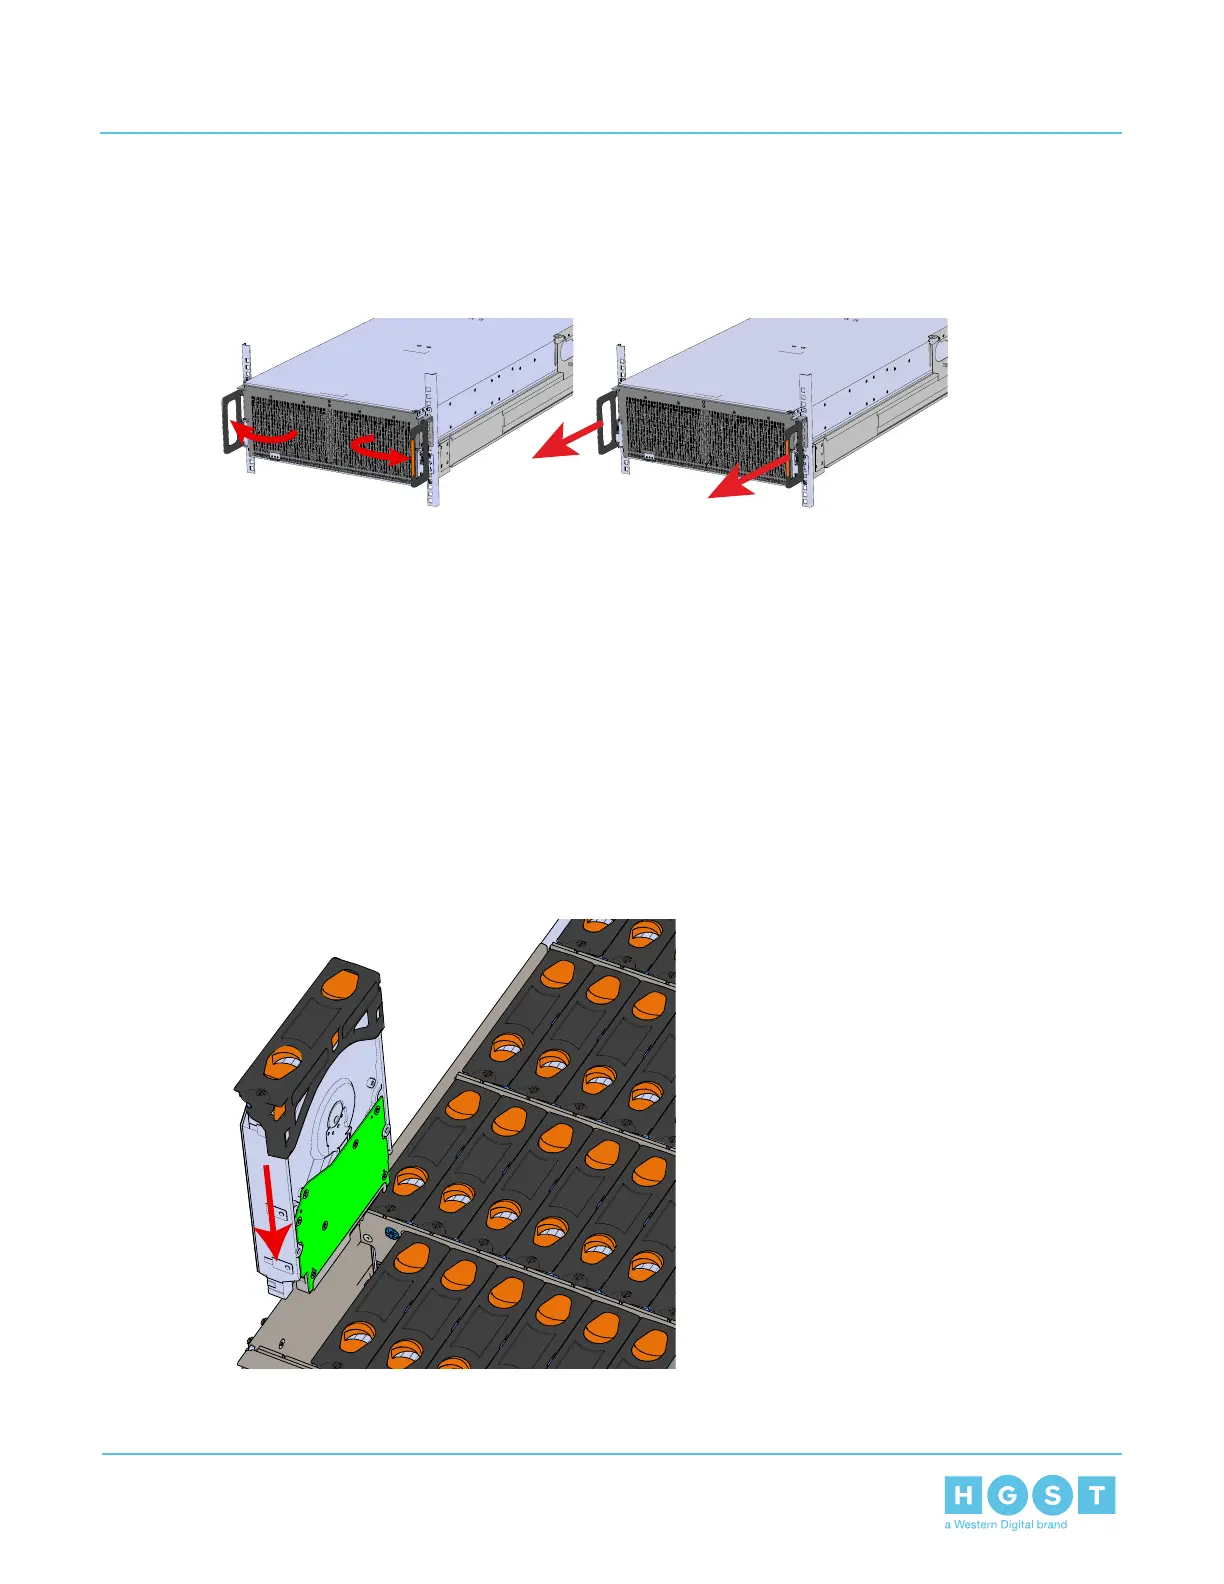
1. Grasp both handles at the front of the enclosure and pull with even pressure to extend the chassis out of
the rack until it is stopped by the safety latches. The safety latches will prevent the enclosure from coming
out of the rack completely and the cover will remain in the rack attached to the rear alignment brackets.
Figure 195: Chassis Handle Operation
2. Locate the area that the new drives will be installed into. When adding SSDs, the drives slots may already
contain a drive. The drive will have to be removed and relocated before installing the HDD.
3. Follow the requirements for partial populations listed in Partial Population Configurations on page 183.
4. Install the Drive Assembly.
a) Ensure that the enclosure has been pulled out of the rack until the rail latches engage.
b) Find the LED pointer on the top of the drive carrier. This pointer should point toward the front of the unit
as shown in the following image.
Figure 196: LED Pointer Orientation
c) Align the drive with the empty slot that will receive it. Lower it into the slot, making sure it stays level
and does not snag.
Figure 197: Installing a Drive Assembly
d) Pinch the latch release and carefully press downward to seat the Drive Assembly the rest of the way.
187
5 System Management
User Guide 5.3 Partially Populated Enclosures

 Loading...