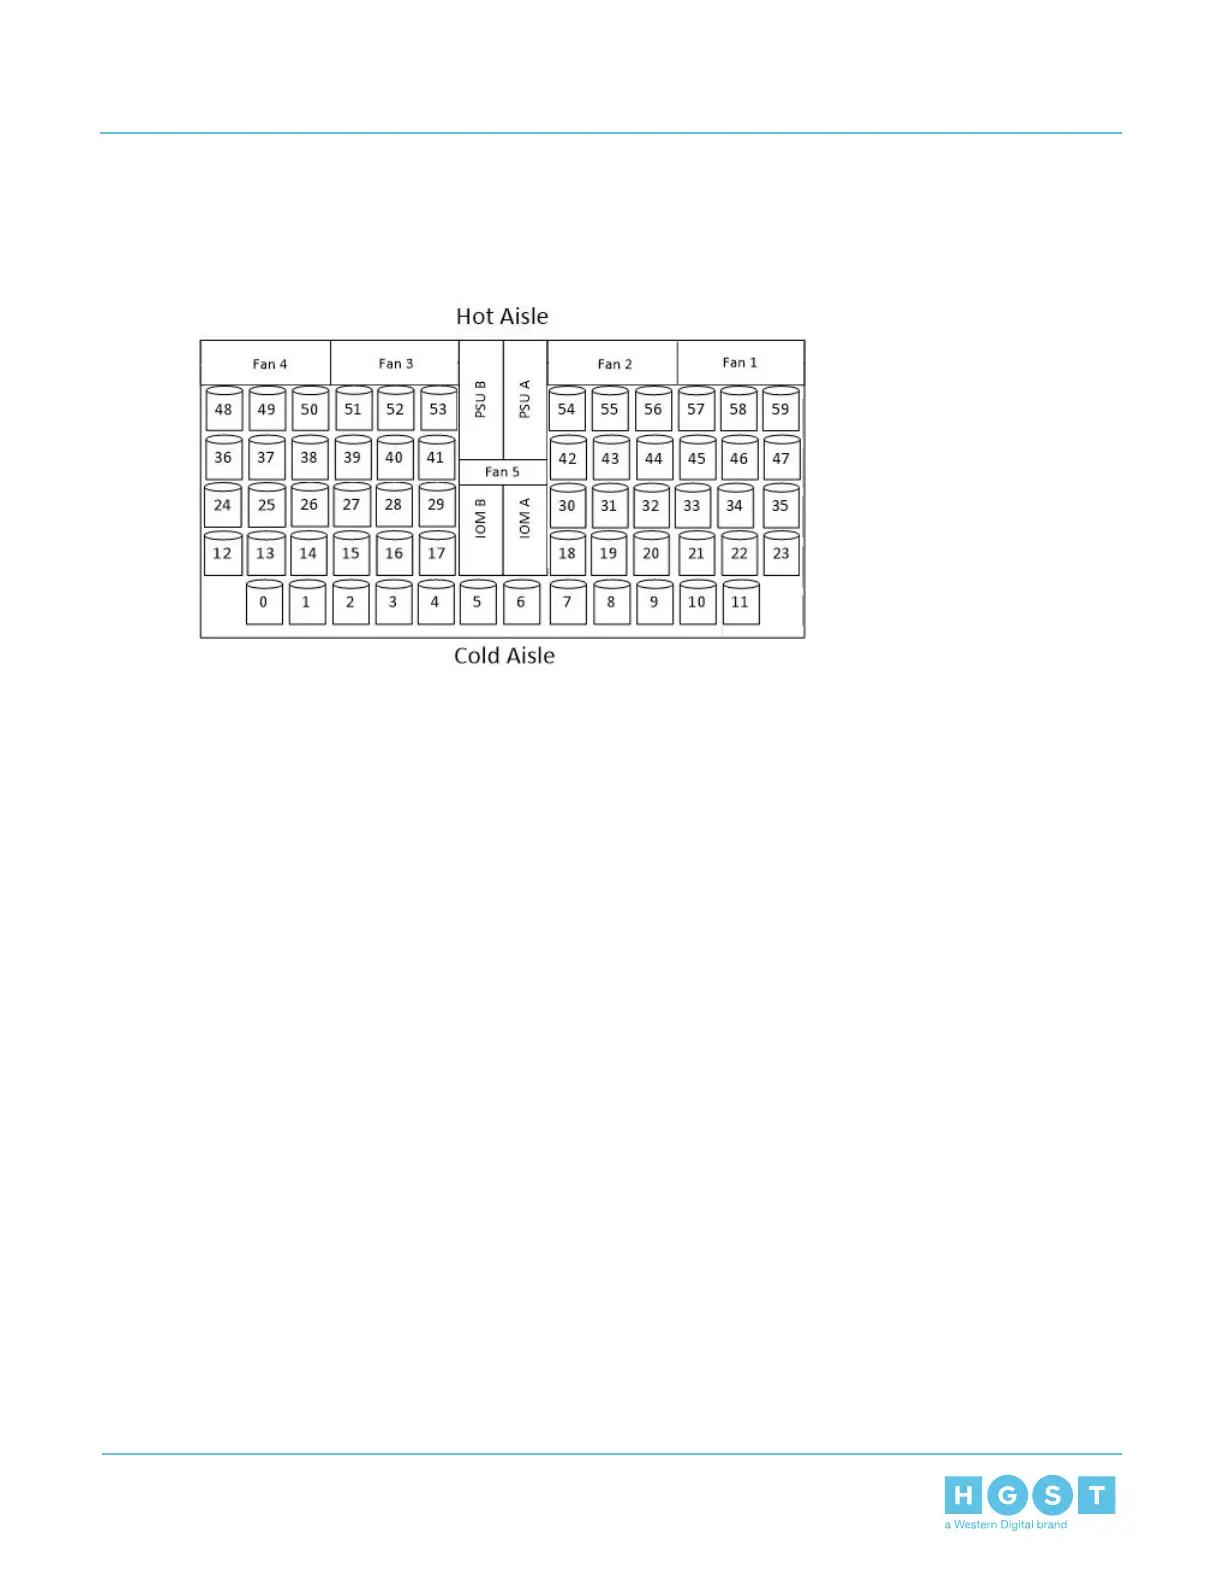
5. Install each drive in the same way the first was installed. Make sure to follow the drive layout shown in the
following image.
Figure 198: Drive Layout
6. Push the enclosure back into the rack to ensure proper cooling.
5.4 Daisy Chaining
5.4.1 Daisy Chaining Configurations
This section provides information on the predefined daisy chaining configurations for the Ultrastar Data60.
The Ultrastar Data60 supports configurations up to four enclosures daisy chained together using active cables.
The Daisy Chaining Key identifies the specific information needed to use the cable maps in the following
sections. The daisy chaining configurations are broken into two sections: one host configurations and two
host configurations. Each of the sections provide a list of the configurations and an example diagram of how
the enclosures can be connected using SAS cables.
The specific connections for each configuration can be found in One Host Cable Configurations on page
191 and Two Host Cable Configurations on page 195.
Active Cables: During the process of Daisy Chaining the Ultrastar Data60 enclosures, active cables must be
used when connecting between enclosures. The use of active cables provides improved signal integrity
between the enclosures.
188
5 System Management
User Guide 5.4 Daisy Chaining

 Loading...